1 |
|
|||||||||
|
|
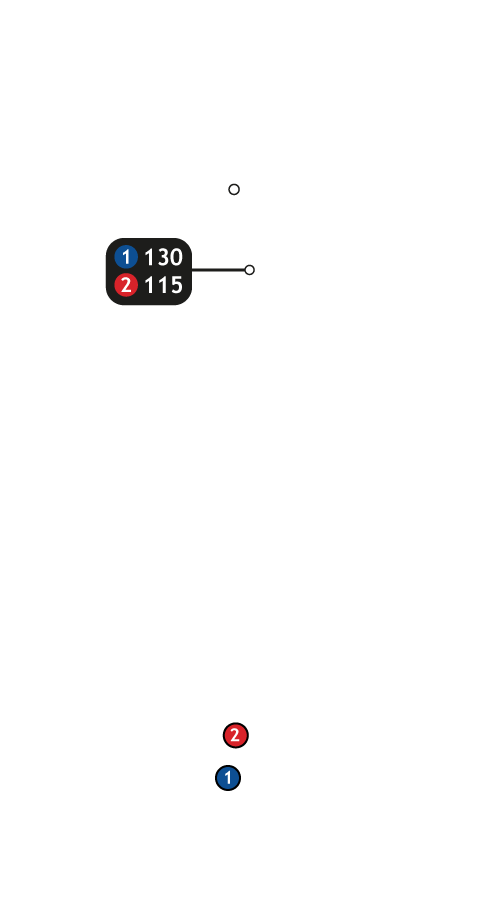
Buttons toggle between distance guide and media. See hole layout for result. If available, click icons to view media.
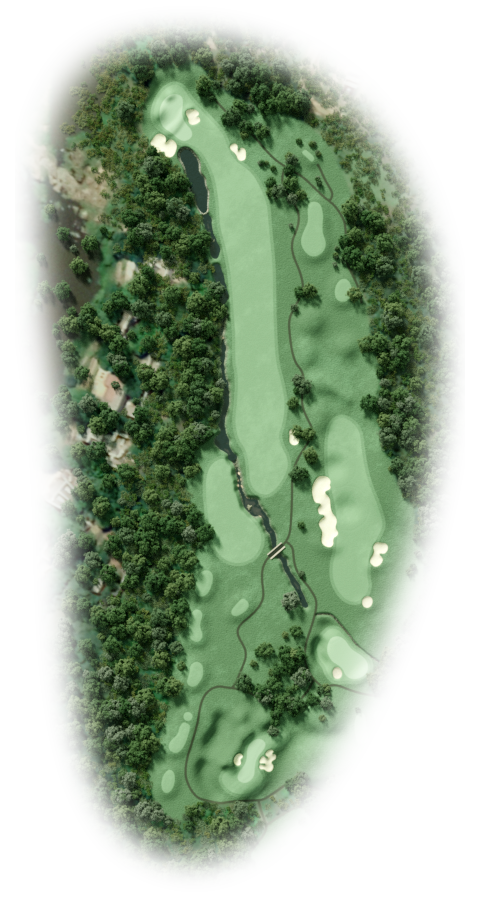
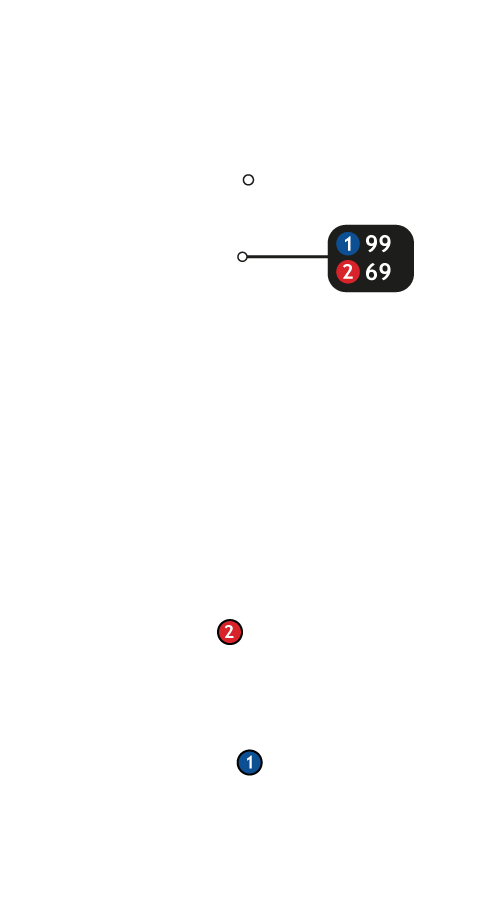
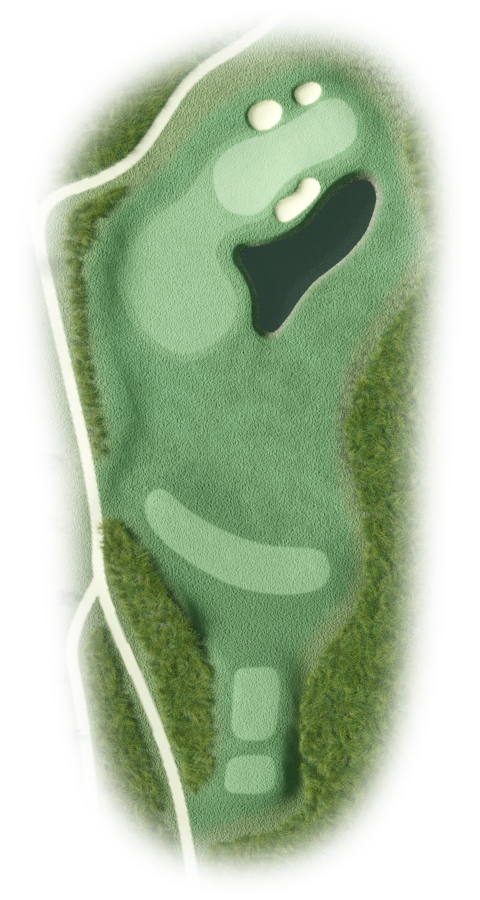
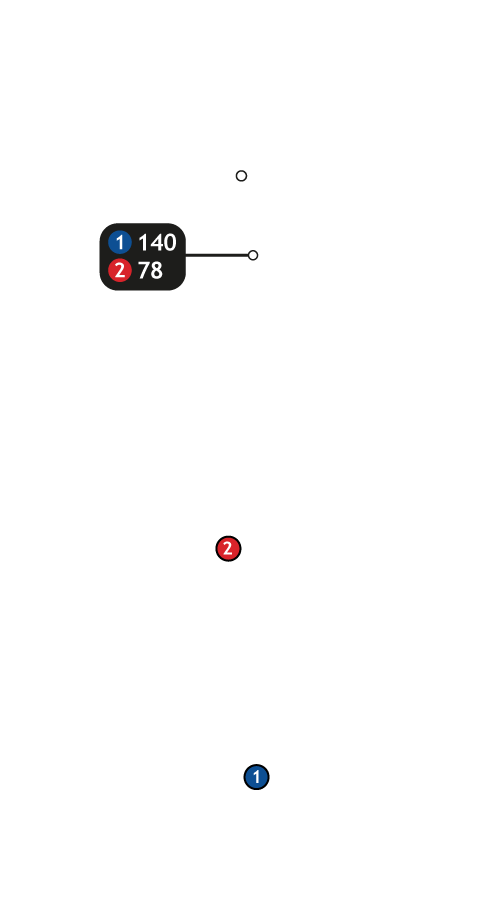
The opening offering is a fairly gentle Par 4 measuring just under 400m from the tips, a more soothing 333m from the members tee. A dogleg from right to left, bunkers found both sides of the fairway. Should you want to take them out of play with a 3 wood or say a long iron, do so as the approach from short of them is not long although it is predominantly uphill. The green lies from front left to back right and is just over 30m in length. It is a kidney bean shape and that affords several pin positions. Wherever the flag is, it’s best to be shy of it. A four is accepted here to set you on your way.

2 |
|
|||||||||
|
|
Buttons toggle between distance guide and media. See hole layout for result. If available, click icons to view media.
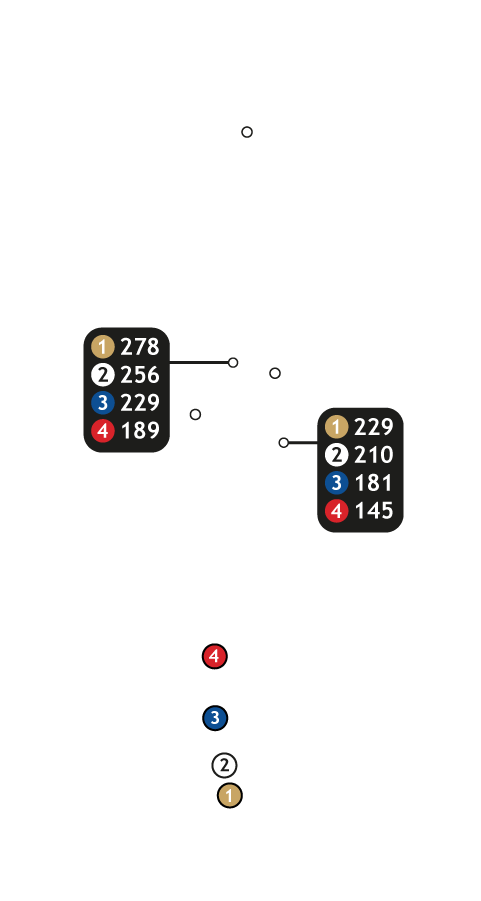
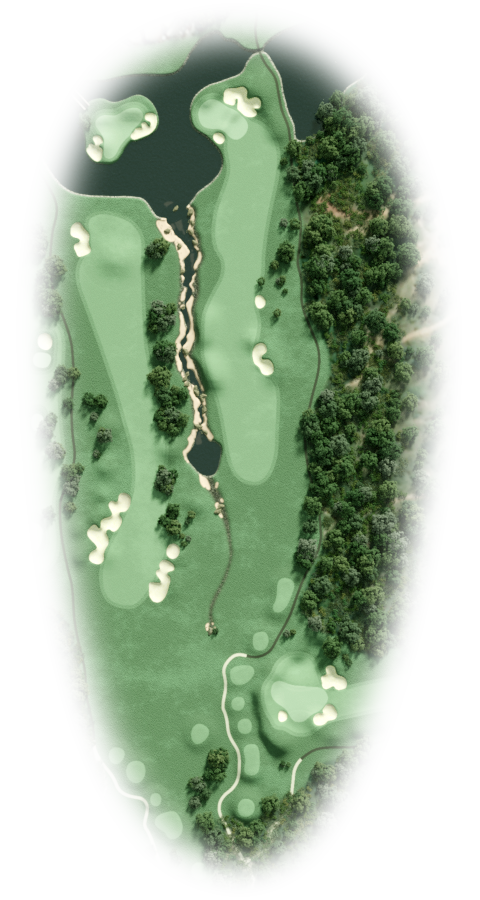
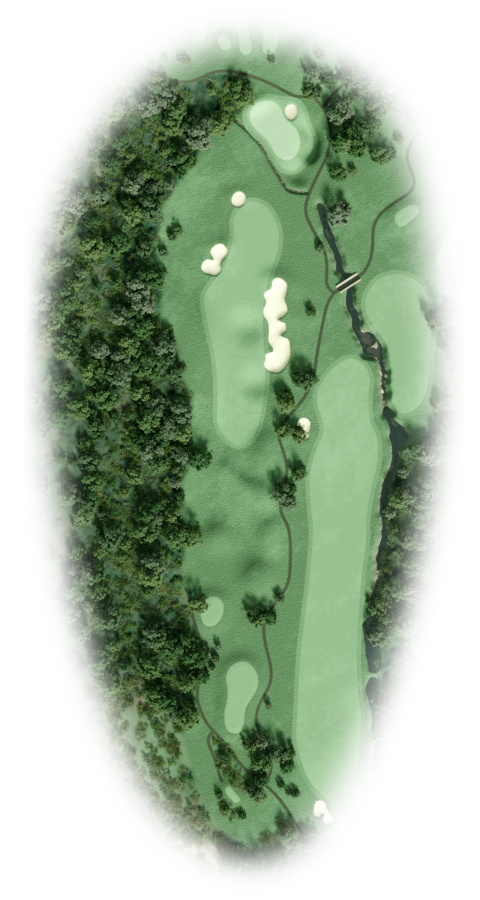
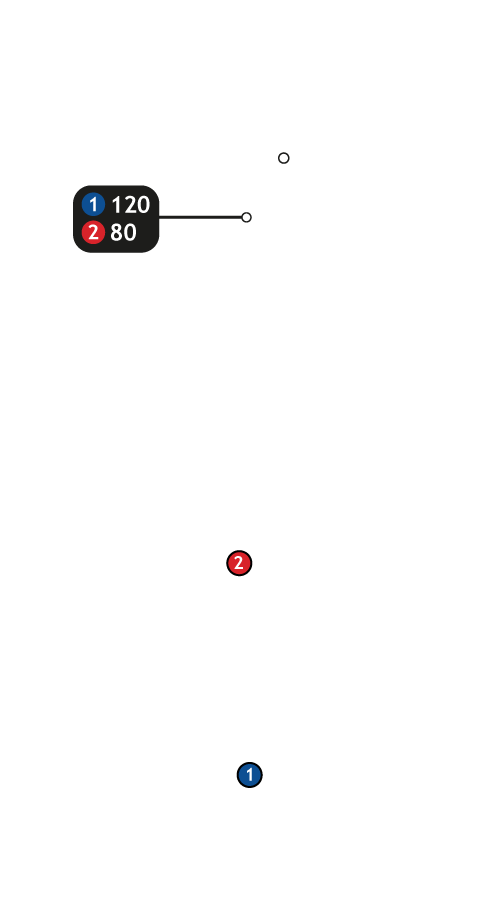
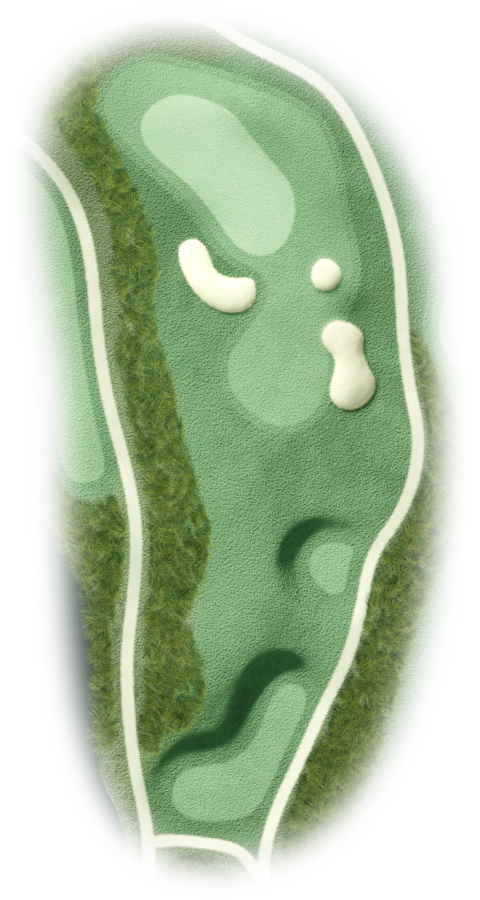
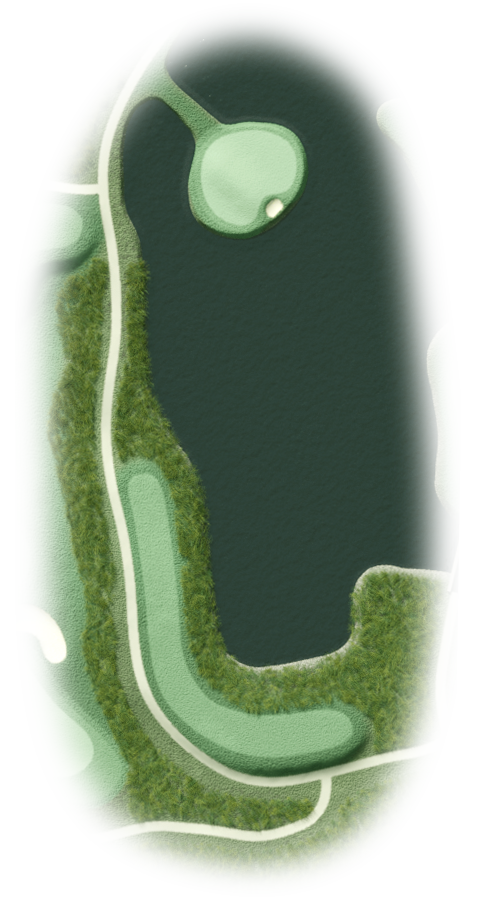
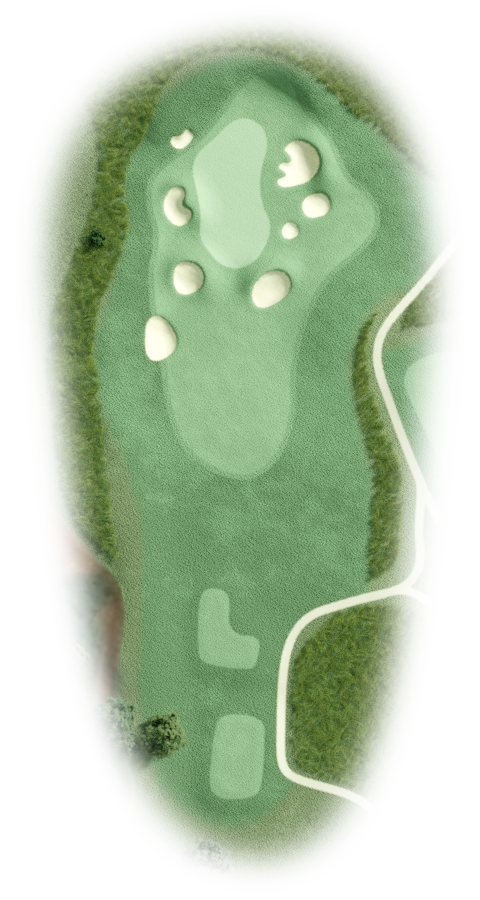
You don't have to wait too long for the first of four Par 5's. The second is the only one on the front nine, straight and away this one, but you don't see all of it from the tee as the drive is dispatched over a slight rise. Two bunkers lie in wait by the right side of the fairway. The smaller of the two is first up, just over 240 meters from the back tee, the larger one is some 20 paces ahead of it. It's a tight fairway, and one you want to be playing your second from. If not, the layup becomes difficult, because there's two bunkers that come into play down the left hand side. The green has a similar shape to the first, and has exactly the same depth. Try and use it slope from left to right to feed the ball down towards the hole.
3 |
|
|||||||||
|
|
Buttons toggle between distance guide and media. See hole layout for result. If available, click icons to view media.
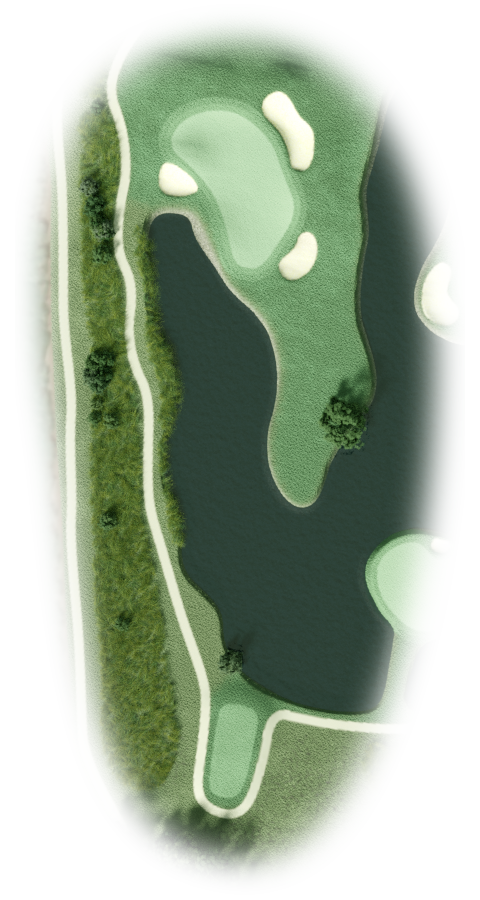
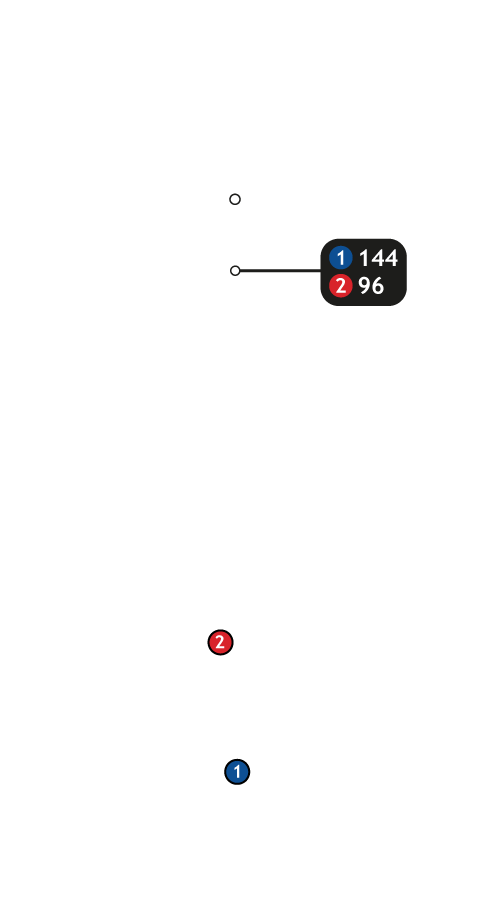
The second Par four and again, not long at a tad over 400 meters. The Bushveld is to be avoided down the right side. The large bunker left won’t worry, the bigger hitters, but the pot bunker at 280 meters will. It may be small, but it's a magnet for golf balls as the third gently follows from right to left. Once in position ignore the flag if it’s left of centre as two deep bunkers await anything pulled. Should you miss right, you'll face quite the delicate pitch on to the green that slopes away from you. Accuracy off the tee is key here, length, not so much.
4 |
|
|||||||||
|
|
Buttons toggle between distance guide and media. See hole layout for result. If available, click icons to view media.
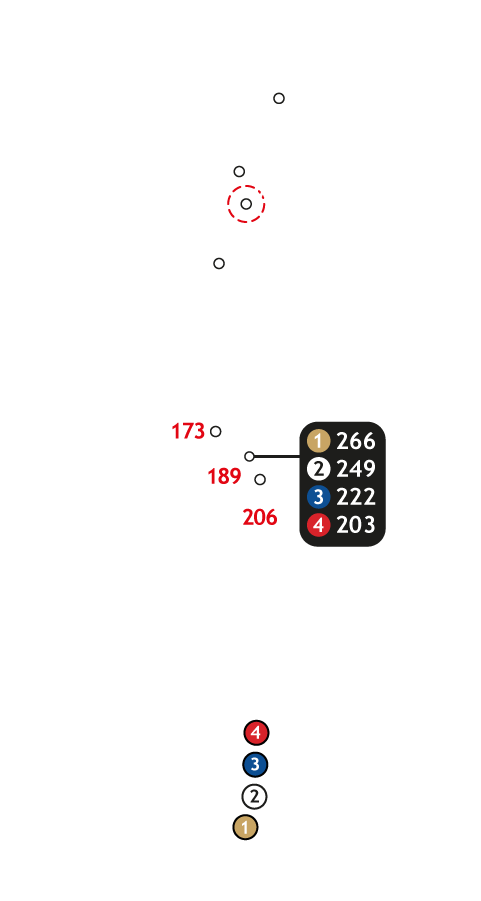
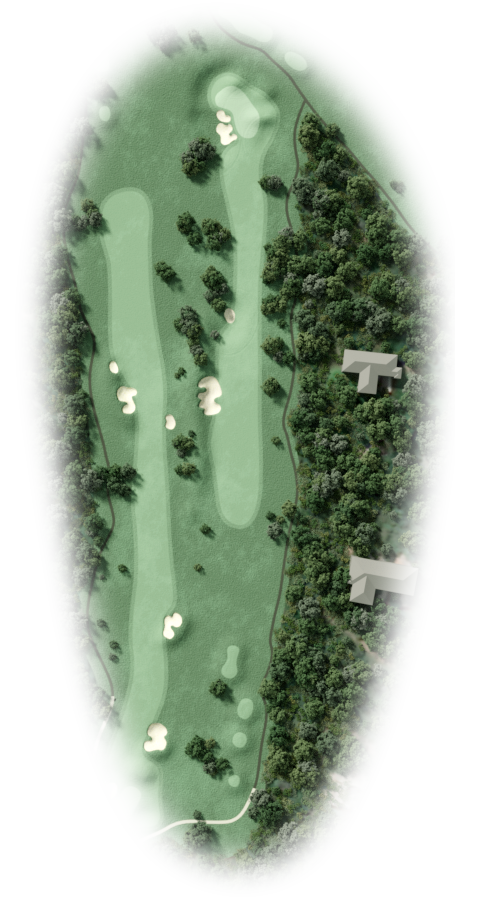
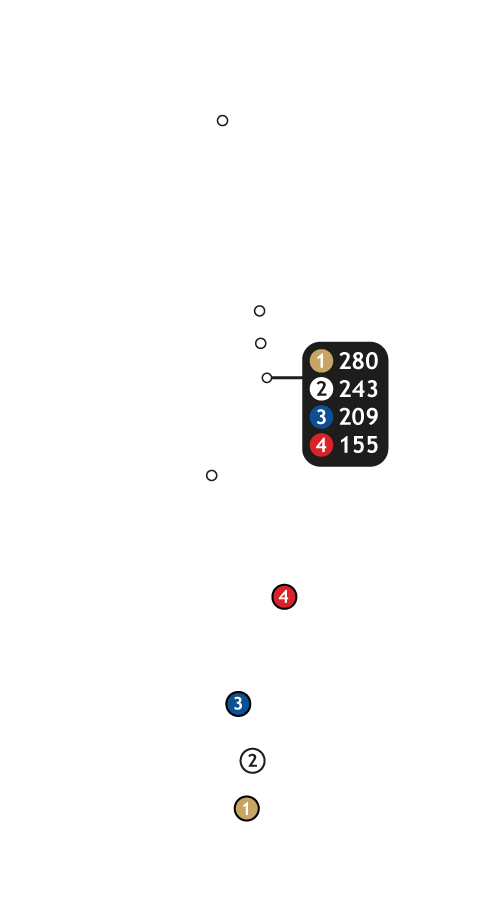
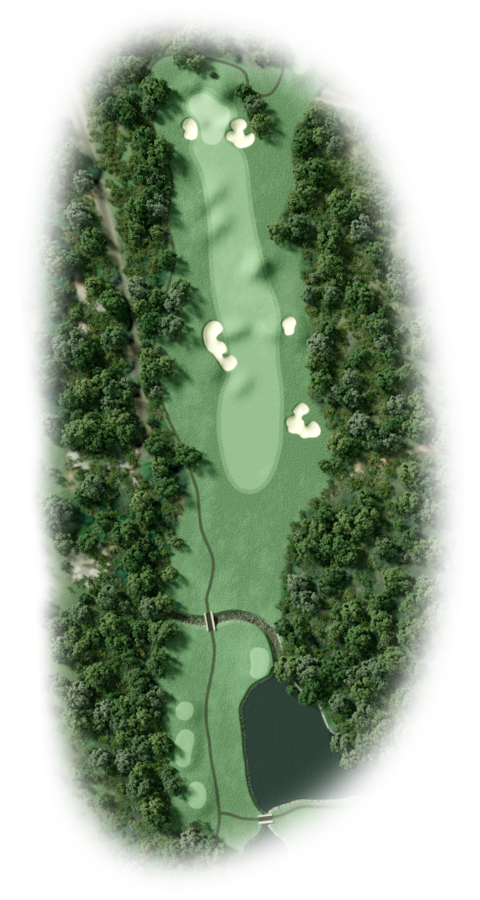
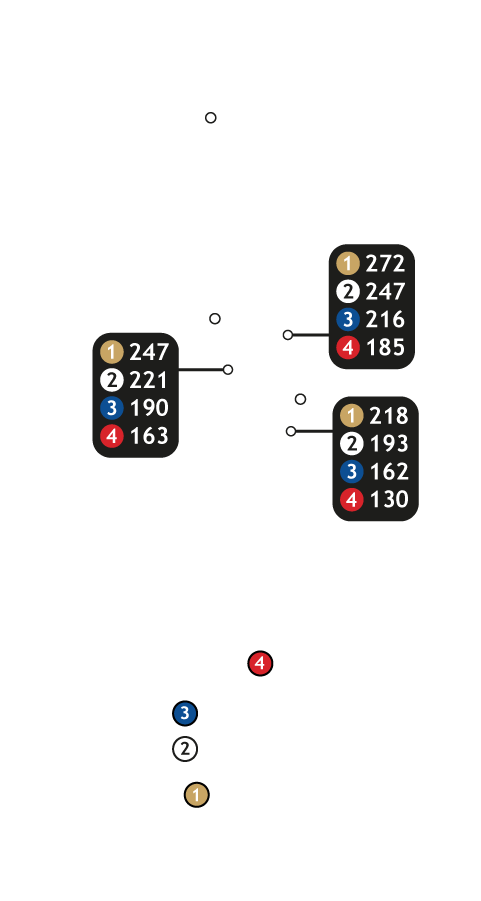
Similar in many ways to the opening hole and much the same strategy is required. You can take the sand out of play by laying up short, or take on the challenge of finding what's a smaller area between the two bunkers that guard the elbow of the dogleg. The toughest pin position is back right, a small pocket of green is hard to find, and is protected by a solitary bunker, to the right, which from the air, strangely enough, looks like a map of Scotland, England and Wales. Get you drive away and the approaches is just a short iron at 390 meters. There's a good birdie chance available here.
5 |
|
|||||||||
|
|
Buttons toggle between distance guide and media. See hole layout for result. If available, click icons to view media.
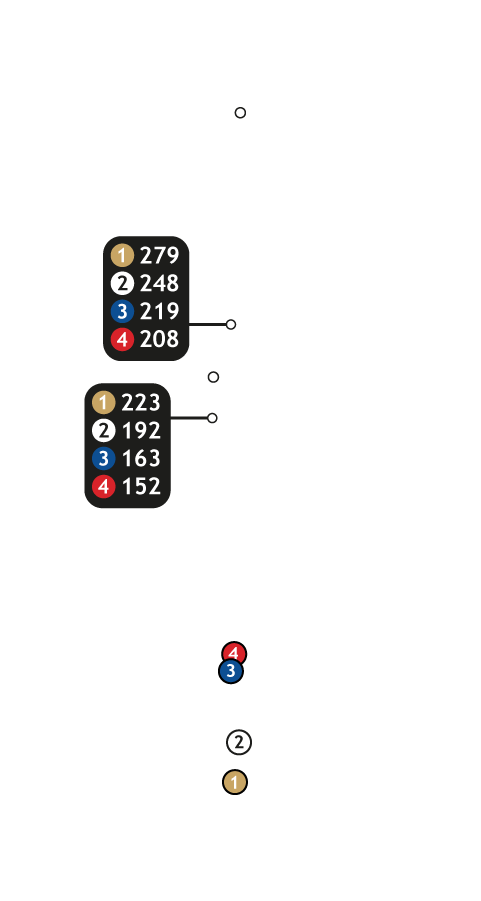
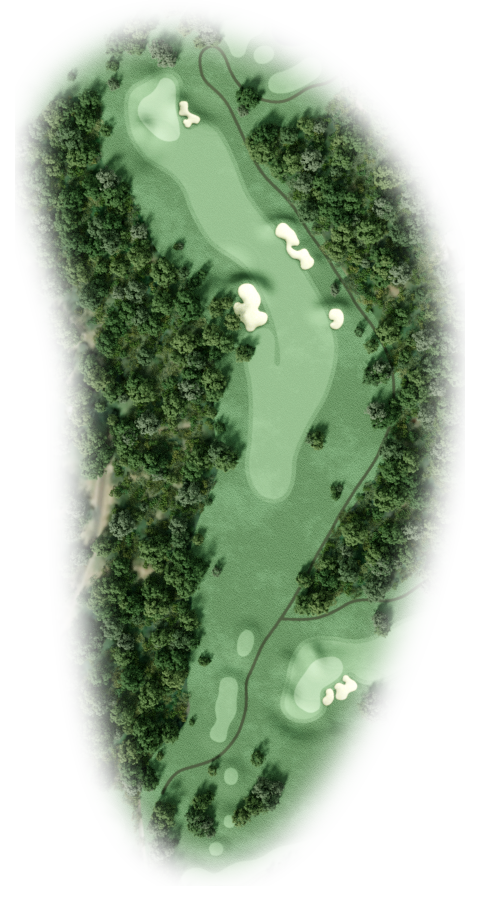
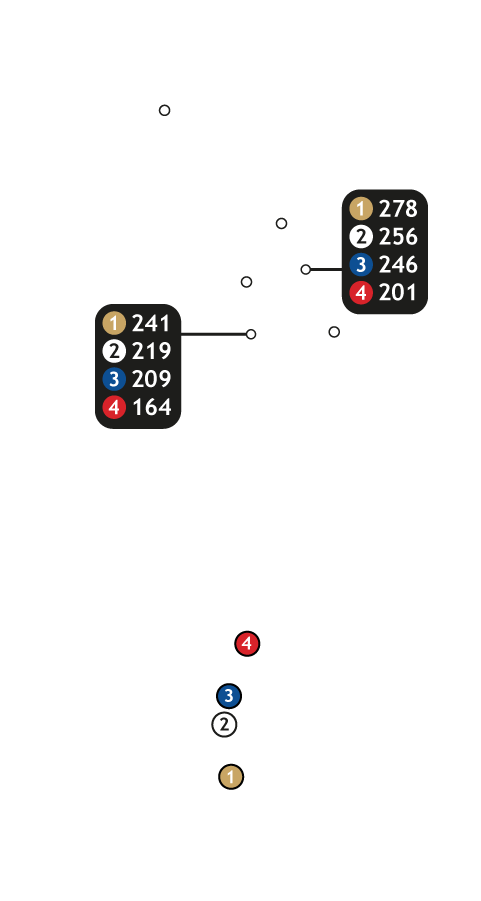
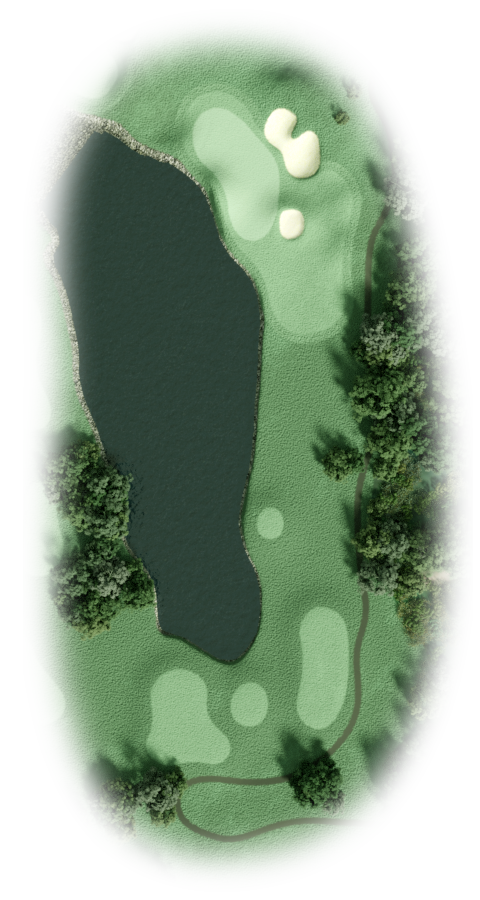
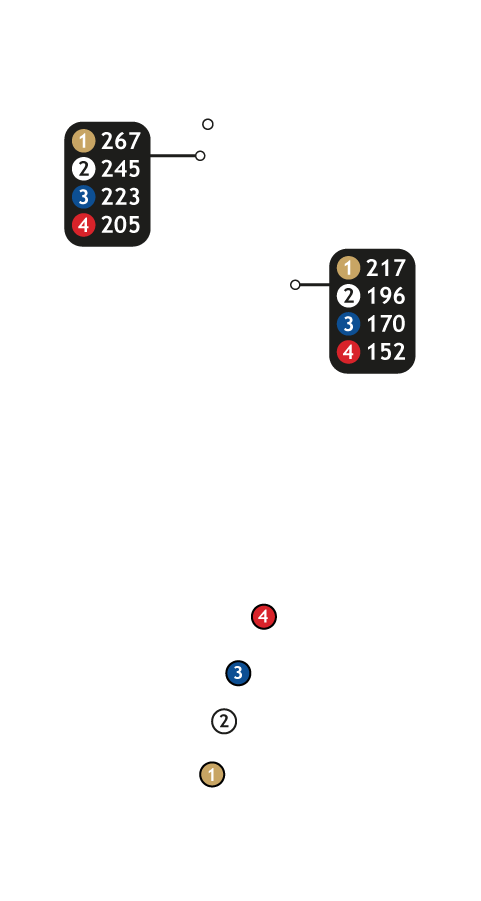
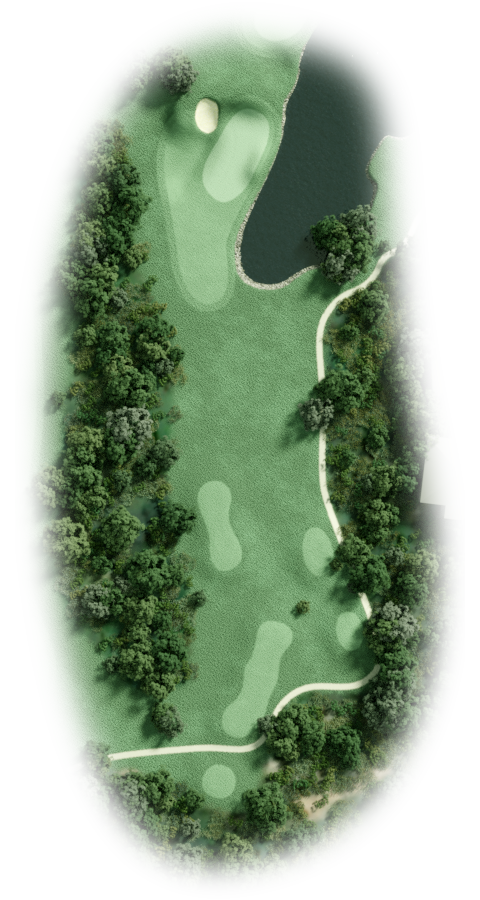
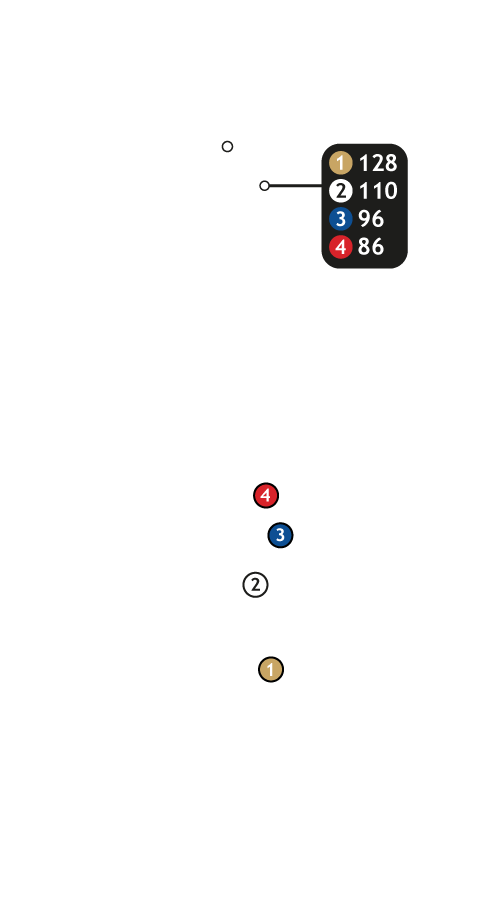
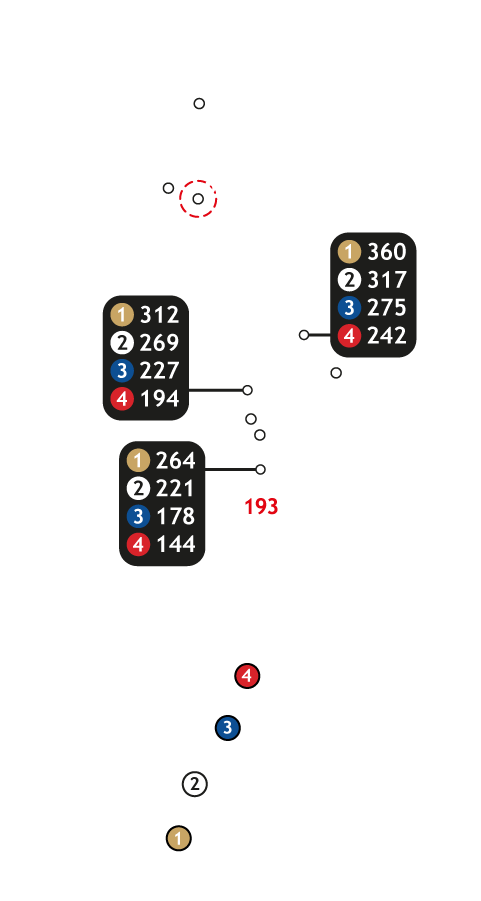
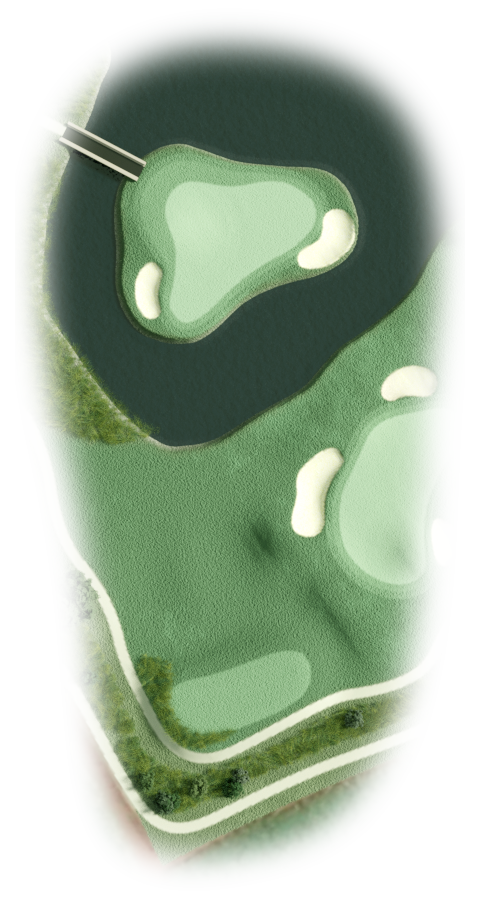
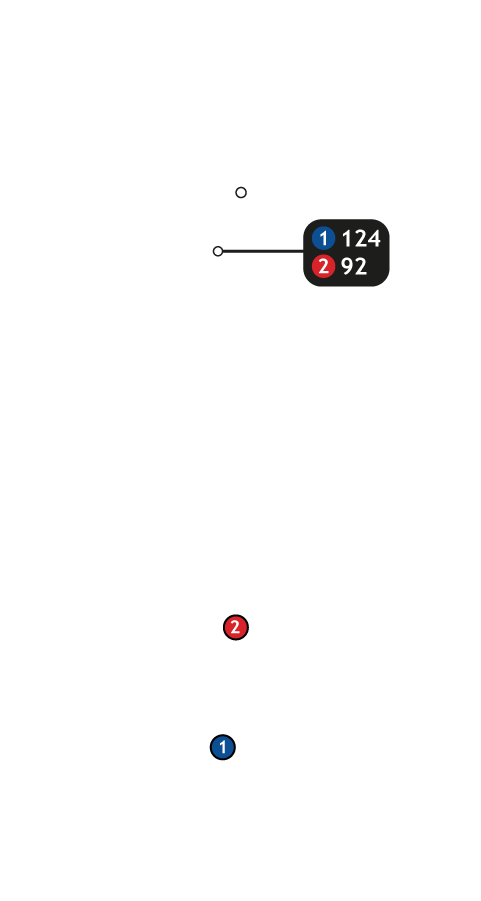
The 5th the first of four wonderful par 3's and the shortest hole on the front nine at just 148 meters off the tips. However, don't be fooled by this length as the difficulty of this is entirely dependent on the location of the pin. When it's positioned on the left side the water is never far away. The front pin could well be the hardest as a pot bunker comes into play. The pin centre right or long offers the best opportunity here for a birdie 2.
6 |
|
|||||||||
|
|
Buttons toggle between distance guide and media. See hole layout for result. If available, click icons to view media.
Short par 4's are one of the games joys, and the six that just 284 meters is up there with the best risk and reward holes. Should you play this as a two shotter be careful with the layup. A deep right side bunker awaits some 50 meters short of the green. Going for it requires the straightest of shots as the putting surface is jealously guarded by sand. A long green from left to right, but narrow from front to back. A superb par 4 and the best chance I think of a birdie on the front nine.
7 |
|
|||||||||
|
|
Buttons toggle between distance guide and media. See hole layout for result. If available, click icons to view media.
There are some famous par 3's in the world. Troons postage stamp, the 17th at Sawgrass, the 7th at Pebble Beach and Augustus 12th just to name a few. Leopard Creeks 7th is stunning, but it has given golfers many nightmares. The design is outstanding, a bailout area left allows you to be conservative, wherever the pin is placed this majestic shortfall will only tolerate a shot of shear quality. It can be played at 177m, or as short is 129m. I believe this is in the world's top 10 par 3's. Quite simply, it's fabulous.
8 |
|
|||||||||
|
|
Buttons toggle between distance guide and media. See hole layout for result. If available, click icons to view media.
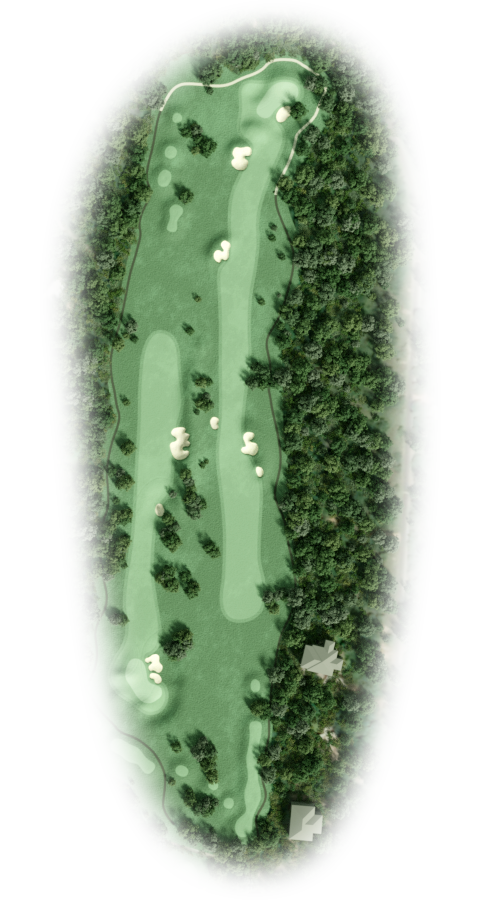
After two par 3's in the last three holes, the front nine finishes with two strong par 4's. The first of these the 427m 8th is virtually straight. The landing area for the tee shot varies depending on how far you hit your drive. It's generous up to the 250 mark, but past that a pot bunker sits silently by the edge of the fairway. Only one bunker by a green that has a hint of a figure of eight about it and slopes from right to left. It's undulating and it's long, 39m. Anything a little left and your ball will gently cascade into Leopard Creek's Valley of Sin. Hardly surprising the 8th is Stroke Index 1. A four here and march proudly on your way to the last offering of the front nine.
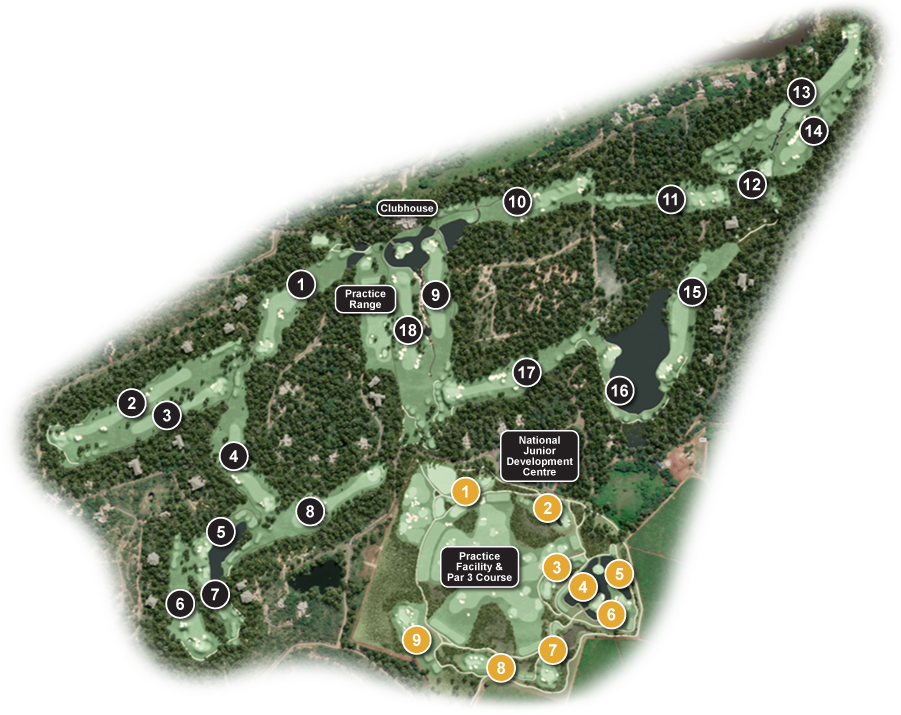
9 |
|
|||||||||
|
|
Buttons toggle between distance guide and media. See hole layout for result. If available, click icons to view media.
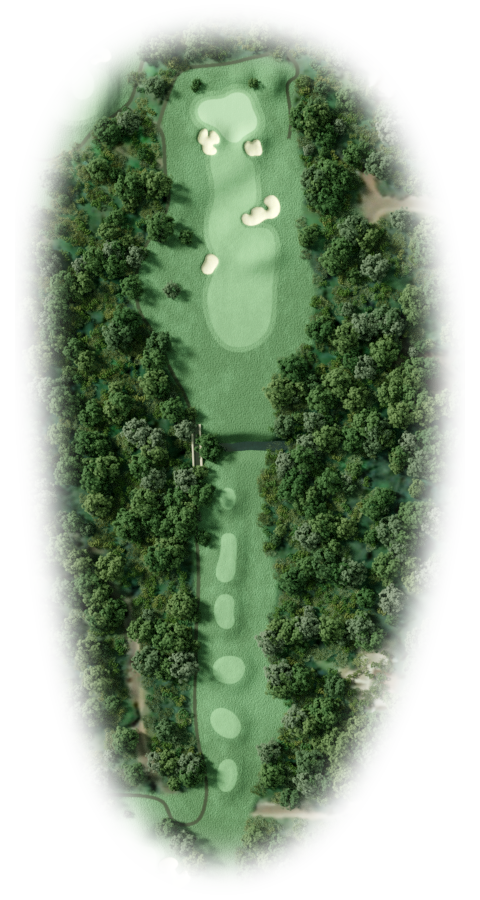
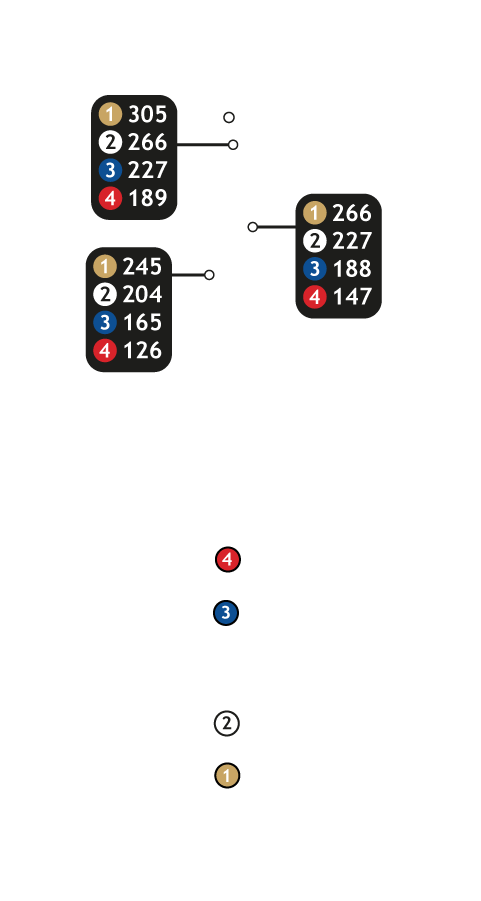
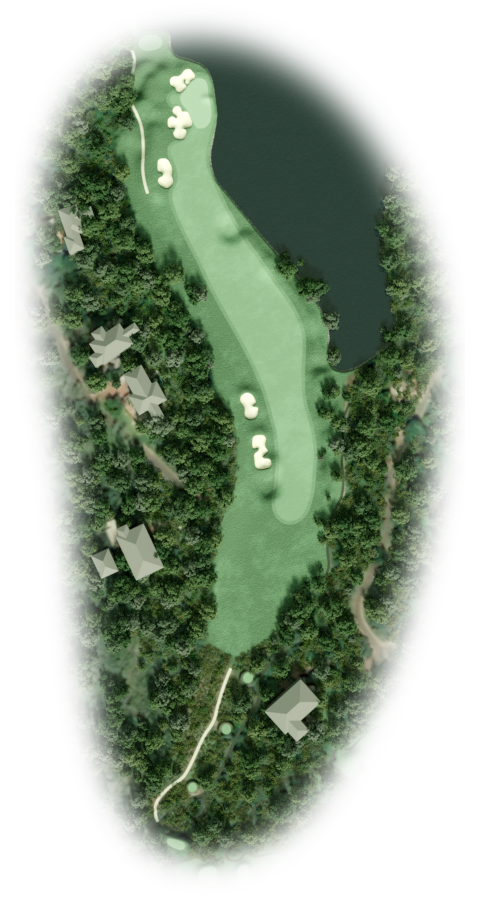
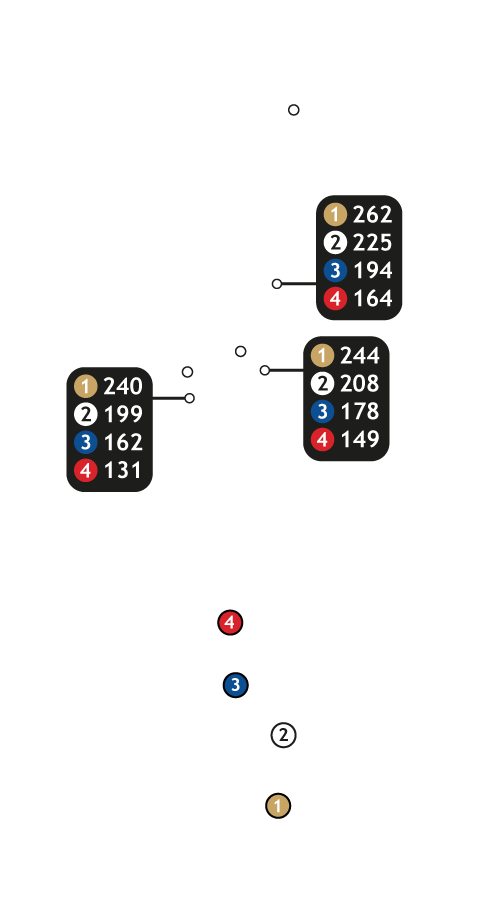
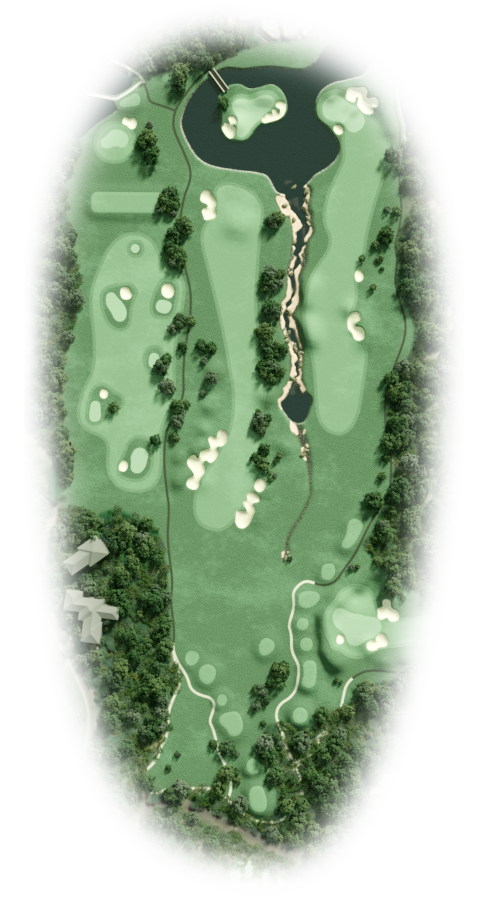
And what a hole it is at 447m. When you stand on the elevated tee looking down to the valley it seems like you have the whole of Africa ahead of you. A cascading stream follows the lie of the land before tumbling into a lake that guards the green. The tee shot here is vital. Offline, and the second is almost certainly a layup. However, if in position you have choices and it's a case of how brave are you feeling? Water short left and beyond. Sand short right and long. Again a wide green, but not deep. The 9th asks a lot of awkward questions, only your best will provide the answers.
10 |
|
|||||||||
|
|
Buttons toggle between distance guide and media. See hole layout for result. If available, click icons to view media.
Suitably refreshed, it's time for the back nine. It begins with a par 4 of just under 400m. A good drive should leave a mid to short iron for the approach. Again, very clever design here. The longer you hit your tee shot, the narrower the fairway becomes. If the pin is positioned on the front half of the green it's not a big target, mind you the the same could be said of the back section of the putting surface. Lots of movement in this green which in many ways is its defence.
11 |
|
|||||||||
|
|
Buttons toggle between distance guide and media. See hole layout for result. If available, click icons to view media.
Another par 4, this time only 380m but don't be fooled by that. This tee shot is not for the faint hearted as it's over a gorged and economical fairway. Huge changes in elevation from tee to green, mean that there are no flat stances for the second shot. And it's from there you're now getting a glimpse of the top half of the pen. Be careful here. Short yes, but the 11th has wrecked many a scorecard and any slight lapse no doubt will prove costly. It's also one of the trickiest greens on the course. Lightning fast from beyond the hole, it's best to take you four and move on.
12 |
|
|||||||||
|
|
Buttons toggle between distance guide and media. See hole layout for result. If available, click icons to view media.
Another delightful par 3 affording stunning vistas from the elevated and terraced tees, which nestle into the hillside. If you can take your eyes away from the distance, you'll find the green in the lowlands. It's one that shifts from front right to back left with several different levels. Club selection here is never easy and sand awaits short left and long right. I don't have the statistics, but I'm betting there has been more three putts here than anywhere else on the course.
13 |
|
|||||||||
|
|
Buttons toggle between distance guide and media. See hole layout for result. If available, click icons to view media.
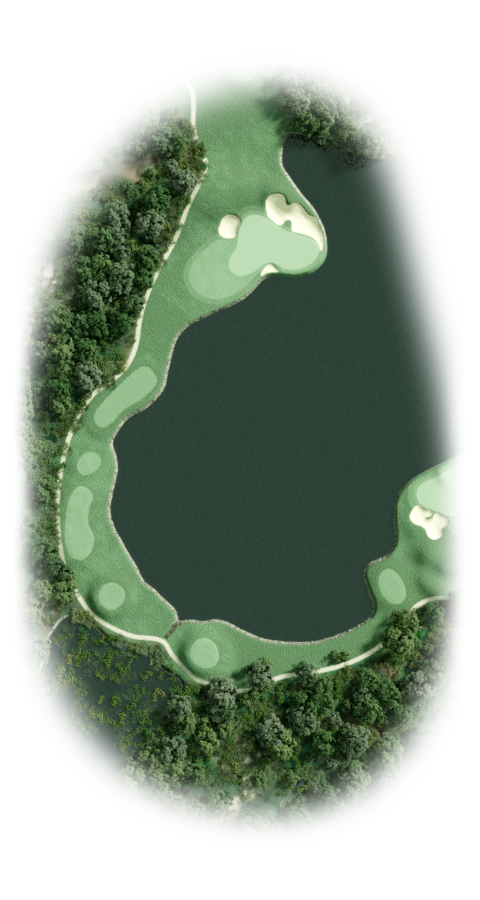
The 13th is everything that is beautiful in golf design, a stream runs diagonally across the fairway. Before lining the left hand side of it, and then tumbling into a pond short left of the green. It's a generous fairway so you can open up the shoulders. But further down there's a bunker some 40m from the green that reduces the target for the second shot, which is gently downhill. The green is shaped opposite to the fairway, and it's by that green, you meet with nature. The Crocodile river is just a few pieces from the back of the putting surface. Beyond that, lies the Kruger National Park and all its glory, home to Africa's Big Five and so much more. A wilderness that no doubt holds many secrets. Your secret to success at 13 is caution, respect and remember this iconic hole only accepts golfing excellence. When you have completed one of the world's most recognisable holes. Take a moment to gaze. It's a visual image that will stay with you long into the future.
14 |
|
|||||||||
|
|
Buttons toggle between distance guide and media. See hole layout for result. If available, click icons to view media.
The 14th moves a fraction from right to left and the problem here is the fairway tilts from left to right which means the right hand bunker, one of the largest on the golf course, gets plenty of business. I said earlier, the 12th would have seen many three putts, it wouldn't surprise me to find out that this one rivals it. Jealously guarded by a stream at the front of the putting surface, the left edge is proud here before tumbling down onto lower levels. It's not deep but wide and distance control is at a premium. 324m, yet leaving here with a 4 gives you a feeling of contentment.
15 |
|
|||||||||
|
|
Buttons toggle between distance guide and media. See hole layout for result. If available, click icons to view media.
The first of two par 5's in the last four holes, the 15th is another masterpiece of design. It heads in the same direction as the previous hole, and covers 530m. For the long hitters it's important to hug the left hand side if you were to find a fairway that slopes gently from left to right, but not too much, as the out of bounds wall is not far away. A generous enough layup area, but for the Cavalier player thinking of taking on the green in two, be aware, this is only for the brave. The green is long at 34m, but that's all you have in your favour as the lake encroaches into the edge of the putting surface. Should you have second thoughts on the downswing of the approach and bailout left, you leave yourself a pitch across the green towards the water. A birdie chance, yes. A possible golfing disaster, certainly.
16 |
|
|||||||||
|
|
Buttons toggle between distance guide and media. See hole layout for result. If available, click icons to view media.
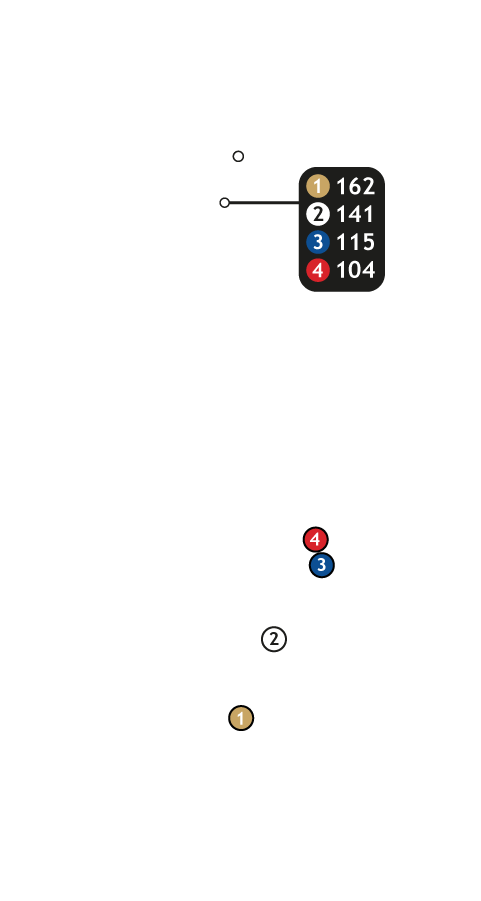
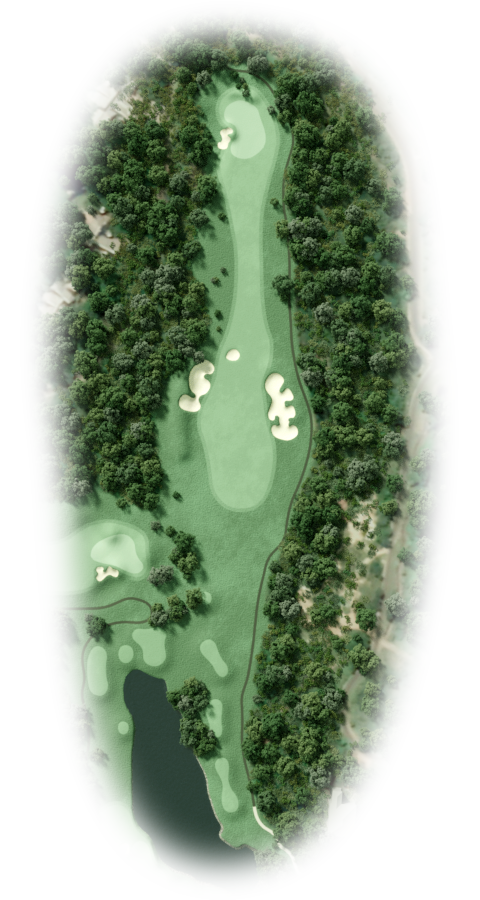
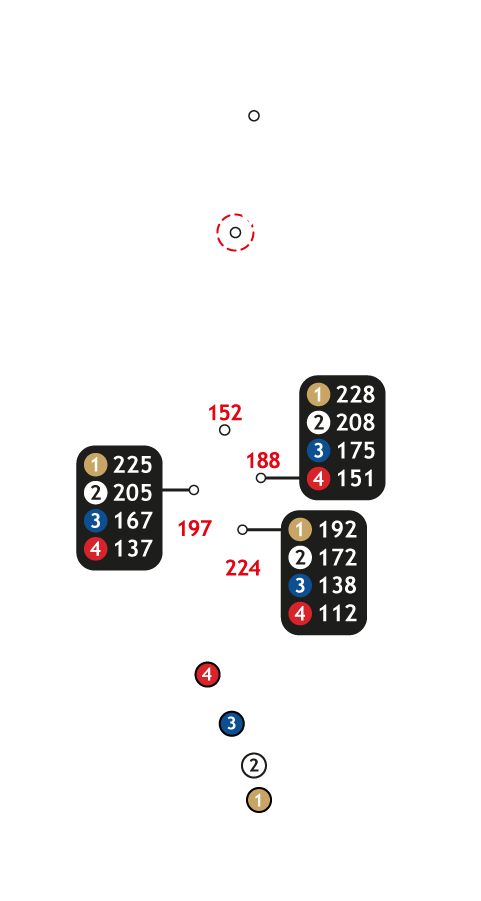
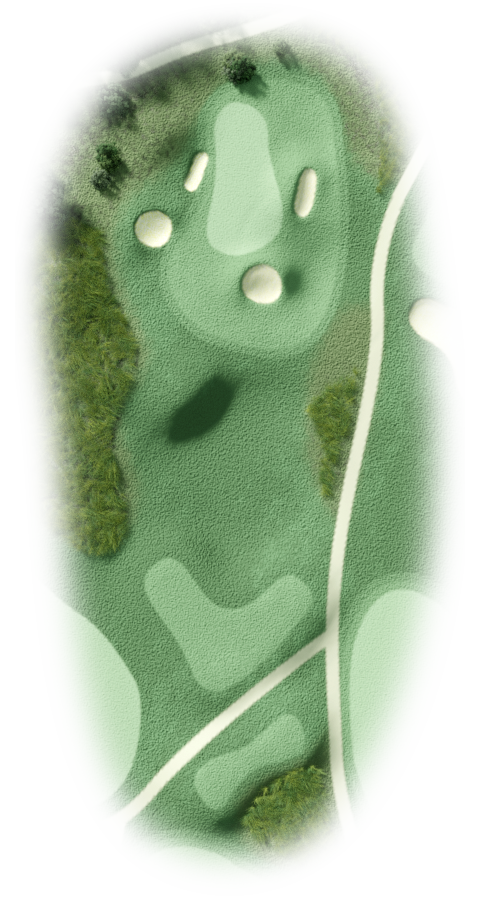
The last of the par 3's and 16 can play anything from 182 to just 149m. There's no escape here, tee, water, a brilliantly shaped green and you. This was the kingdom of a hippo affectionately named Harry by the members where he laughed on several occasions, as one ball after another splashed into the water. The far right pin position is one of golfs toughest questions, although any other pin placement, could never be classed as easy. When you finish your trip around here, ask yourself which of the par 3's is the most testing. It may be a while before you answer.
17 |
|
|||||||||
|
|
Buttons toggle between distance guide and media. See hole layout for result. If available, click icons to view media.
Having left the water behind I see the 17th as a classic Bushveld hole. It meanders from left to right during its 400m journey with bush framing both sides of the fairway. Having reached the elbow of the dogleg, the green sits with its head raised just enough for you to see the putting surface. By now you will know how much the green complexes play a huge part in the examination Leopard Creek presents. The 17th continues that trend offering a multitude of pin positions, none of which is straightforward.
18 |
|
|||||||||
|
|
Buttons toggle between distance guide and media. See hole layout for result. If available, click icons to view media.
The intoxicating mixture of holes here is a huge part of your golfing experience and of course enjoyment. The final offering, a par 5 of 497m, has been described as majestic, elegant, inspiring and awesome. Bloody frightening has been used more often than any of the other four put together. From the elevated tee you want you to drive on the fairway, preferably on the flat plateau. The island green gets smaller, the more you gaze. I've enjoyed commentating on it much more than playing it, whether it's your second or third shot, even your fourth, finding the sanctuary of the green offers a great sense of achievement. It's a fitting conclusion to a wonderful golf course. A scratch handicap member, who shall remain nameless, has never bettered a bogey 6. Some of the game's top players have succumbed at this final hurdle. If it happens to you, just smile, cross the bridge, and head to the 18th. However, if it's a birdie fall, stand there and soak it all in. Finally on completion of your round, allow yourself some time in the clubhouse and enjoy a sip of the sumptuous wine this delightful country has to offer. As dust settles, you never know what you may see, it's just possible, you might view some of Leopard Creeks non-playing members.
1 |
|
|||||||
|
|
Buttons toggle between distance guide and media. See hole layout for result. If available, click icons to view media.
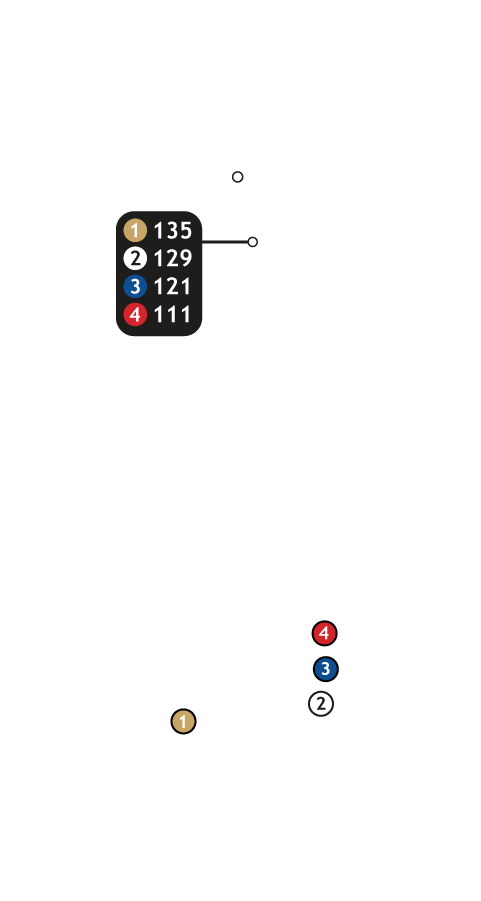
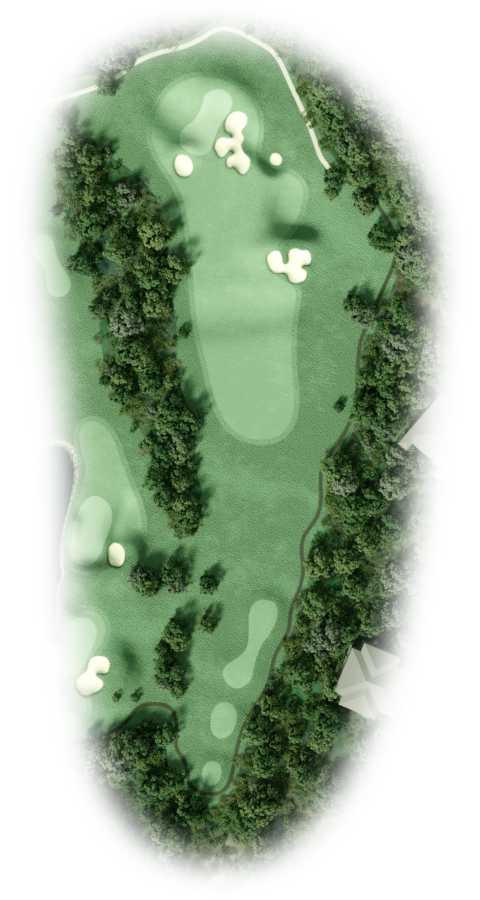
This short Par 3 1st was designed in the likeness of the famous Postage Stamp 8th at Royal Troon. Beware of this innocuous looking little hole, as an errant tee ball might see your ball roll into one of the dreaded ‘coffins’ guarding this little beauty.
2 |
|
|||||||
|
|
Buttons toggle between distance guide and media. See hole layout for result. If available, click icons to view media.
Without a shadow of doubt one of the most iconic golf holes in the world is the Par Three 12th at Augusta National GC. The 2nd at the NJDC was broadly modelled to give you a similar feel to the famous hole at ‘Amen Corner’, with a shallow green that is well protected by bunkers, a steep bank and a watery grave.
3 |
|
|||||||
|
|
Buttons toggle between distance guide and media. See hole layout for result. If available, click icons to view media.
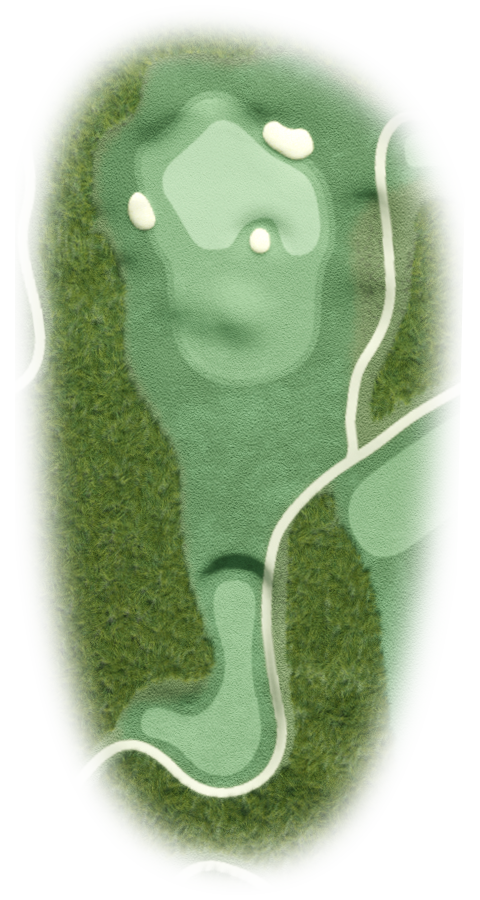
The original Redan hole, the 15th of the West Links at North Berwick, can probably lay claim to being the most copied hole in all of golf. The NJDC’s Par 3 3rd hole is our rendition of this signature hole with its characteristic blind tee shot to a green that slopes steeply from front to back and then again for right to left.
4 |
|
|||||||
|
|
Buttons toggle between distance guide and media. See hole layout for result. If available, click icons to view media.
The island green 17th hole at Sawgrass is probably the most easily recognisable short hole in the world and the NJDC’s version of the hole is pretty darn close to the real thing. The scariest tee shot on our short course requires a well struck iron and deft touch on the green to manage the severe undulations.
5 |
|
|||||||
|
|
Buttons toggle between distance guide and media. See hole layout for result. If available, click icons to view media.
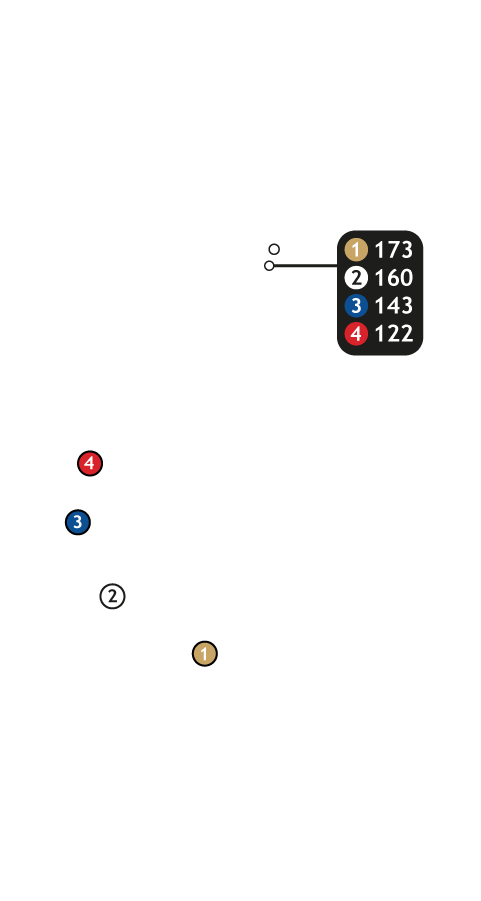
The 5th hole at the NJDC’s course is designed in the likeness of the 16th of Augusta National. One of the longer tee shots on the course, it tests you to carry the water body hugging the green and challenges your stroke with a serious slope from the back of the green to the front.
6 |
|
|||||||
|
|
Buttons toggle between distance guide and media. See hole layout for result. If available, click icons to view media.
Leopard Creek Country Club’s Par 5 18th has one of the most daunting approaches in all of golf. The 6th hole at the NJDC course attempts to replicate the difficulty with this short, yet very tricky, little tee shot.
7 |
|
|||||||
|
|
Buttons toggle between distance guide and media. See hole layout for result. If available, click icons to view media.
The Old Course at St. Andrews requires no introduction; it simply is the best-known golf course in the world. The 7th hole of the NJDC Par 3 is inspired by the very difficult 11th of The Old Course. Although it does not have the double green you will find with the original, it does mimic the deep pot and false front that successfully protect the hole.
8 |
|
|||||||
|
|
Buttons toggle between distance guide and media. See hole layout for result. If available, click icons to view media.
Ernie Els made one of the most amazing up-and-downs in Open history from a deep pot bunker at Muirfield’s 13th hole and this was instrumental in him going on to win his first Claret Jug. The NJDC’s 8th hole has the same look and feel as this legendary Par 3 and it requires a very accurate tee shot to stay out of these similarly shaped pot-style bunkers.
9 |
|
|||||||
|
|
Buttons toggle between distance guide and media. See hole layout for result. If available, click icons to view media.
The closing hole at the NJDC Par 3 course is modelled in the likeness of the devilishly difficult 17th of the renowned Seminole GC. A long tee shot to a very well protected green that wants to feed the sand traps surrounding the green is the perfect finish to your 90-minute trip around the golfing world.