1 |
|
||||||||||
|
|
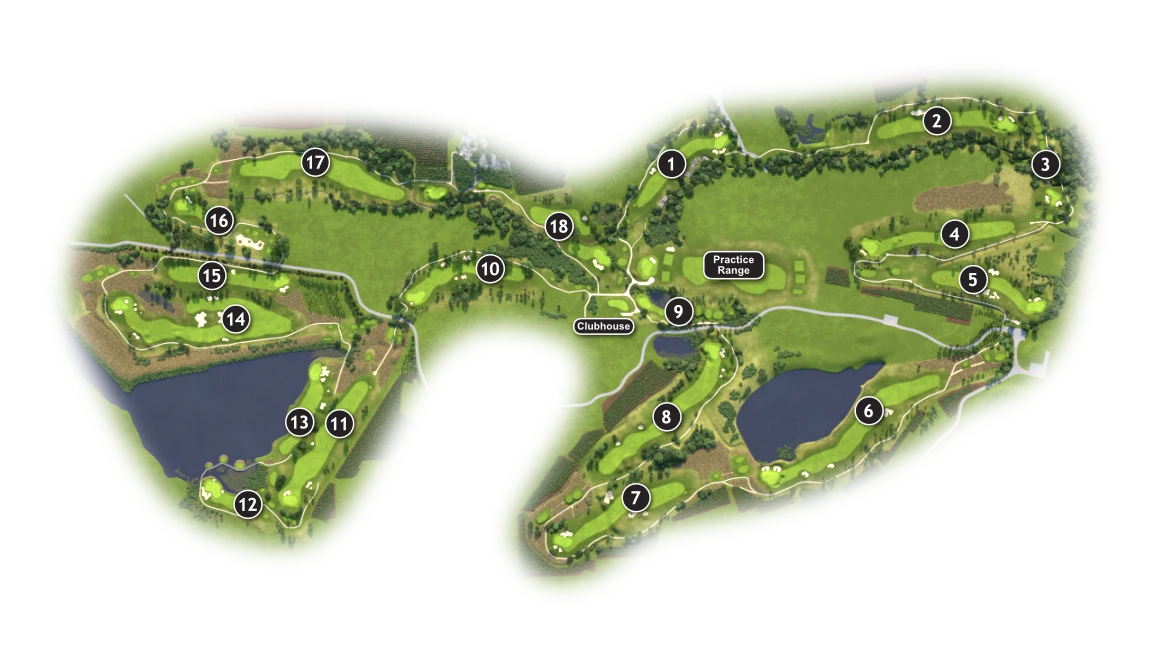
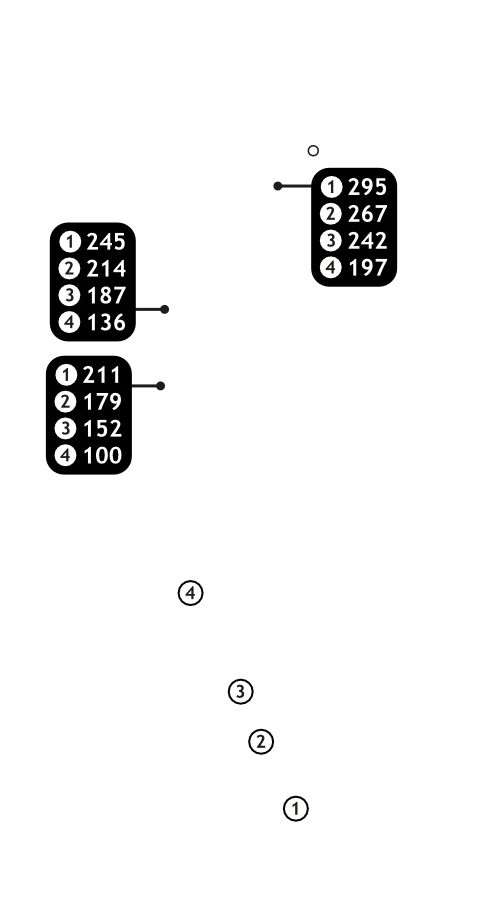
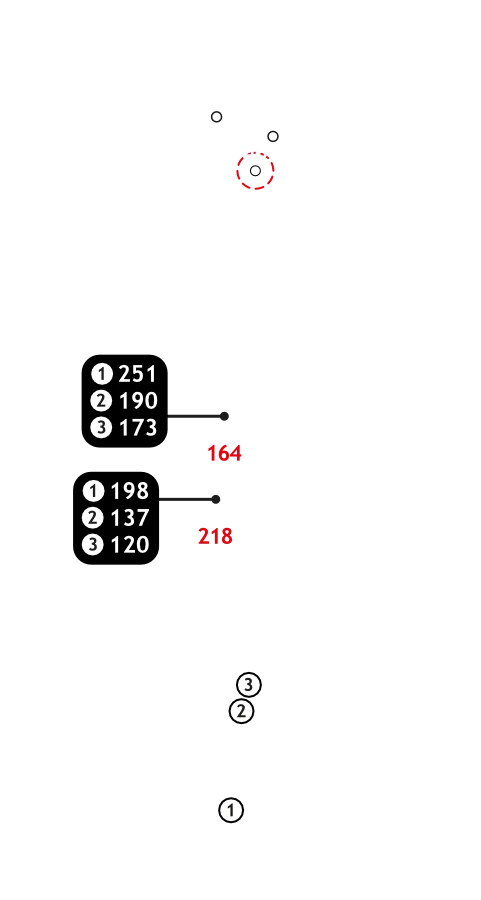
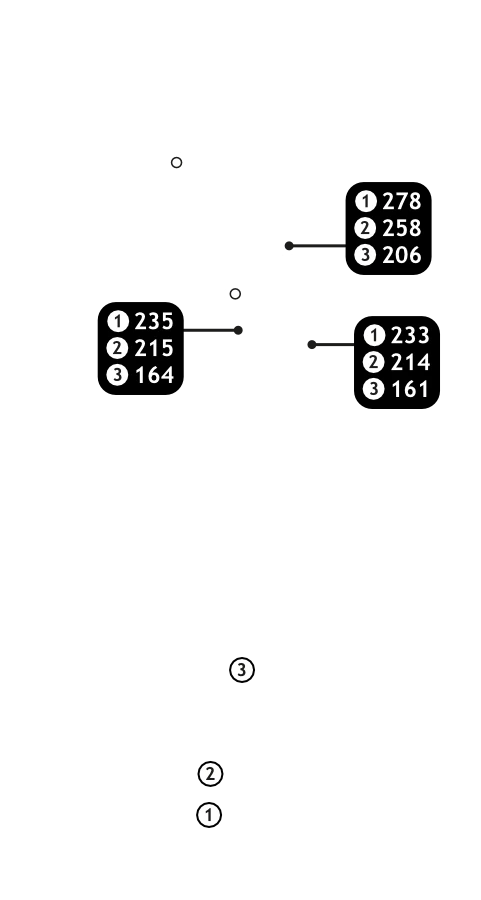
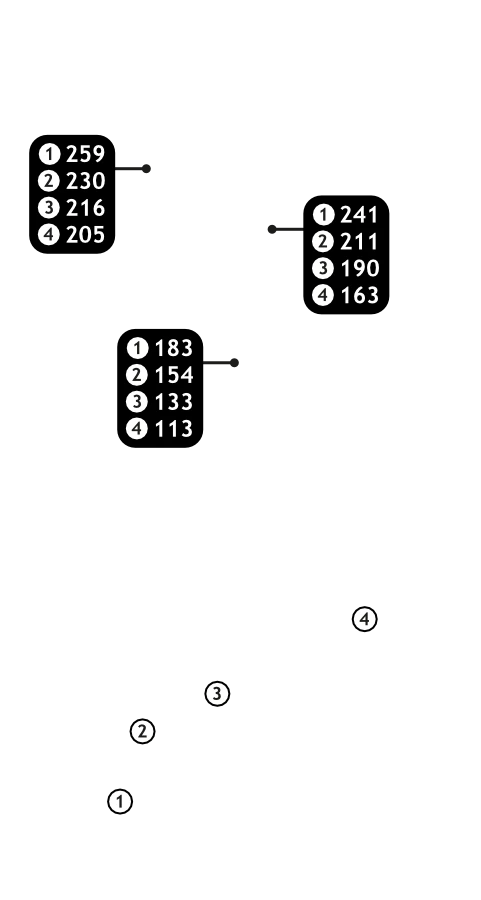
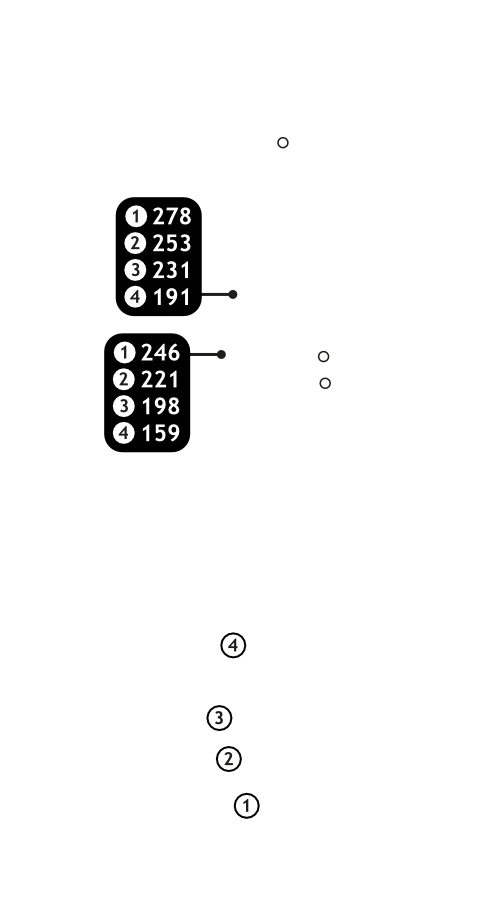
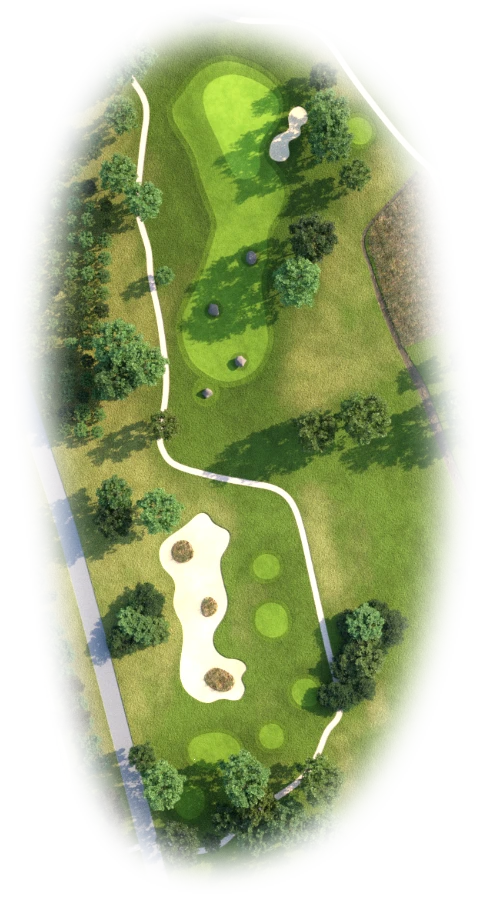
Buttons toggle between distance guide and media. See hole layout for result. If available, click icons to view media.
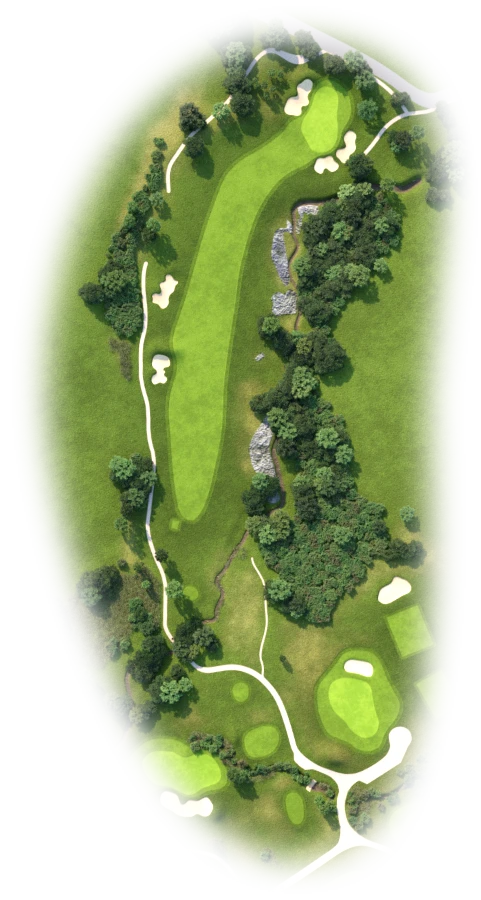
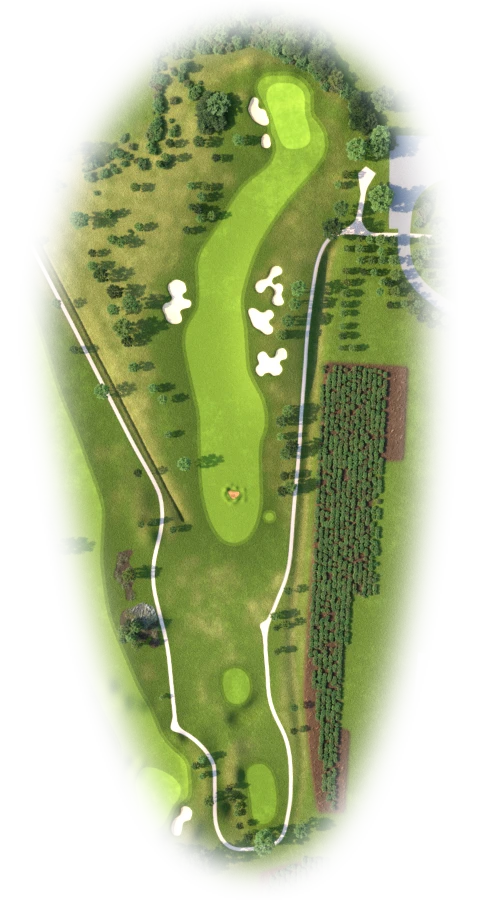
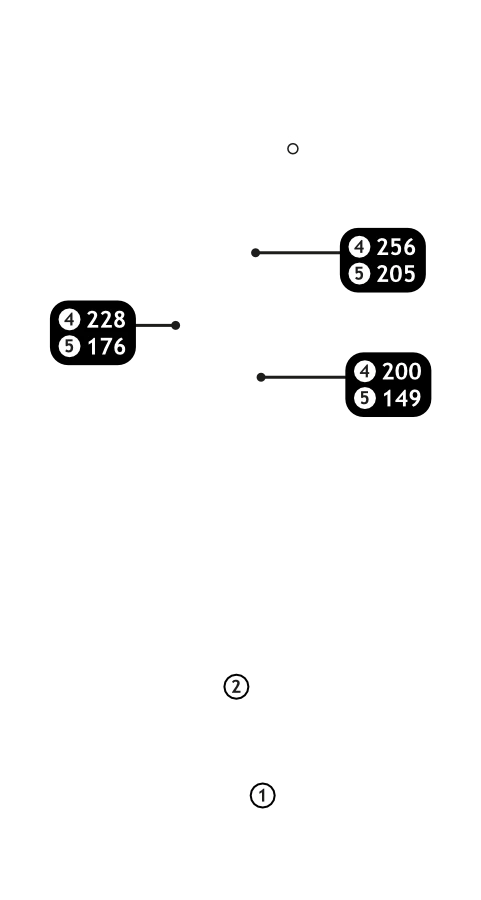
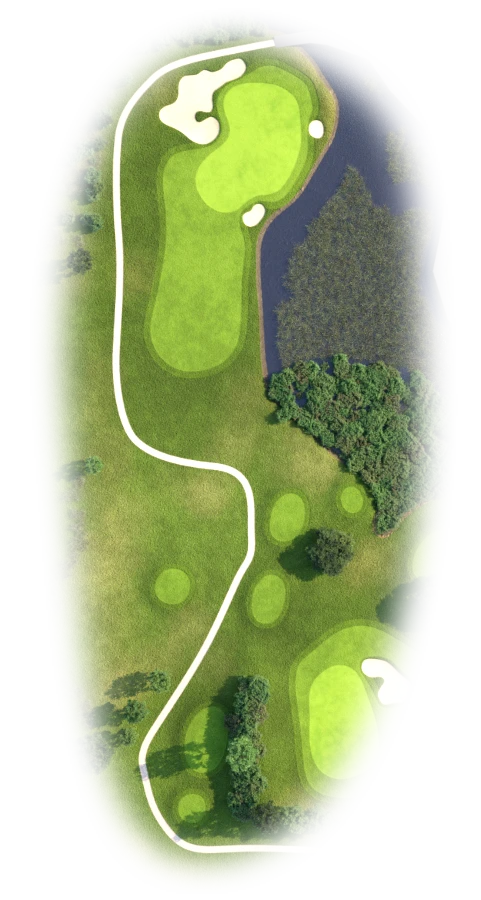
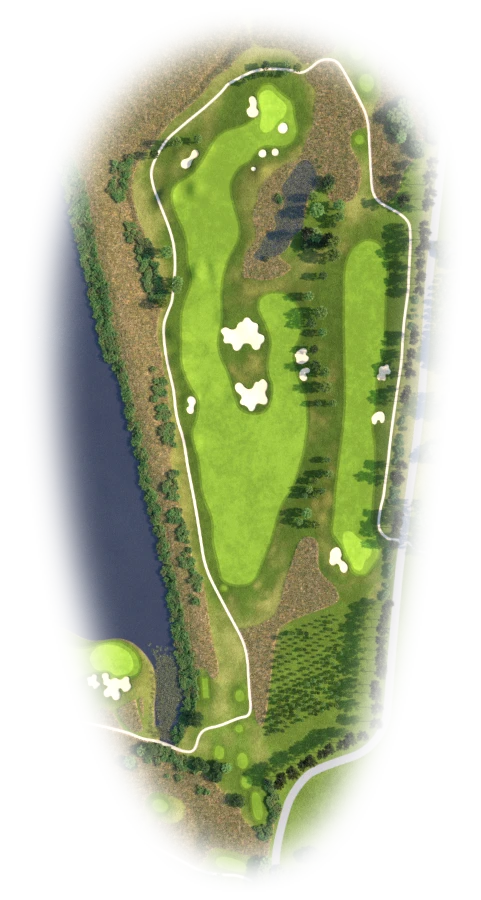
A wonderful opening hole that demands a good tee shot to a sloping fairway. This allows for a short to mid iron approach into a large two-tiered green that well protected by three greenside bunkers.


2 |
|
||||||||||
|
|
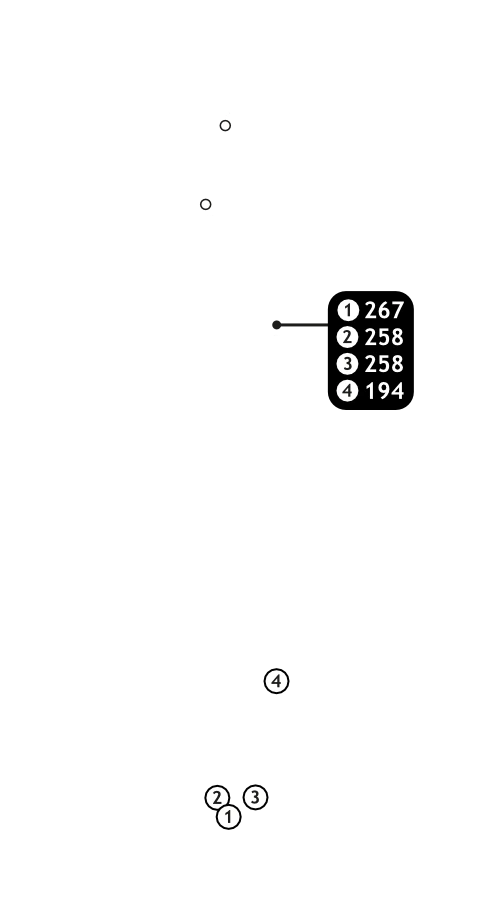
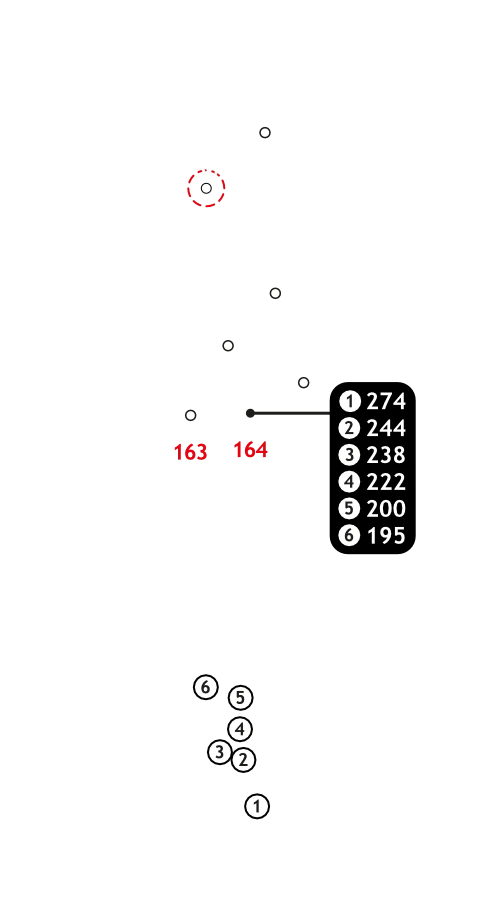
Buttons toggle between distance guide and media. See hole layout for result. If available, click icons to view media.
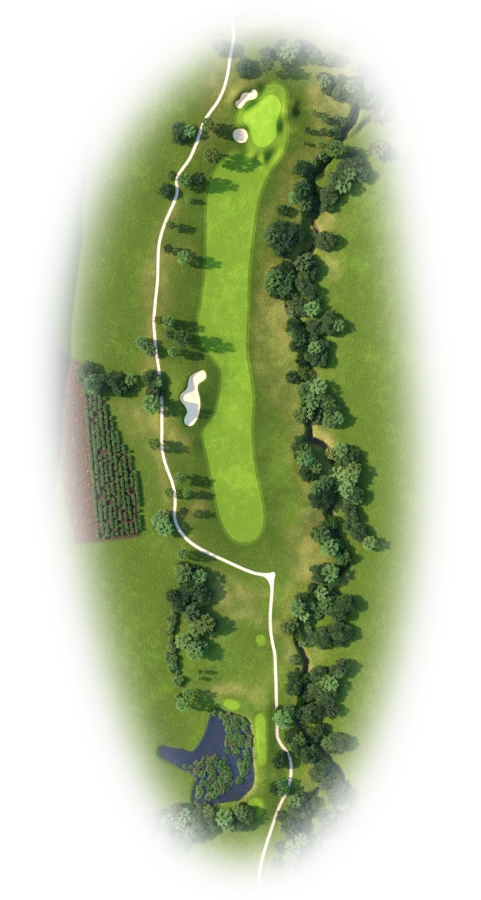
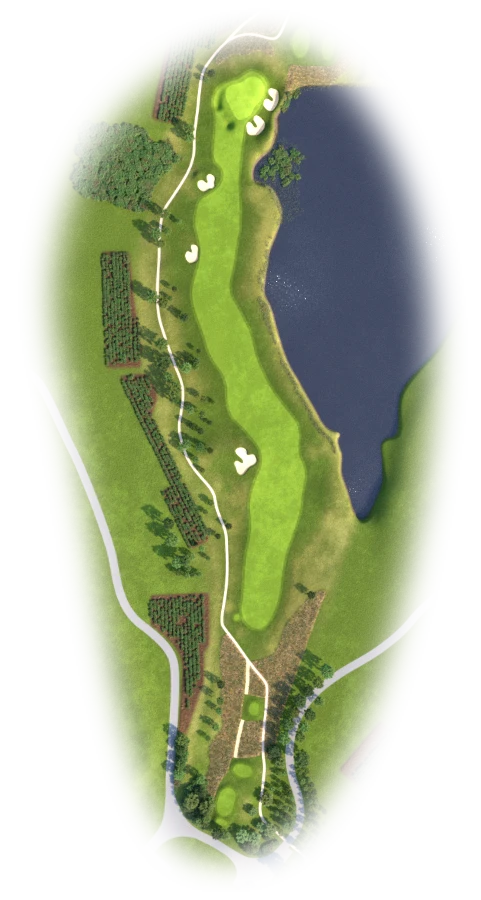
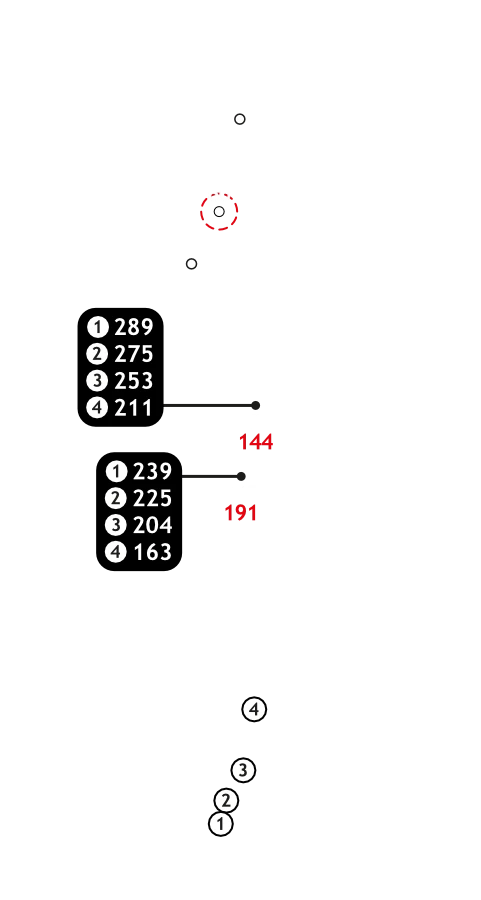
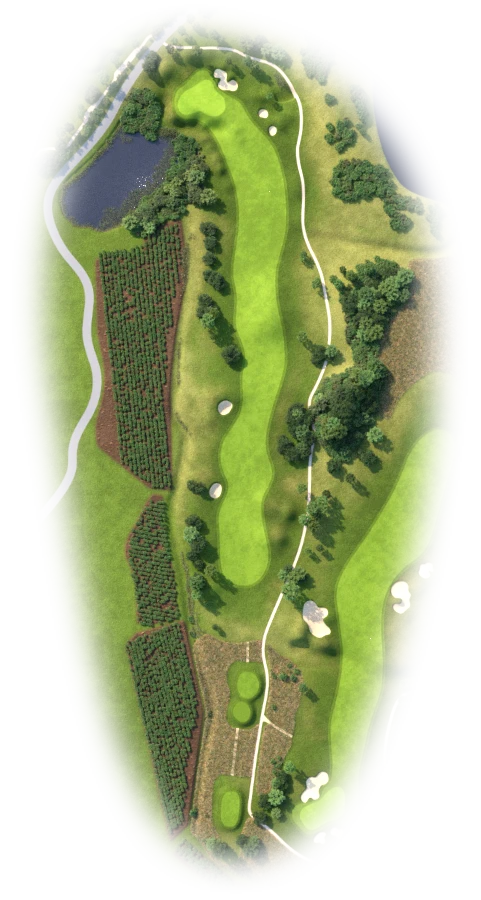
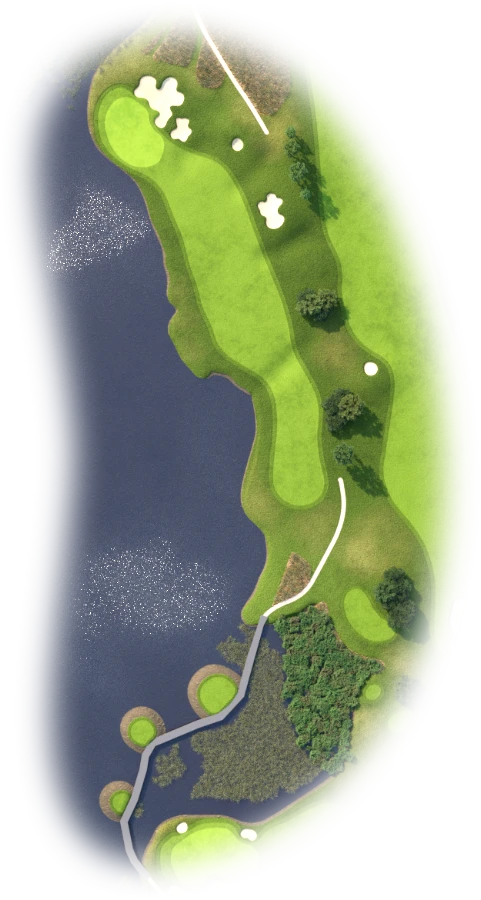
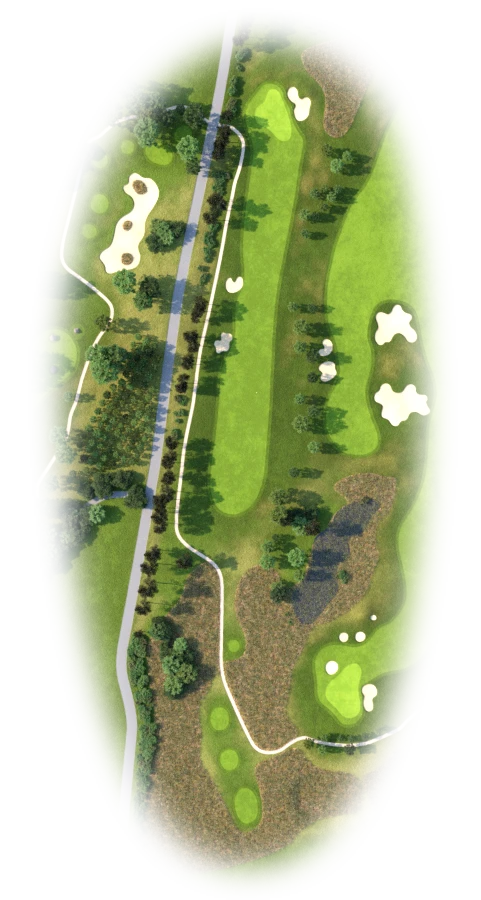
A slight dogleg right with a fairway bunker left and a tree lined stream guarding a wide undulating fairway. Two bunkers left, and tall trees from your approach will bear testimony to your efforts on this testing green.
3 |
|
||||||||||
|
|
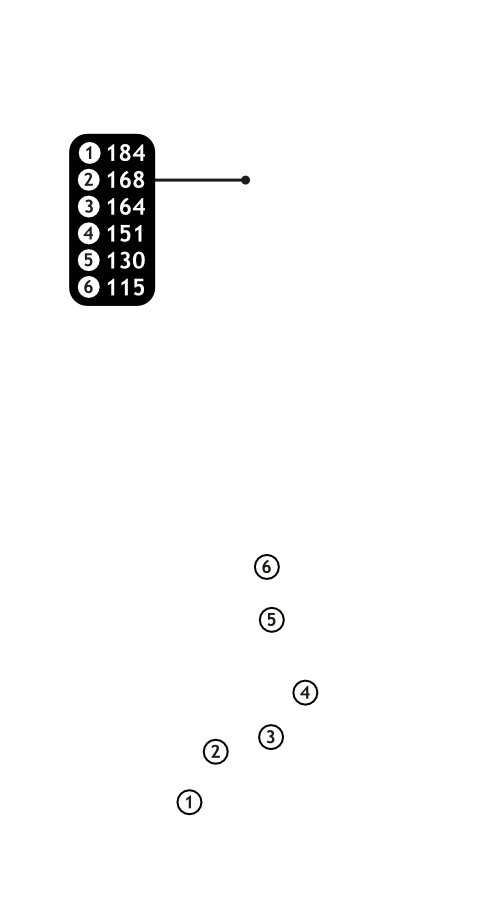
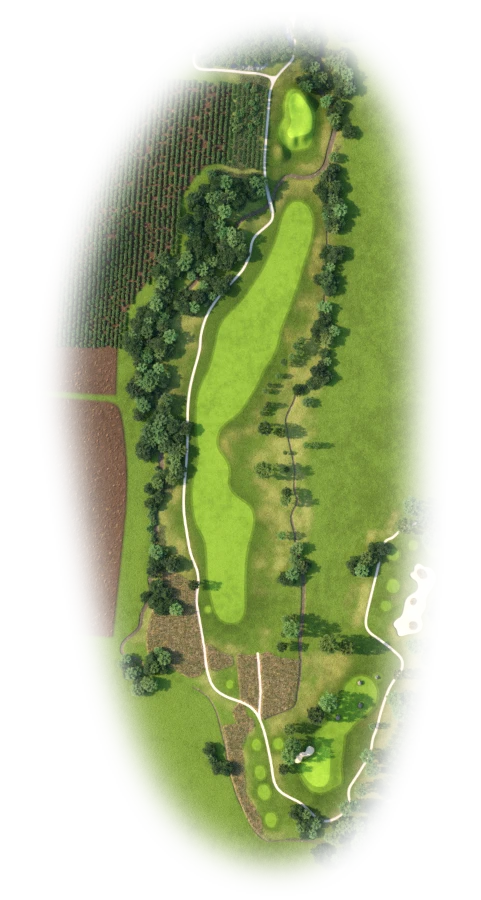
Buttons toggle between distance guide and media. See hole layout for result. If available, click icons to view media.
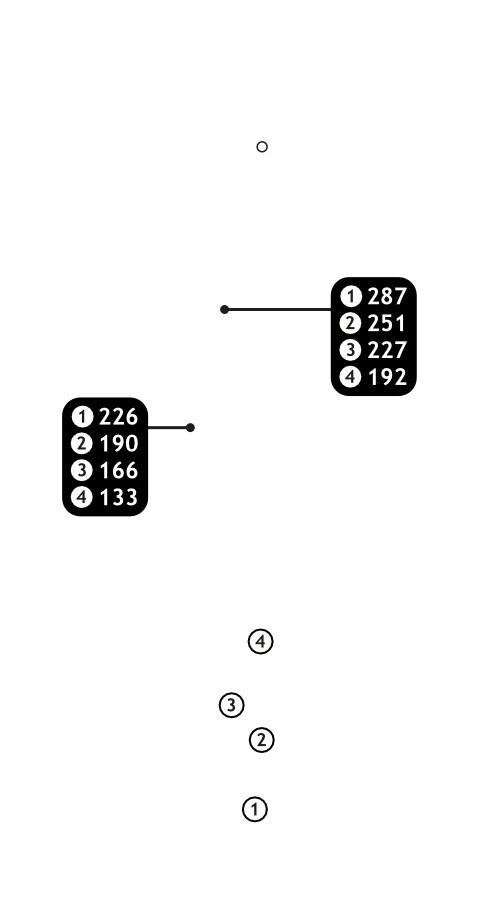
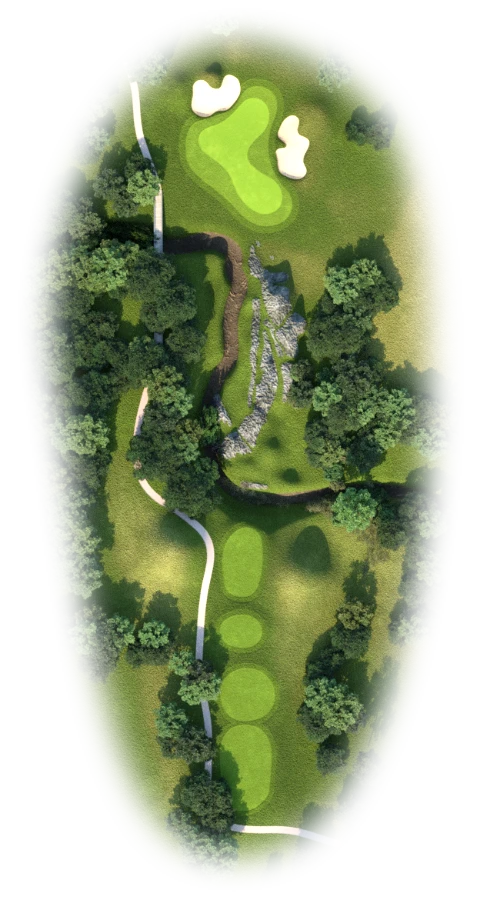
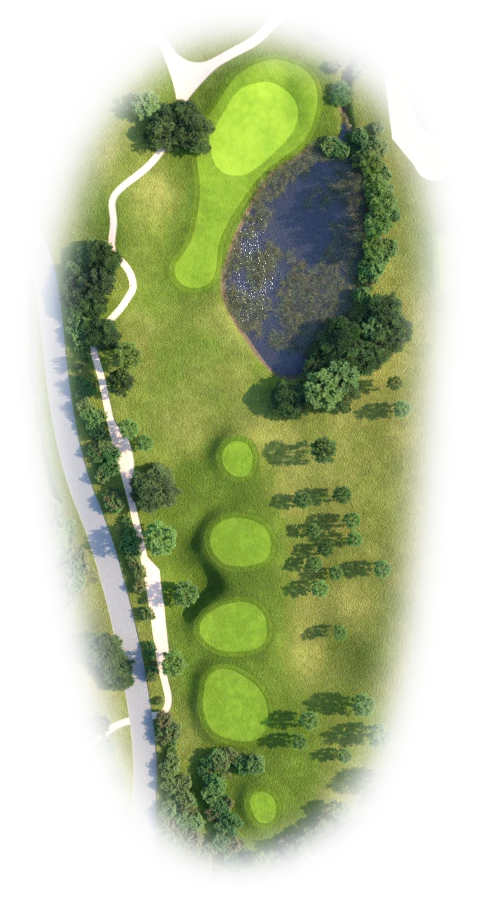
A picturesque par 3 that requires a carry over a rocky tree lined river bed to a boomerang shaped green protected by 2 highly visible greenside bunkers. Pay careful attention to the pin placement as there will be many challenges if the ball is on the wrong side of the pin.
4 |
|
||||||||||
|
|
Buttons toggle between distance guide and media. See hole layout for result. If available, click icons to view media.
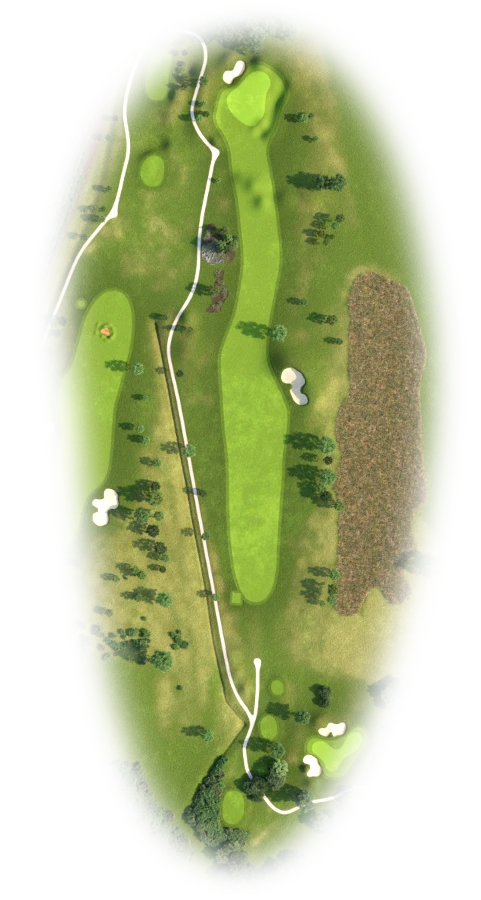
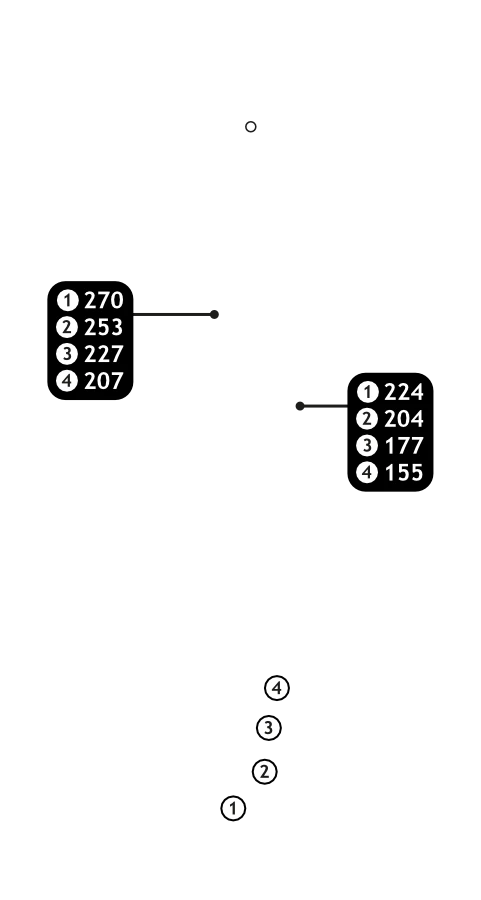
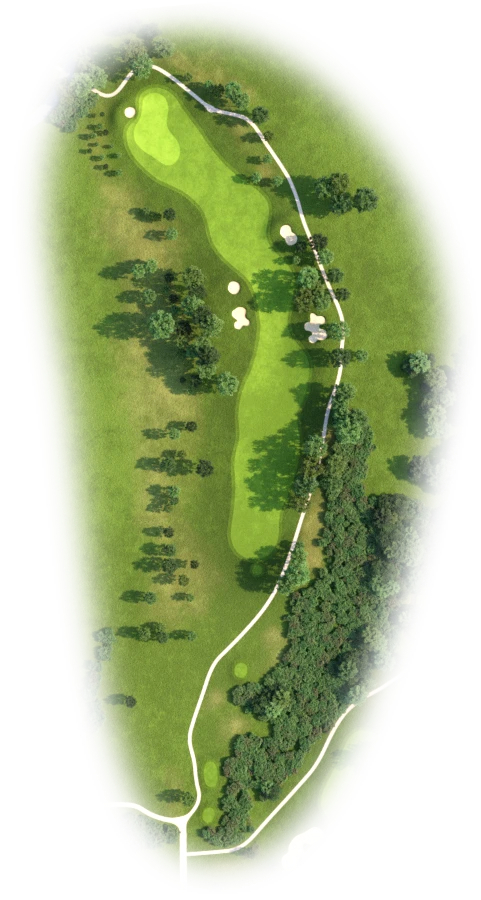
With a beautifull view of Table Mountain in the back-ground this hole requires a good tee shot as distance off the tee will dictate the degree of difficulty on this par 4. Hazard left and reeds right are the to catch the really wayward short and a fairway bunker left and thickets right, narrow the perspective. The approach shot is to a green that slopes uphill protected by 2 greenside bunkers.
5 |
|
||||||||||
|
|
Buttons toggle between distance guide and media. See hole layout for result. If available, click icons to view media.
The splendour of the Stellenbosch mountain range forms the back drop of this par 4. The array of bunkers successfully threaded off the tee leaves a short second shot to an elevated green surrounded by 3 greenside bunkers.
6 |
|
||||||||||
|
|
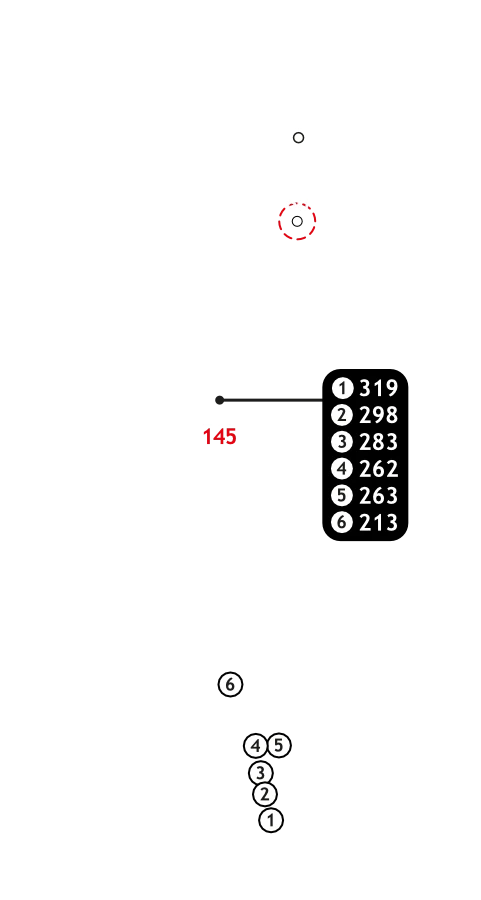
Buttons toggle between distance guide and media. See hole layout for result. If available, click icons to view media.
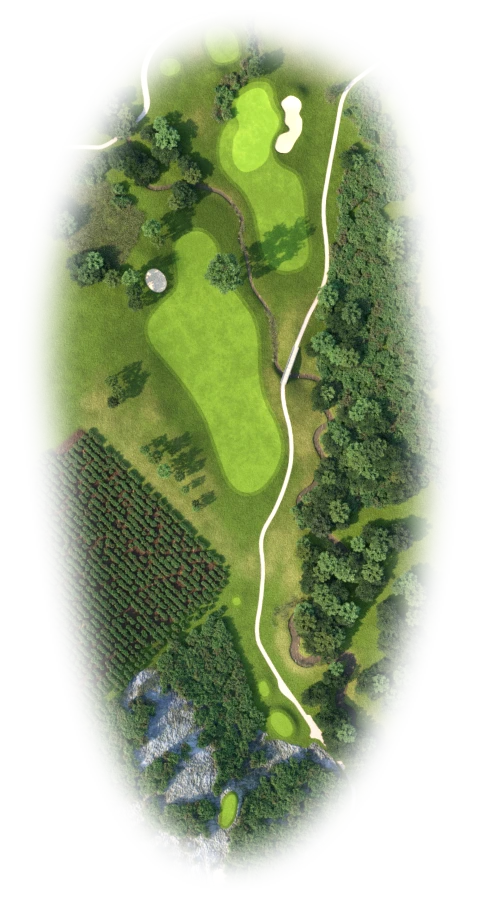
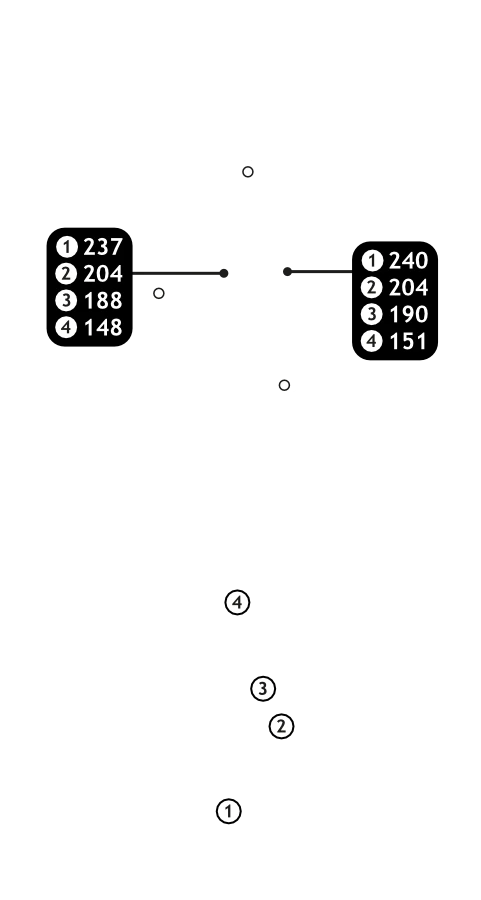
A magnificent par 5 made special by a dam that will catch a wayward second shot. The fairway curves left and then right alongside the dam with grassy mounds and bunkers adding to the interest. The green is found only after negotiating cleverly placed grassy swales.
7 |
|
||||||||||
|
|
Buttons toggle between distance guide and media. See hole layout for result. If available, click icons to view media.
A classic par 4 with a fairway narrowed by bunkers either side of it. Favour the right-hand side of the fairway to avoid the out of bounds on the left. A large sloping but narrow green will test your second shot and ability to make a four.
8 |
|
||||||||||
|
|
Buttons toggle between distance guide and media. See hole layout for result. If available, click icons to view media.
The tee shot is blind but carefully placed bunkers shows the path to find the fairway. At the landing area the fairway slopes steeply downhill and to the left. Fice bunkers guard the green. This is a high risk and reward hole for the longer hitters.
9 |
|
||||||||||
|
|
Buttons toggle between distance guide and media. See hole layout for result. If available, click icons to view media.
This short par 3 has water to be carried at the front and avoided to the right. The green is protected by wild olive trees on the left to catch those that is too cautious. The green sits diagonally to the tee and slopes severely uphill from front to back and will test your iron play.
10 |
|
||||||||||
|
|
Buttons toggle between distance guide and media. See hole layout for result. If available, click icons to view media.
This hole has a severe dogleg left and the ideal shot has to hug the right side of the fairway. It will leave you with an uphill shot to a large but narrow green. Keep an eye out on the pin position as one can easily leave themselves a tough chip and putt.
11 |
|
||||||||||
|
|
Buttons toggle between distance guide and media. See hole layout for result. If available, click icons to view media.
This narrow and long par 4 will test your ability to hit the fairway. Length will determine the difficulty of your second shot to the most difficult green on the course. Walking away with a par 4 on this hole will be an achievement for most golfers.
12 |
|
||||||||||
|
|
Buttons toggle between distance guide and media. See hole layout for result. If available, click icons to view media.
Another challenging par 3 where the green is well protected by water to the right and well-placed bunkers to the left. A good tee shot to the middle of this big green should secure a par of even less.
13 |
|
||||||||||
|
|
Buttons toggle between distance guide and media. See hole layout for result. If available, click icons to view media.
Without a doubt this is our signature hole at De Zalze Golf Club A boardwalk leads to a selection of tees in the heart of the dam. The hole doglegs left around the dam and a brave tee shot might just result in a great opportunity to make a birdie.
14 |
|
||||||||||
|
|
Buttons toggle between distance guide and media. See hole layout for result. If available, click icons to view media.
The re-designed 14th hole is another beautiful par 5. An elevated tee shot with an option to favour either side of this split fairway. Make sure you avoid the two bunkers and the wetlands just short of the green that is guarded by a few small bunkers. Birdies are rare here but a possibility for the longer hitters.
15 |
|
||||||||||
|
|
Buttons toggle between distance guide and media. See hole layout for result. If available, click icons to view media.
Once again, an elevated tee that allows fantastic views of the mountain range. Here pines and orchards create a narrow path to a very straight hole. At the green the grassy swales in front of the green will challenge your approach shot.
16 |
|
||||||||||
|
|
Buttons toggle between distance guide and media. See hole layout for result. If available, click icons to view media.
A challenging par3 where club selection and accuracy are very important. Two greenside bunkers at the green will catch a wayward tee shot and leave you a tough up and down.
17 |
|
||||||||||
|
|
Buttons toggle between distance guide and media. See hole layout for result. If available, click icons to view media.
Perhaps one of the toughest yet memorable Par 5`s you will ever play. A tree lined fairway with mountain backdrops creates a painting, with the focal point a central bunker complex. The fairway straightens to a river crossing that has to be carried to an elevated green. This is definitely a 3 shot par 5.
18 |
|
||||||||||
|
|
Buttons toggle between distance guide and media. See hole layout for result. If available, click icons to view media.
From the highest tee the challenge on this delightful par 4 is immediately visible. The careful tee shot is short of the river leaving a mid to short iron into a large green that is protected by a water hazard to the left. Walking off the 18th you can say you have played one of the best finishing holes in the country.