1 |
|
||||||||||
|
|
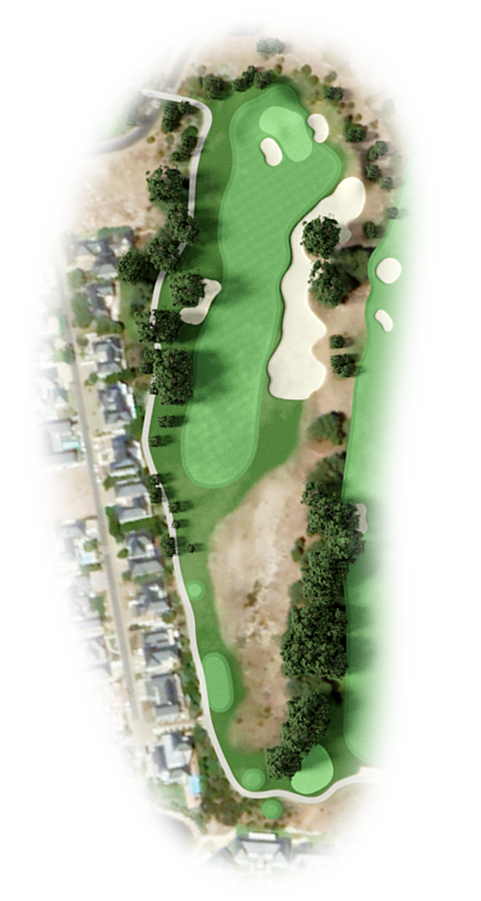
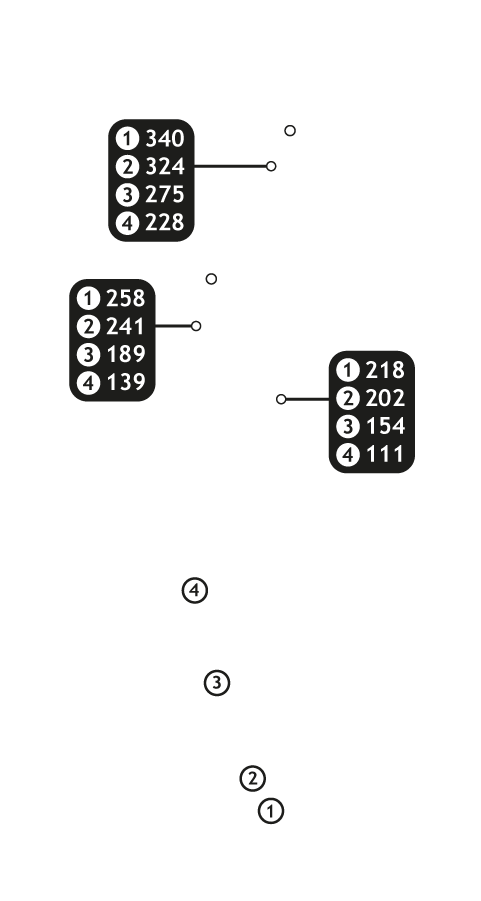
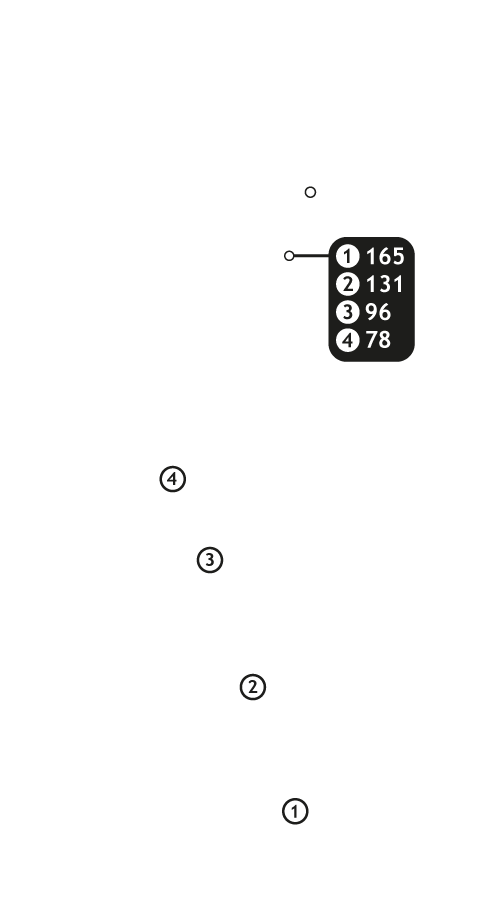
A reasonably short hole where positioning of your tee shot is important. Bunkered almost the full length of the hole down the right and with a strategically placed bunker on the left, accuracy is more important than distance. A well-placed tee shot will leave a short iron approach to the fairly shallow green, which has two strategically positioned greenside bunkers.

2 |
|
||||||||||
|
|
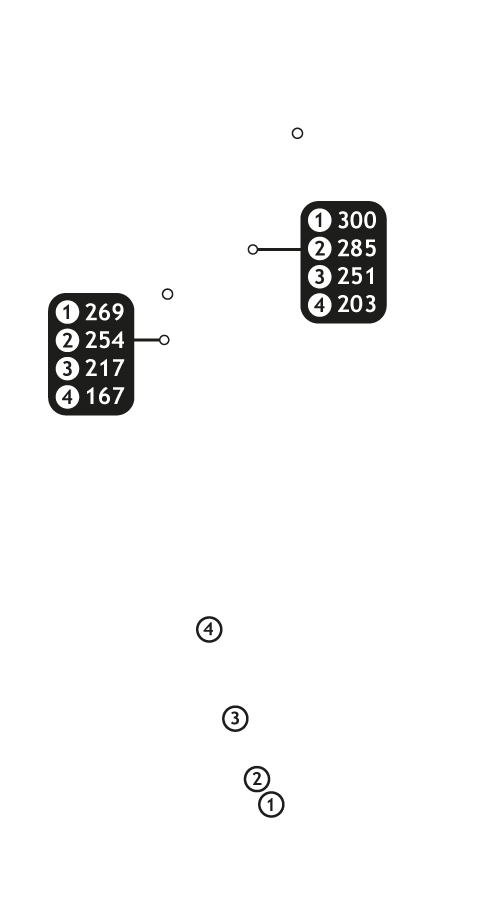
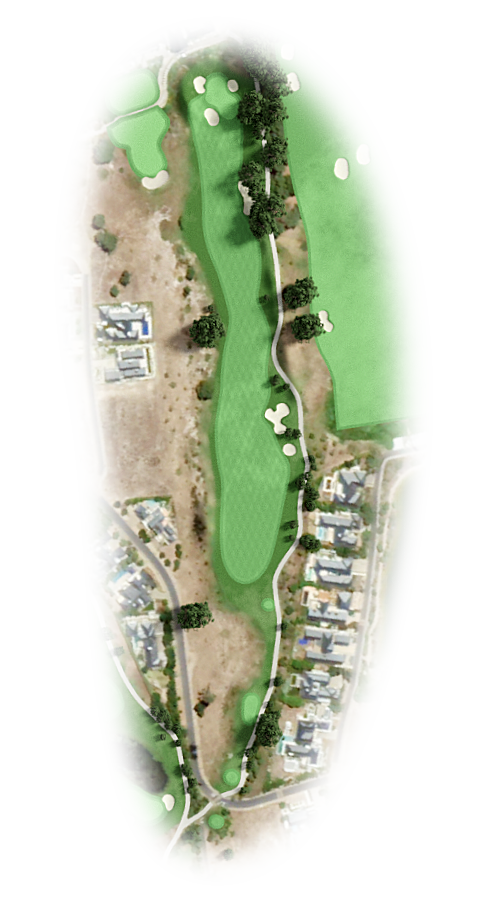
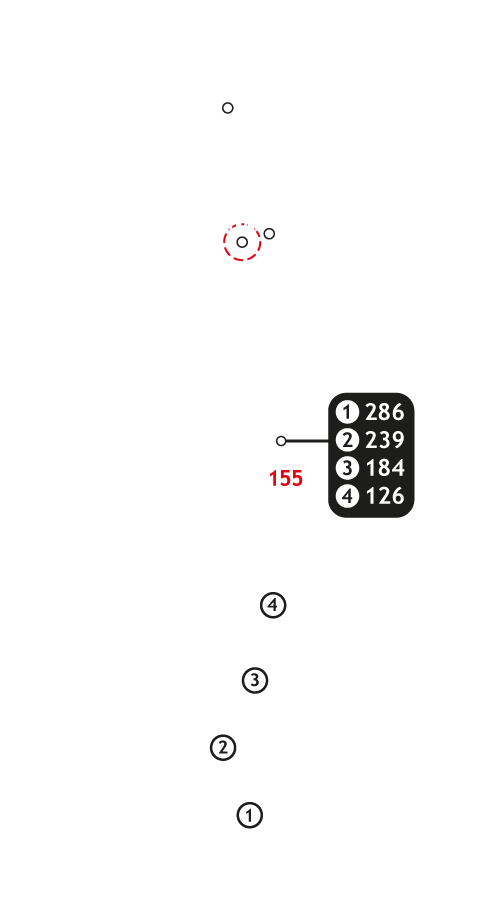
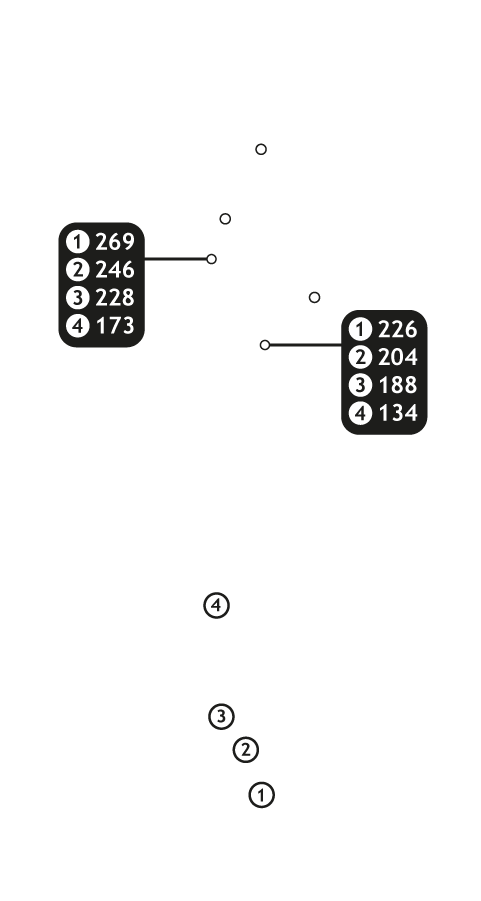
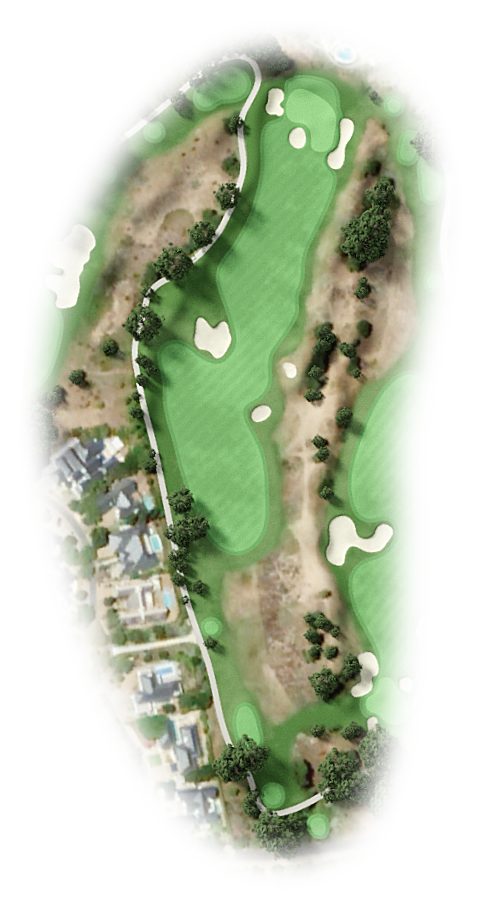
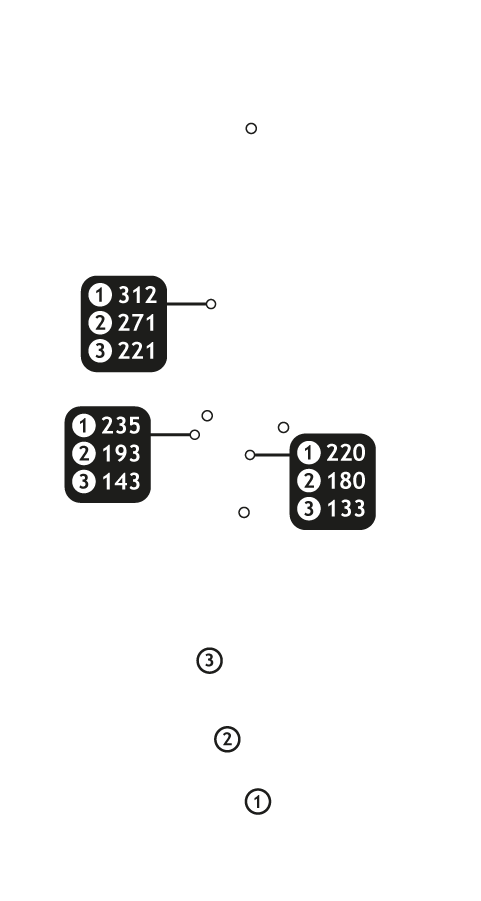
A spectacular hole with water from tee to green, all the way down the right side. Again another strategically placed bunker on the left. Stay short of the bunker and you will have a short iron shot left to the green. The shot must be struck with confidence as anything less may end up leaving the player bunkered or in the water.
3 |
|
||||||||||
|
|
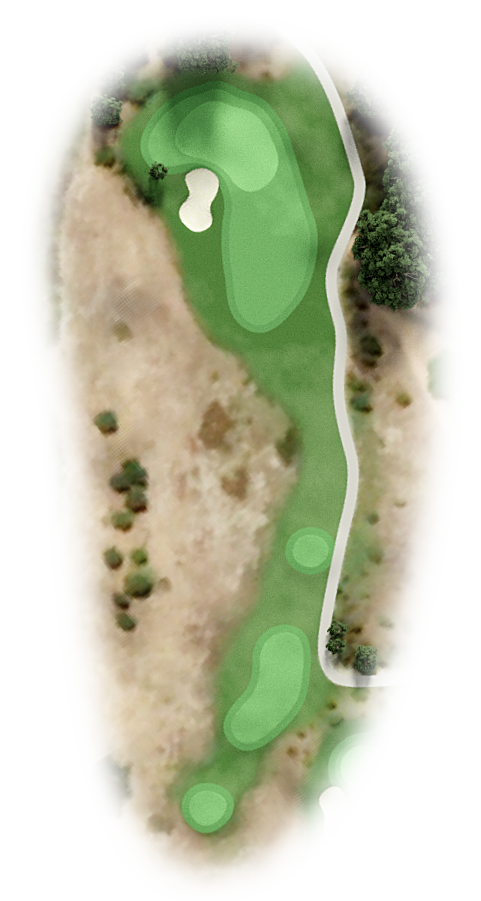
A spectacular mid iron par 3 with a cobbled creek running from the tee past the green is the predominant feature. This tricky green is surrounded by three bunkers which makes the shot a challenge. Getting close to the pin when it is positioned at the back right requires a shot of great skill.
4 |
|
||||||||||

|
|
A genuine 3 shot par five. There’s no room for error, as you need to cross the creek 3 times en-route to the green. This par 5 is listed as one of the best in South Africa and as such commands respect. A true signature hole that you will remember hopefully for the right reasons.
5 |
|
||||||||||


|
|
Drive over the bunkers on the left to leave a second short to a visible pin position; otherwise drive down the right centre and lay up short of the bunker at the end. Rely on your short game to achieve a well-deserved par.
6 |
|
||||||||||
|
|
The easiest of the par 3’s, but miss the green and you will have a tough time making par. The green has a deep bunker front left and collects many tee shots. Plenty of slopes make this green a challenge to two putt.
7 |
|
||||||||||
|
|
A long and testing par 4 hole. The landing area is wide with water on the right and two bunkers for the cautious on the left. Hit the fairway and you will have a mid to long iron for your second shot to a small green surrounded by a massive bunker complex. Your ball striking will need to be spot on if you want to make par.
8 |
|
||||||||||
|
|
Take in the view before deciding on a strategy. You might consider a rescue club or an iron off this tee, but the closer you get to the green the better. Bunkers left and water right for the tee shot. Your second shot requires pinpoint accuracy. The further left the pin is the more club you need. Anything short will certainly find the water.
9 |
|
||||||||||
|
|
A wide fairway where you can try and hit it far. Beware of the bunkers on the right as they are deep. Another wood for your second will leave a short iron to the pin. The green is surrounded by three bunkers and also slopes away, to the back left. You’ll be in need of some refreshments by the time you finish this one.
10 |
|
||||||||||

|
|
A marvellously shaped par 4. The landing area is deeper than it appears from the tee, but it is still a risk vs reward tee shot. Ideally you need to be on the left of the fairway but a long bunker protects this side. Hit it down the right and you will have a semi blind shot for your second. Miss the green and your short game will come under pressure.
11 |
|
||||||||||

|
|
Finding the fairway off this tee is essential. Bunkers on the right and for the long hitters on the left. The green is surrounded by bunkers and requires a shot to remember if it’s a back pin placement. The green slopes from back to front and is tricky to putt on.
12 |
|
||||||||||
|
|
Longer hitters should be looking to carry the native area on the left off the tee but the percentage play would be towards the right hand bunker. Best policy is to lay up to a tight landing area leaving a short iron to a green that has a very narrow entrance. Rely on the short game to record a birdie.
13 |
|
||||||||||
|
|
The second Pearl Valley Signature hole. Get your yardage correct at this most scenic of par 3’s. Water cuts in on the right and a greenside bunker awaits the cautious tee shot. This hole will test your ball striking and your nerve. There’s a drop zone for those who have the misfortune to hit the water. Remember to look up at the mountains behind the green, there’s no better view.
14 |
|
||||||||||
|
|
The large blue-gum tree in the middle of the fairway sets up the tee shot beautifully. The best position is left of the tree as this leaves an easier second with the huge fairway bunker on the right. The safe route off the tee is into the receptive right side. Hit the tee shot down the right and you have to carry the bunker with your second shot. Either will leave a short pitch to the green but beware there is a pot bunker left of the green.
15 |
|
||||||||||

|
|
The ultimate risk vs reward tee shot. Have a go at the green on this short par 4 and make anything from birdie to double bogey. It is recommended that this hole be approached cautiously, from which birdies will emanate. A rescue club tee shot leaves a short iron to the green, which has a very narrow opening. Bunkers left, right and back need a pinpoint shot if it is to stay on the green.
16 |
|
||||||||||

|
|
You have two options off the tee. A three wood down the left half of the fairway or a driver down the right over the bunkers. 160 remaining if you go left with only 100 after clearing the right bunkers. The shallow green is protected by a pot bunker right in front and also bunkers on both sides.
17 |
|
||||||||||


|
|
One of the easiest looking, toughest playing par 3’s you are likely to play. The tee shot requires a wood from most players but the inverted green makes it difficult to stay on the green and even if you do you could be left with a tricky 2 putt. Take 3 and run.
18 |
|
||||||||||

|
|
This long par 4 requires a well-struck drive to a fairway surrounded on both sides by bunkers. If you are long you can take on the bunkers up the right but don’t miss hit the tee shot, as the carry is long. A mid to long iron second shot is needed to reach the green which is flanked by water on the immediate left and a deep, imposing bunker on the right.