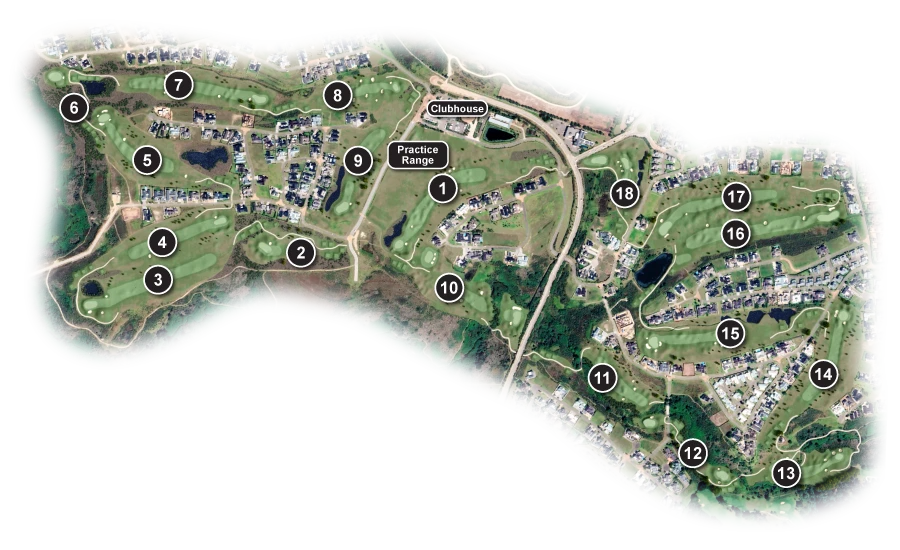
1 |
|
|||||||||
|
|
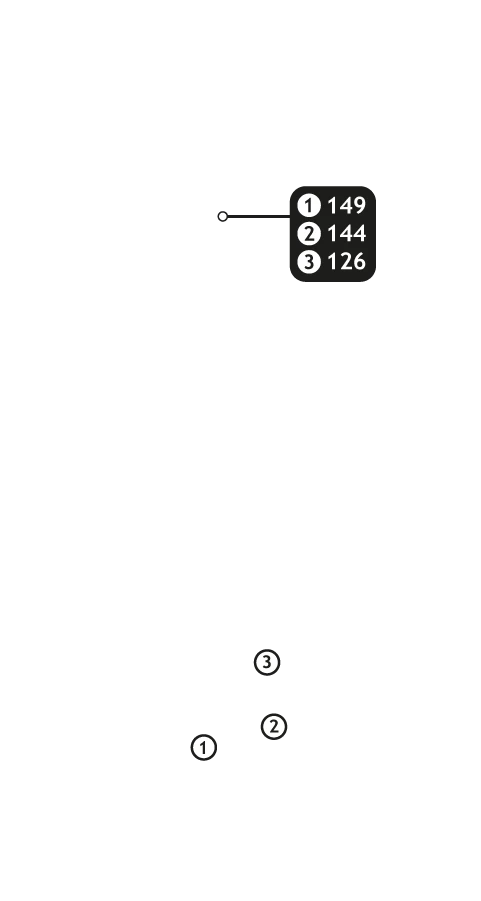
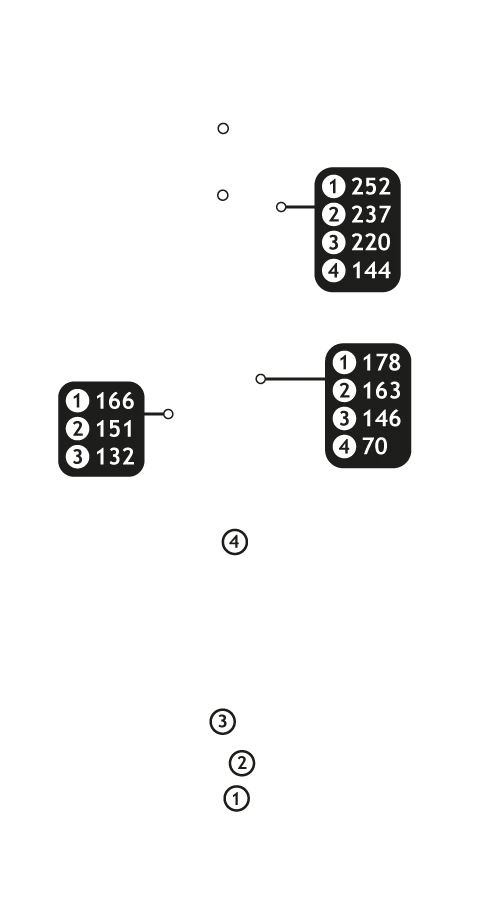
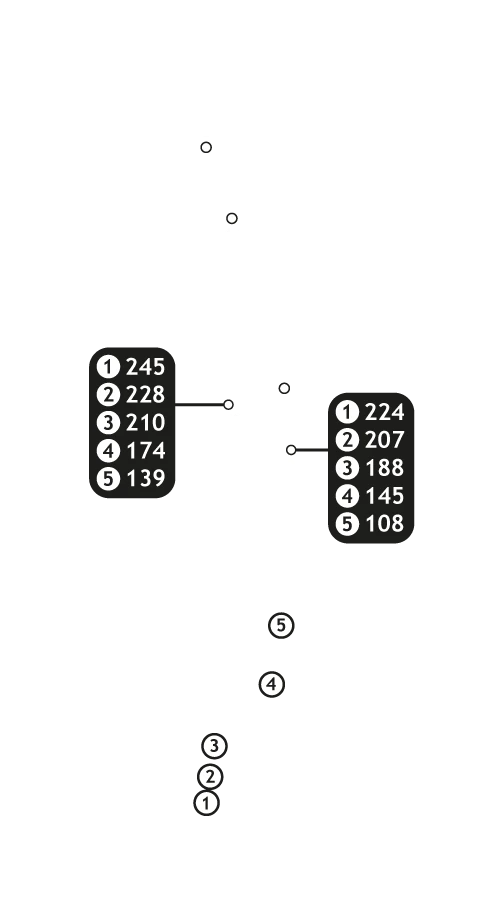
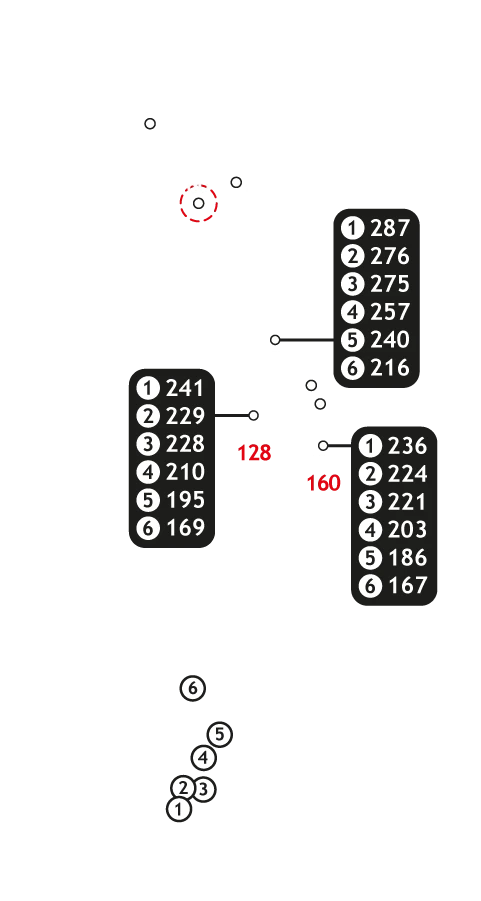
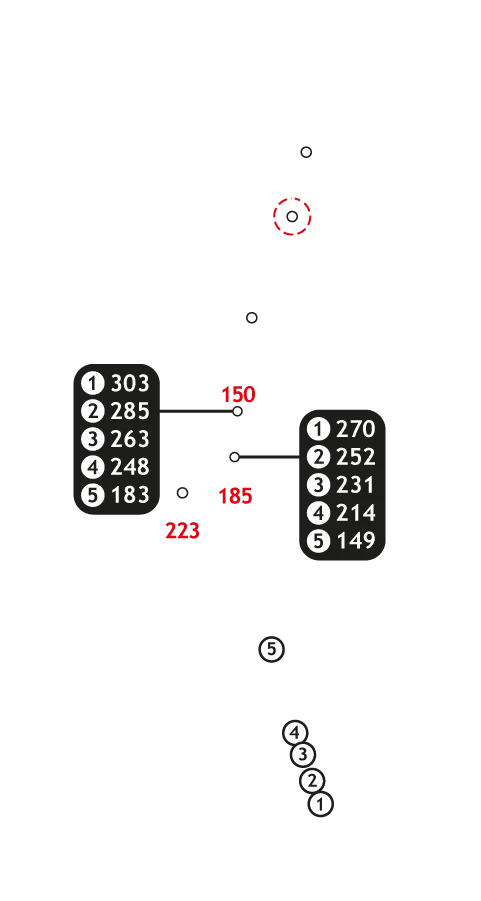
Buttons toggle between distance guide and media. See hole layout for result. If available, click icons to view media.
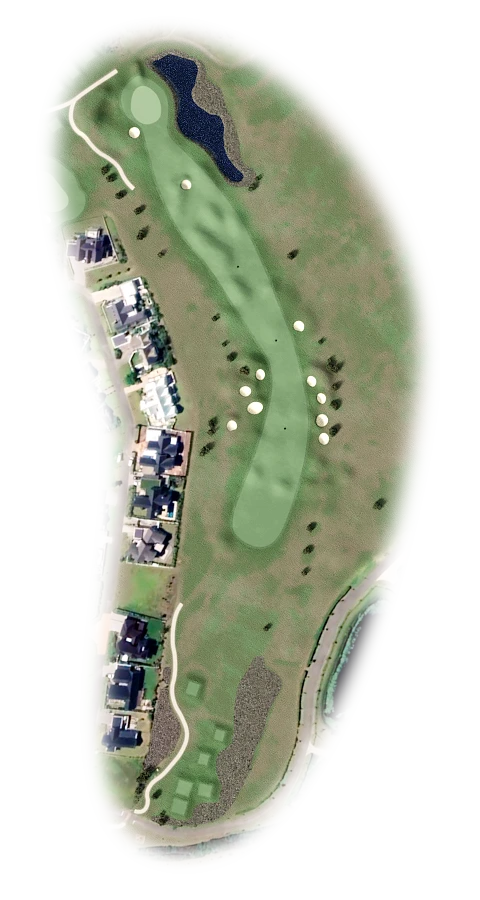
Avoiding the treacherous bunkers off the tee would be the first order of business. Once that is achieved, your approach will have you either lay up, or taking on the green for two. If you decide to lay up be very wary of the bunker in the middle of the fairway waiting approximately 50m short of the green. If you decide to go for the elevated green in two be mindful of the penalty area on the right, the shaved edges provide little resistance for missed shots to the right. Once you have made it onto the green, don’t underestimate the speed.

2 |
|
|||||||||
|
|
Buttons toggle between distance guide and media. See hole layout for result. If available, click icons to view media.
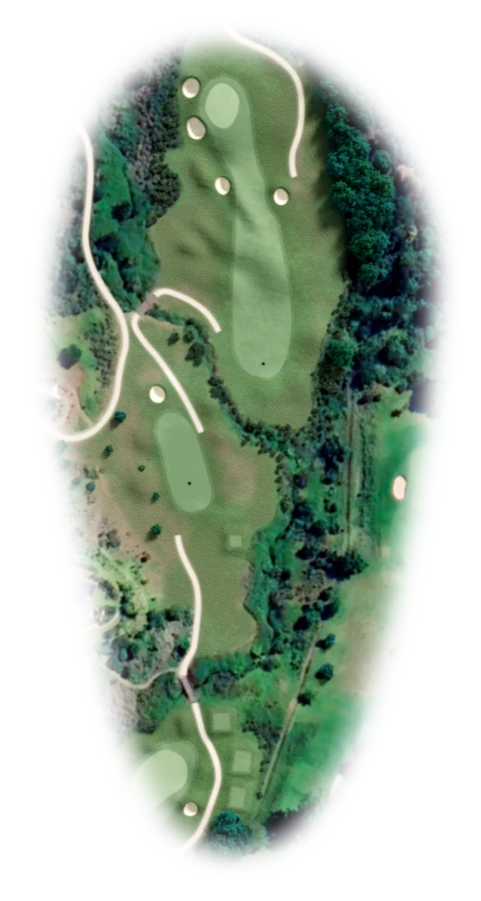
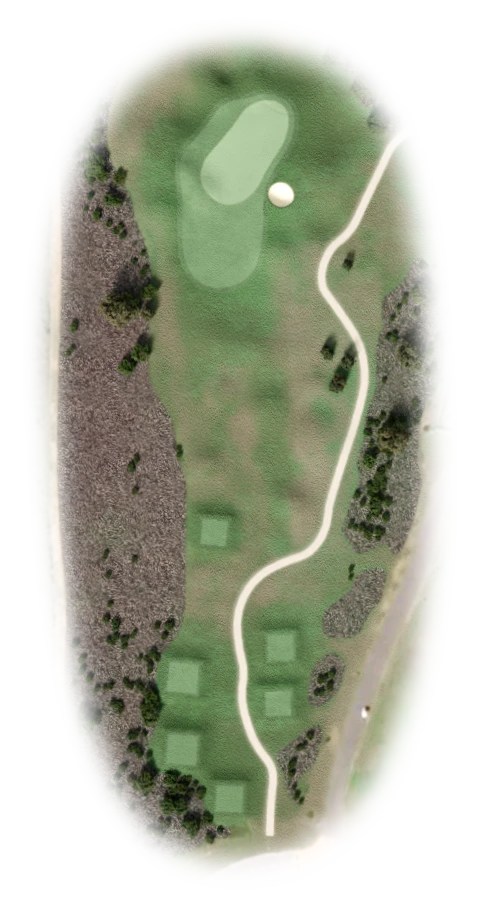
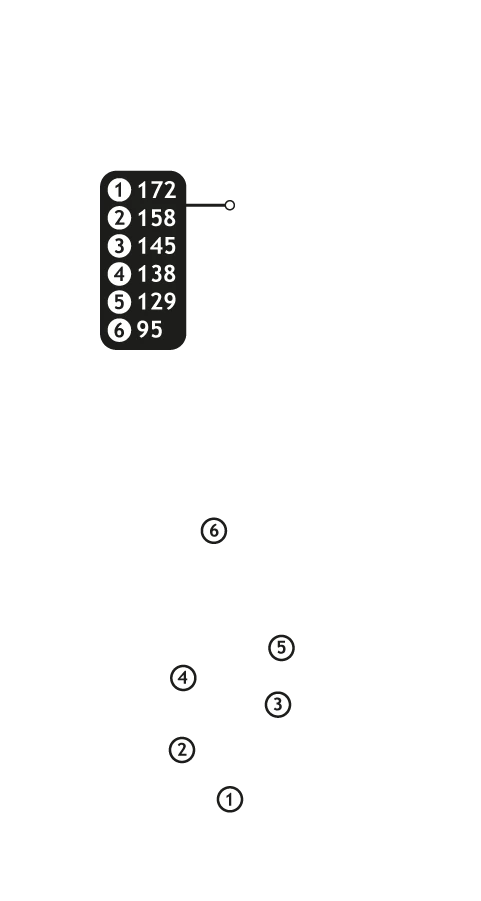
This par 3 looks pleasing to the eye with only one bunker right of the green, but the green itself is where the challenge lies. Short of the pin is ideal.
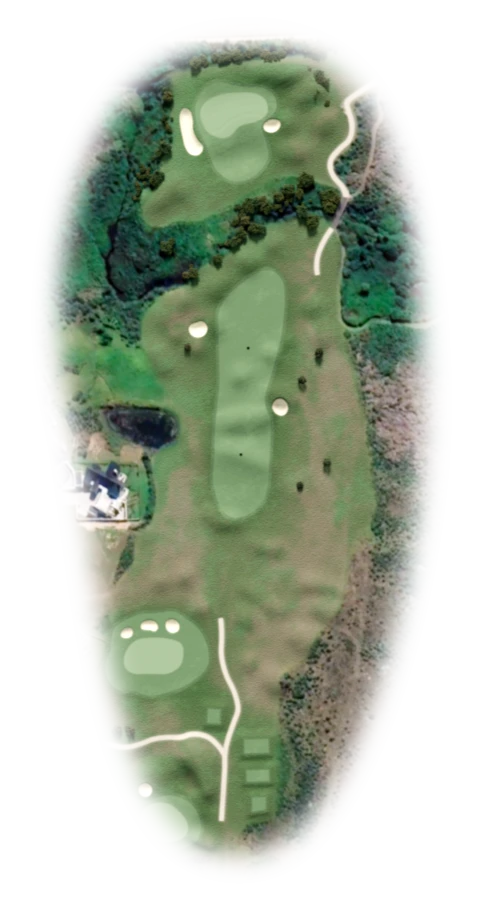
3 |
|
|||||||||
|
|
Buttons toggle between distance guide and media. See hole layout for result. If available, click icons to view media.
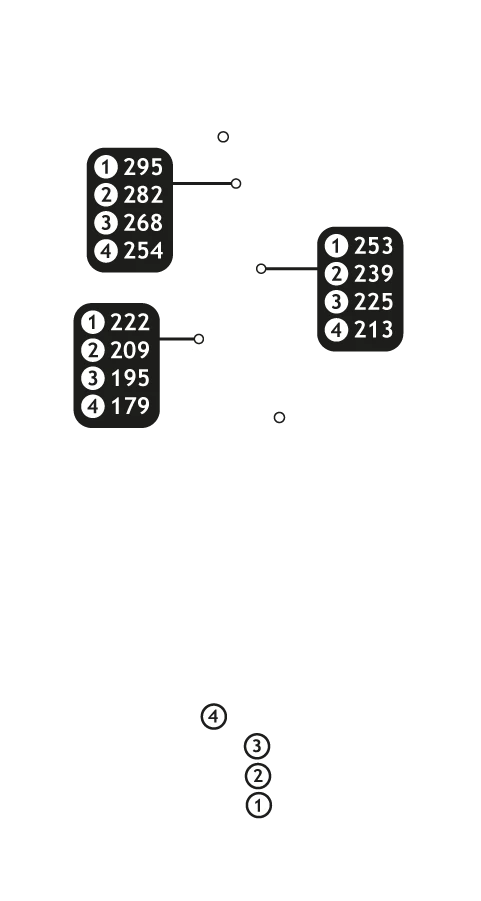
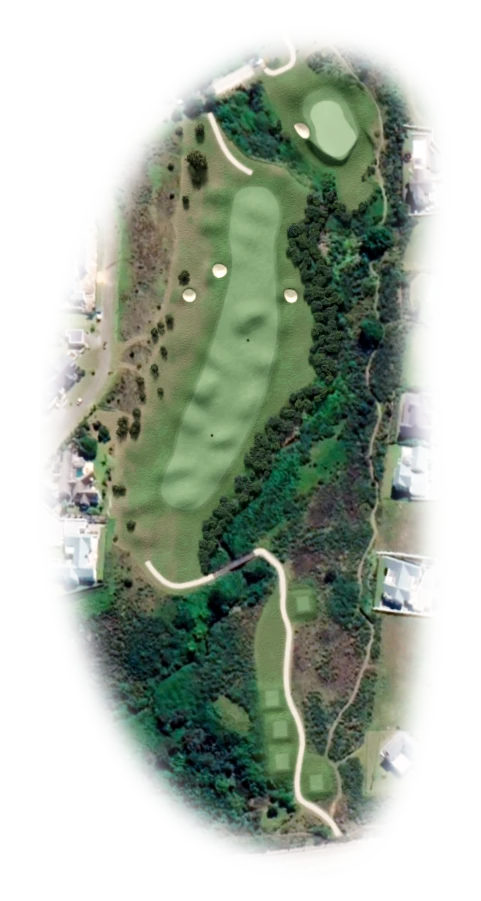
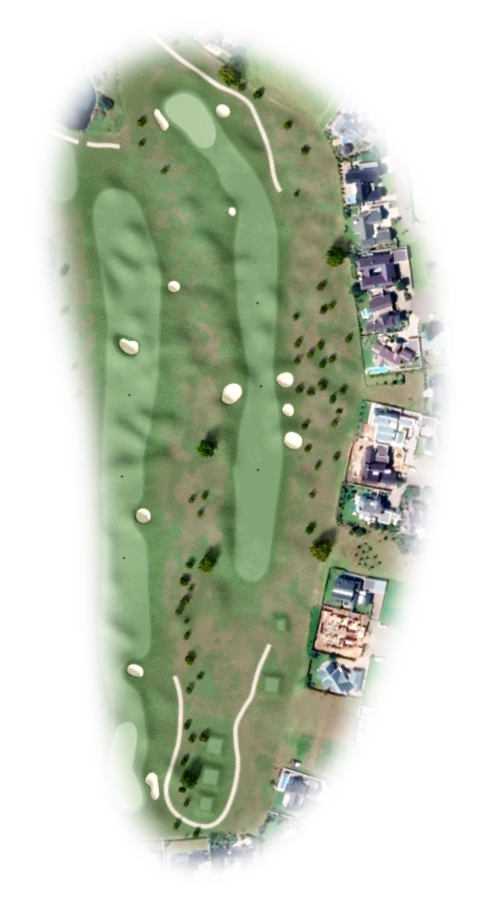
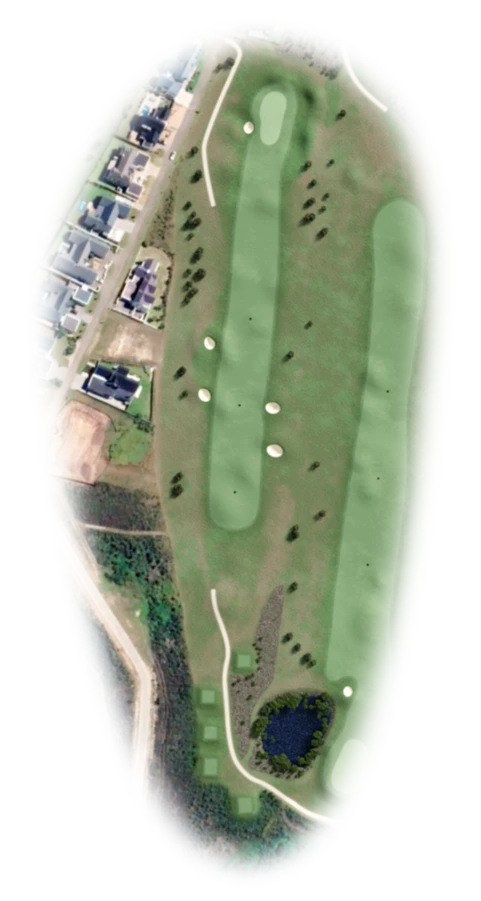
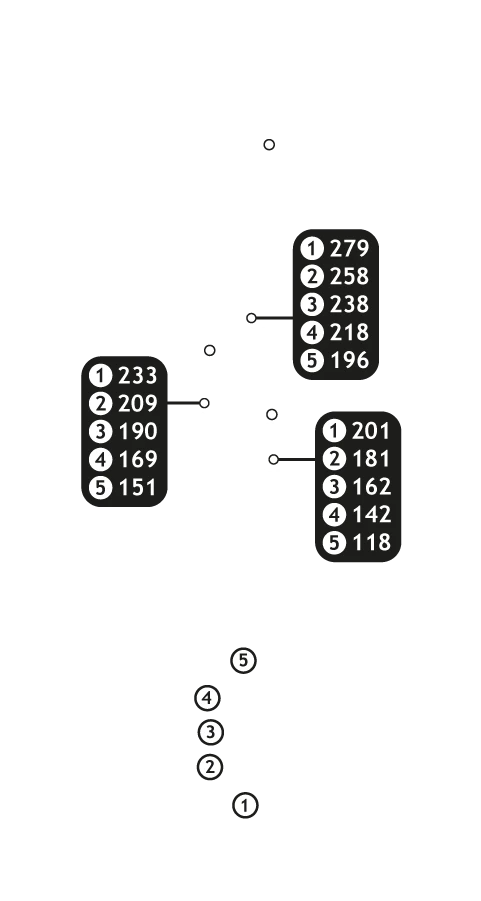
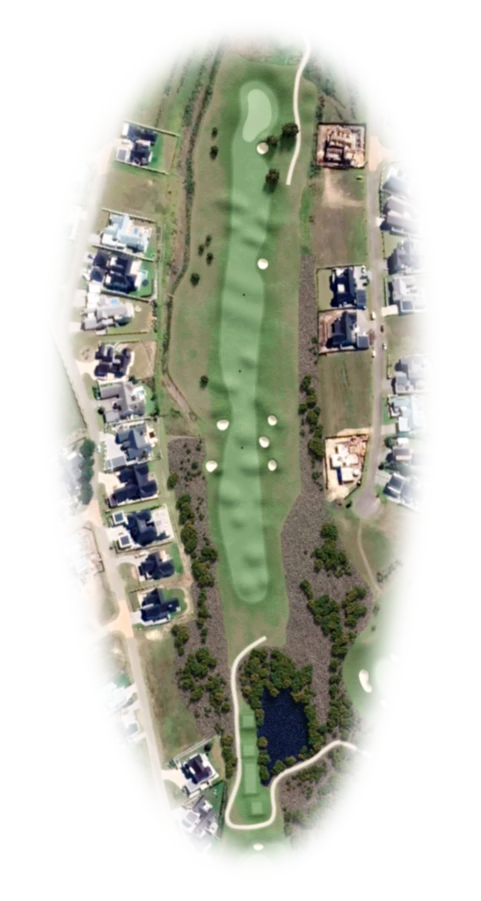
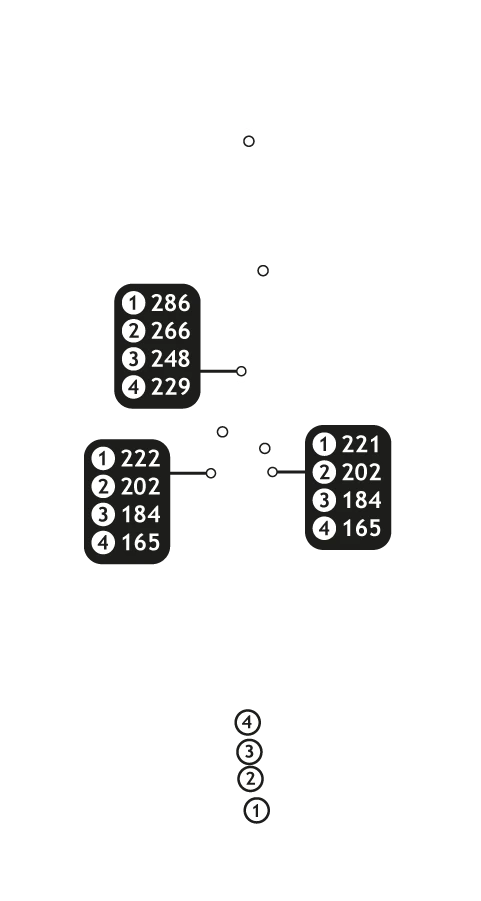
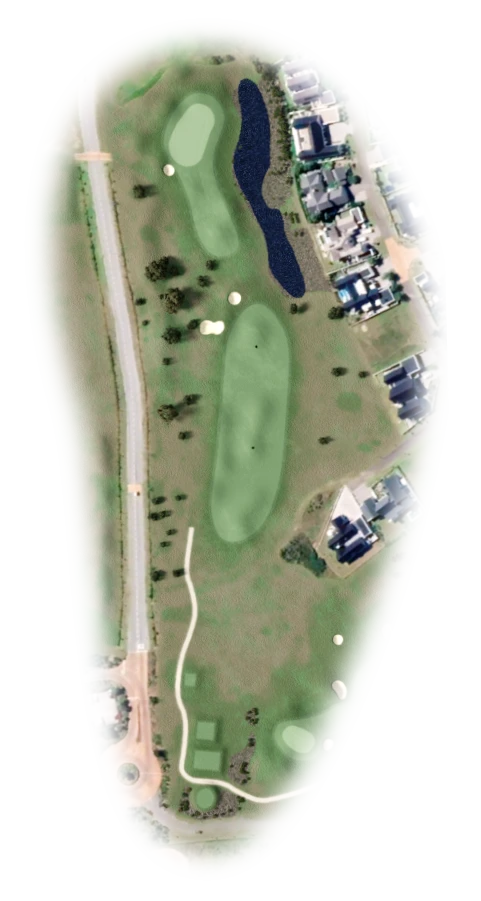
A straight away par 5 that says “open the shoulders” off the tee. With all the space right, one would not like to miss it left OB! If you decide to lay up there is a bunker 50M short on the right hand side of the fairway you need to avoid. If you are taking on the green in two then accuracy is key as left and long is OB and right is a watery Penalty area. Once on the green there are a few pin positions that will have you concentrate on your speed and question your ability to read greens.
4 |
|
|||||||||
|
|
Buttons toggle between distance guide and media. See hole layout for result. If available, click icons to view media.
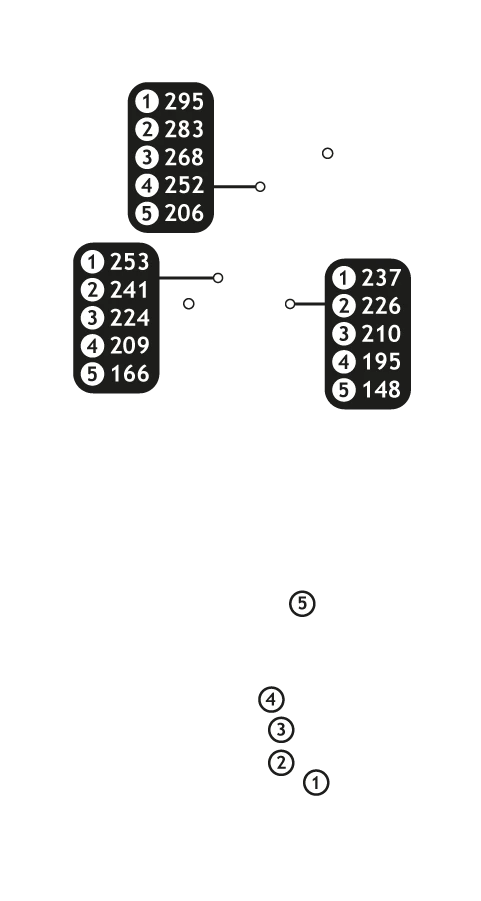
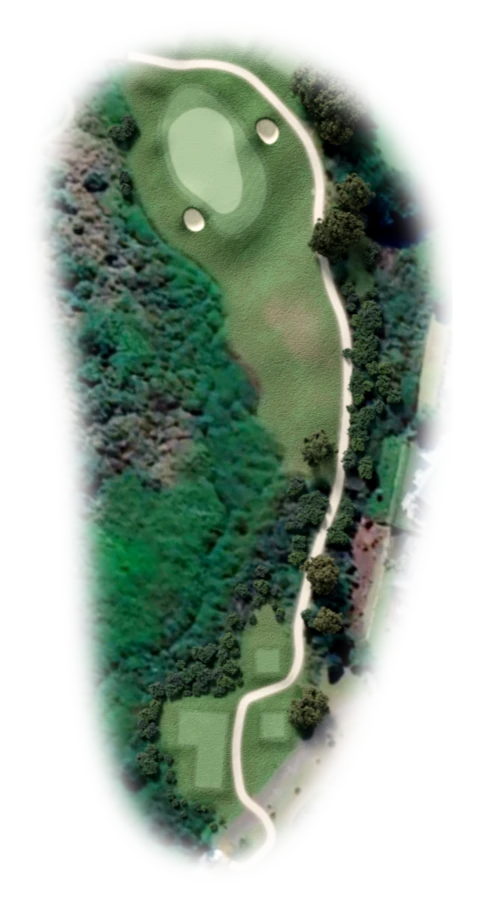
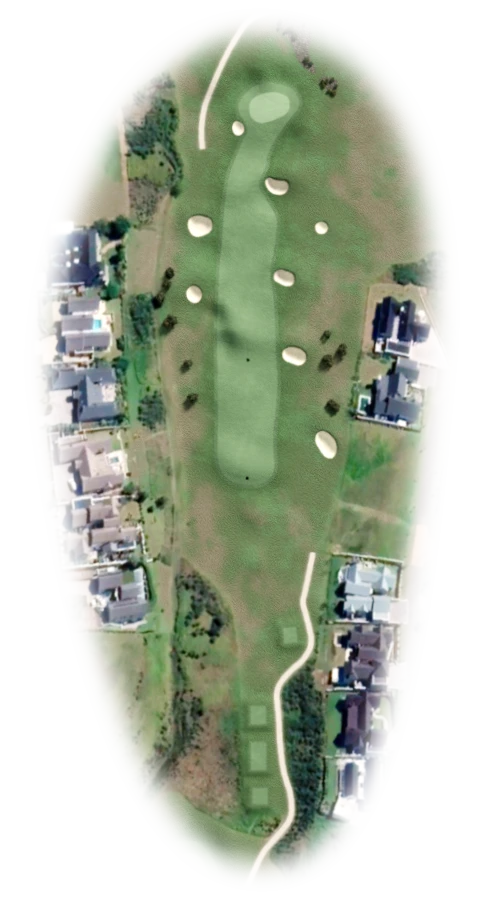
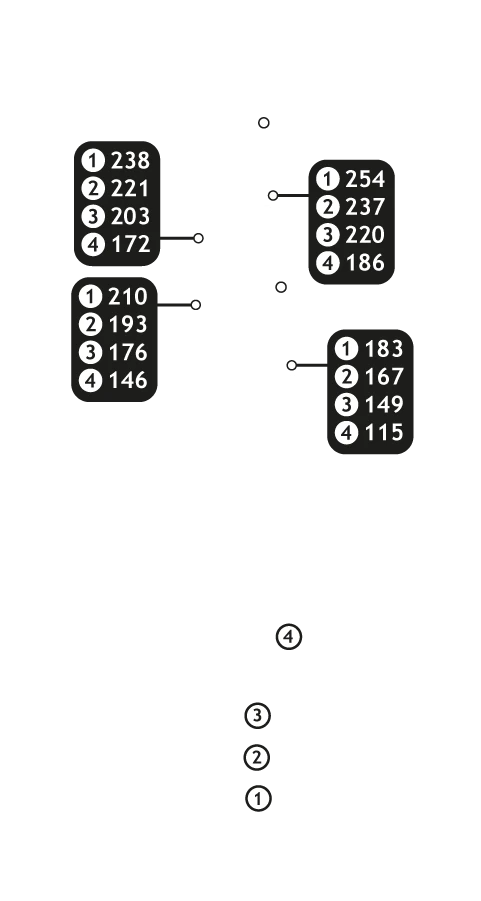
This up the hill par 4 is a tough one. With bunkers on each side of the fairway your drive needs to be either long or accurate. Approach shots need to avoid the pot bunker left of the green. Putting will have you pay close attention to the slopes on the green.
5 |
|
|||||||||
|
|
Buttons toggle between distance guide and media. See hole layout for result. If available, click icons to view media.
Driver off the tee could get you really close to the green. But beware of the OB on the left and right of this hole. The percentage play is fairway wood down the left half of the fairway as the hole slopes to the right feeding the ball into some pot bunkers.
6 |
|
|||||||||
|
|
Buttons toggle between distance guide and media. See hole layout for result. If available, click icons to view media.
Club selection on this par 3 is always tricky. The tee shot is downhill and the wind tends to swirl making your decision considerably tougher.
7 |
|
|||||||||
|
|
Buttons toggle between distance guide and media. See hole layout for result. If available, click icons to view media.
A straight up the hill par 5 that has pot bunkers in your landing zones on both left and right sides of the fairway. Miss those then you have a green light to go for the green in two. Once on the two-tier green you will need some serious pace control to manage a 2 putt.
8 |
|
|||||||||
|
|
Buttons toggle between distance guide and media. See hole layout for result. If available, click icons to view media.
This potentially drivable par 4 is riddled with bunkers waiting for an errant tee shot. The approach shot is to a raised narrow green that is usually pretty firm. It puts president on finding the fairway to maximise spin control.
9 |
|
|||||||||

|
|
Buttons toggle between distance guide and media. See hole layout for result. If available, click icons to view media.
Using a fairway metal to lay up short of fairway bunkers sets up an ideal approach to this two-tiered green. Landing your approach on the correct level will make your putt a lot less complicated.
10 |
|
|||||||||
|
|
Buttons toggle between distance guide and media. See hole layout for result. If available, click icons to view media.
The signature hole here at Kingswood is a risk and reward hole for the long hitters. If the conditions are favourable the long hitters can have a dip at the green. For the average golfer a hybrid or metal fairway off the tee would be the play. Making sure to avoid the fairway bunkers on each side, you will be left with an uphill approach off a downhill lie. If that is not challenging enough, the green always plays a little firm so there is a lot of emphasis placed on your ball striking. The 10th green has a couple of subtle breaks and is also pretty quick from front to back making this hole exciting from start to finish.
11 |
|
|||||||||
|
|
Buttons toggle between distance guide and media. See hole layout for result. If available, click icons to view media.
This tricky par 4 has one of the most demanding greens here at Kingswood. To get there though you have to navigate a penalty area short and to the right of the fairway while also managing to miss the fairway bunkers.
12 |
|
|||||||||
|
|
Buttons toggle between distance guide and media. See hole layout for result. If available, click icons to view media.
This par 3 is a pretty but dangerous hole. Besides having to hit a mid to long iron, the wind tends to swirl a lot making club selection very tricky. You can bail out a bit to the right but short or left will leave you in a penalty area.
13 |
|
|||||||||
|
|
Buttons toggle between distance guide and media. See hole layout for result. If available, click icons to view media.
This par 4 is risk and reward for the longer hitters with about a 290 meter carry onto the green but left is a penalty area and right is OB. For the average golfer you will have a fine test trying to decide whether to go over the creek or lay up with a short to mid iron.
14 |
|
|||||||||


|
|
Buttons toggle between distance guide and media. See hole layout for result. If available, click icons to view media.
This tough driving hole has bunkers situated on the left and the right of the fairway. To make things even more interesting it is uphill as well with OB left. Once you have navigated the tee shot you will have an uphill approach to a raised green with bunkers short right and left of the green.
15 |
|
|||||||||
|
|
Buttons toggle between distance guide and media. See hole layout for result. If available, click icons to view media.
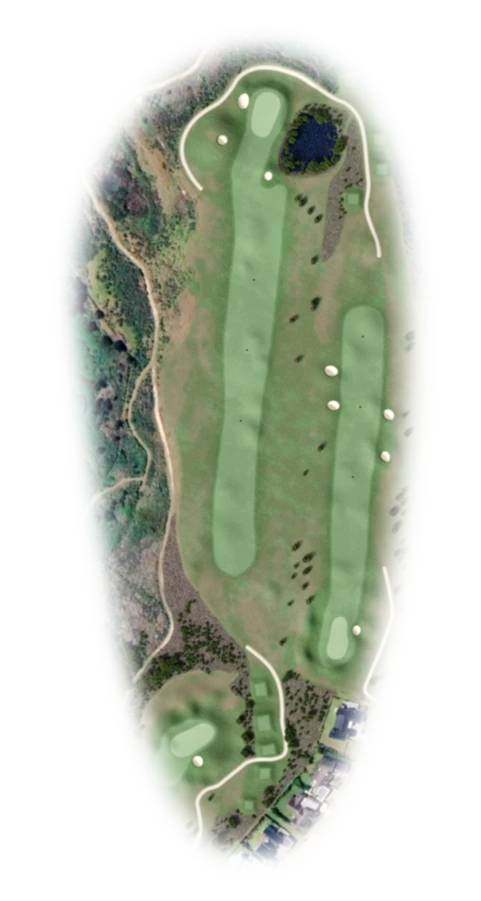
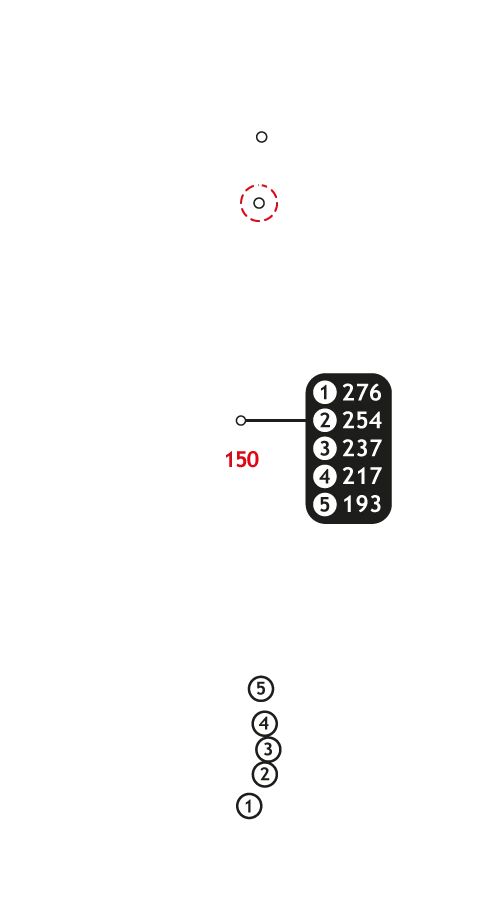
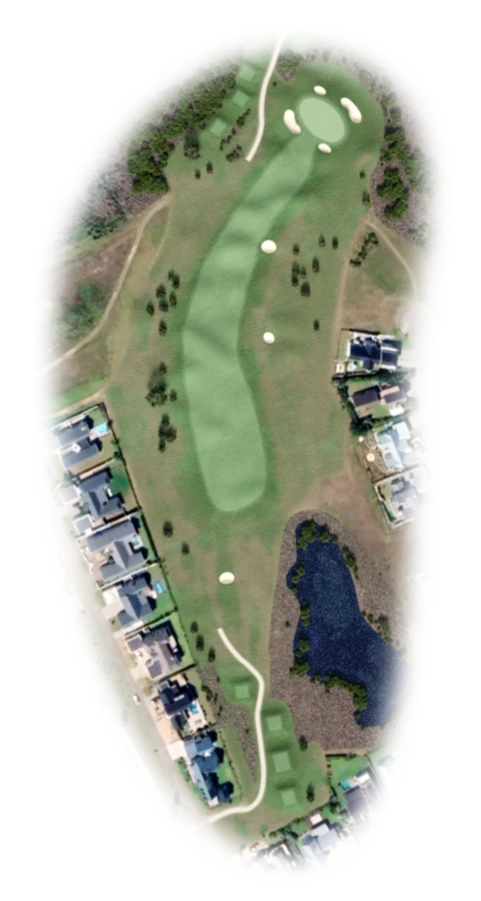
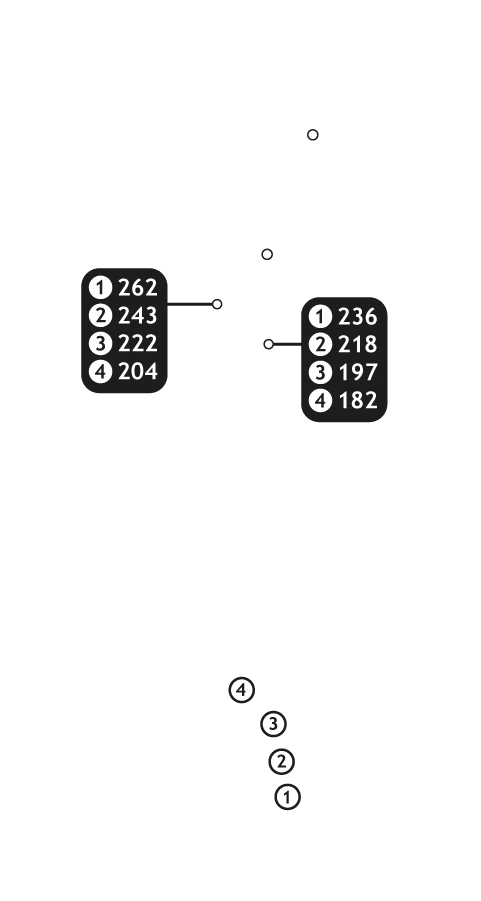
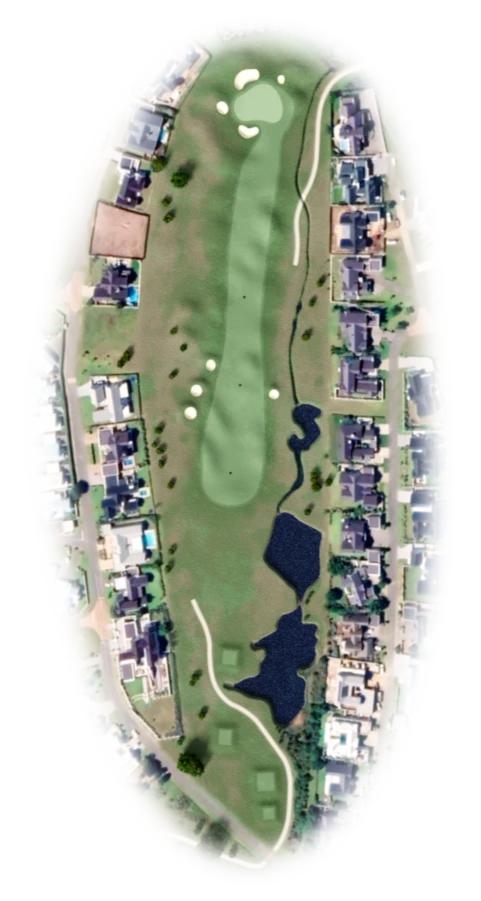
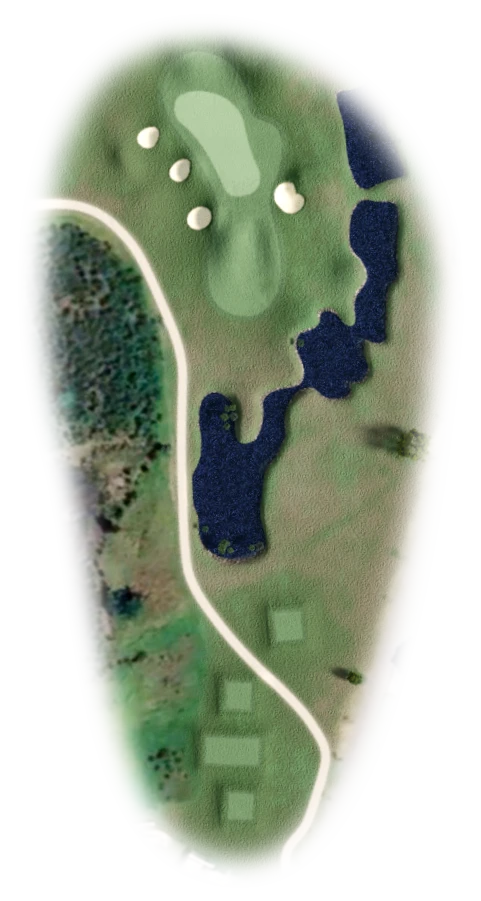
The stroke 1 is a daunting hole with deep bunkers on the left and right of the fairway. There is a water hazard short and to the right which feeds a small creek that runs along the right hand side of the fairway all the way to the green. That’s not all as there is OB left and right of this hole all the way down past the green. If you have negotiated the treacherous deep bunkers greenside and you have made it onto the green then judging the pace and reading a line on this green will take all of your skill.
16 |
|
|||||||||
|
|
Buttons toggle between distance guide and media. See hole layout for result. If available, click icons to view media.
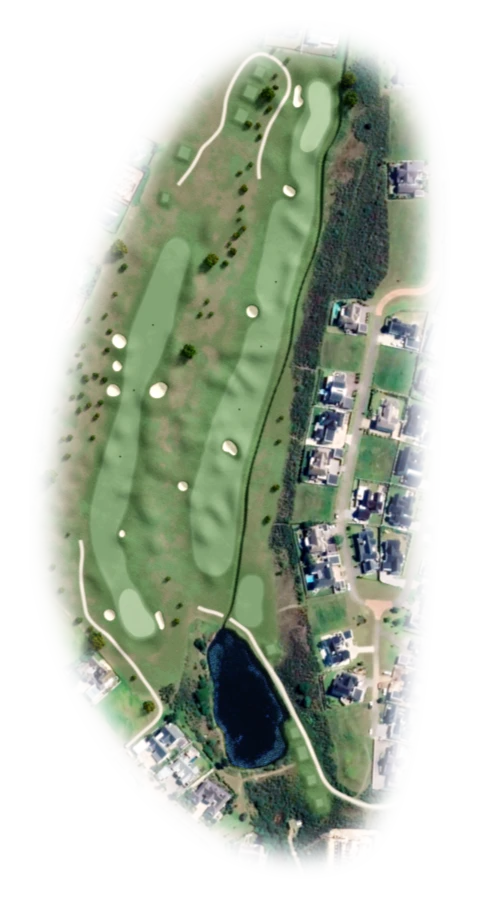
One of the longest par 5’s here at the coast has a bunker right in the middle of the fairway waiting for a perfect drive. There is a creek running down the right hand side of the entire hole that will catch any players trying to bite off too much with the tee shot. Some strategic bunkers are placed in your lay- up area that needs to be avoided before your approach to the longest green on Kingswood so be sure to trust the yardage.
17 |
|
|||||||||
|
|
Buttons toggle between distance guide and media. See hole layout for result. If available, click icons to view media.
This stroke 2 is an absolute beast into the wind that has a raised green and a fall off area to the left that will have you using your imagination to try and get up and down. Keeping out of the fairway bunkers is key to be able to attack the pin for 2.
18 |
|
|||||||||

|
|
Buttons toggle between distance guide and media. See hole layout for result. If available, click icons to view media.
The 18th is a really tough par 3 that penalizes errant tee shots by collecting them in some deep bunkers. Getting up and down from anywhere off this green is a work of art!