
1 |
|
|||||||||

|
|
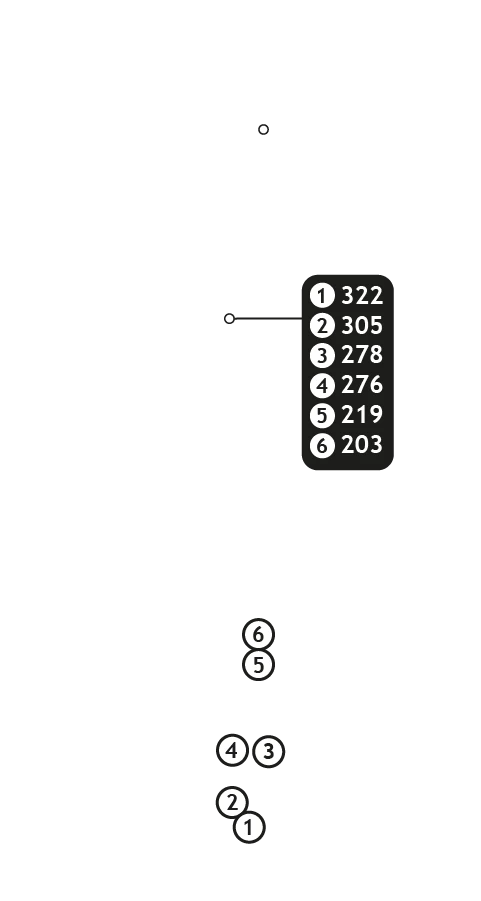
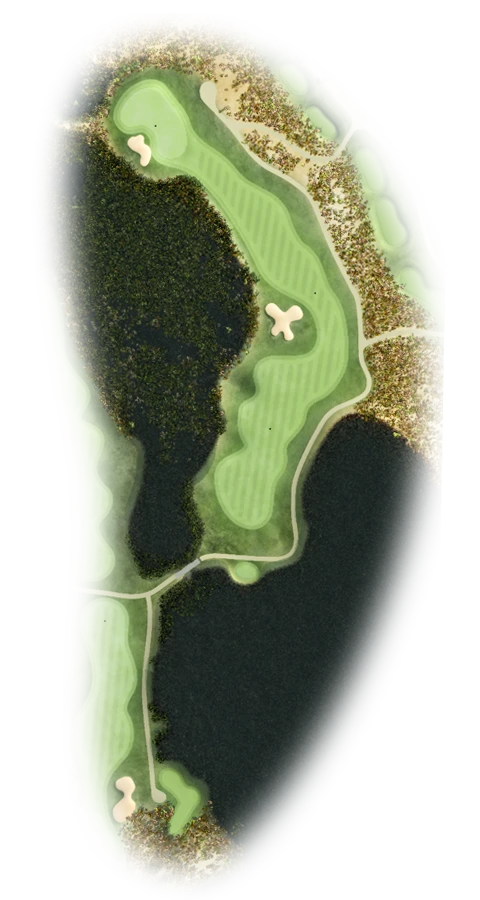
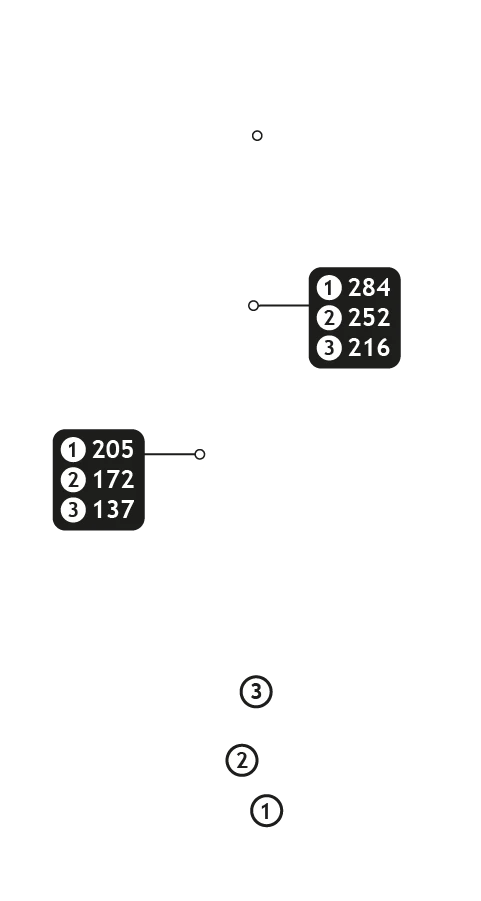
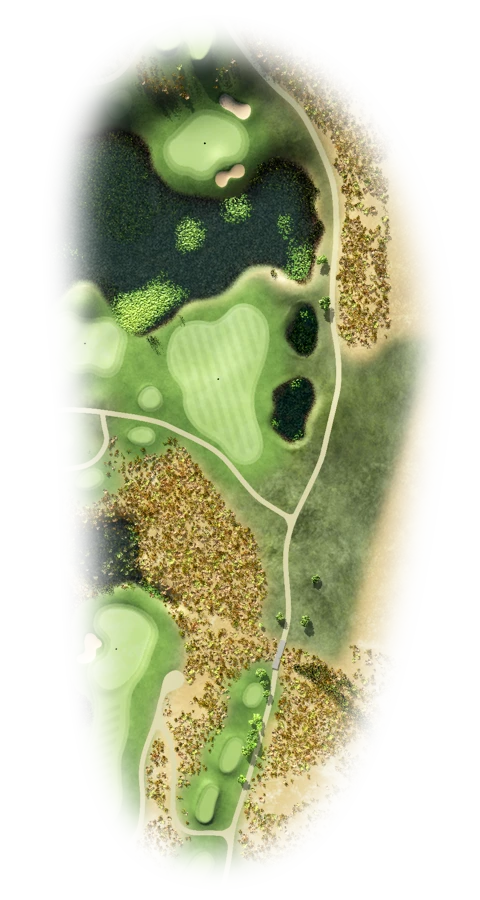
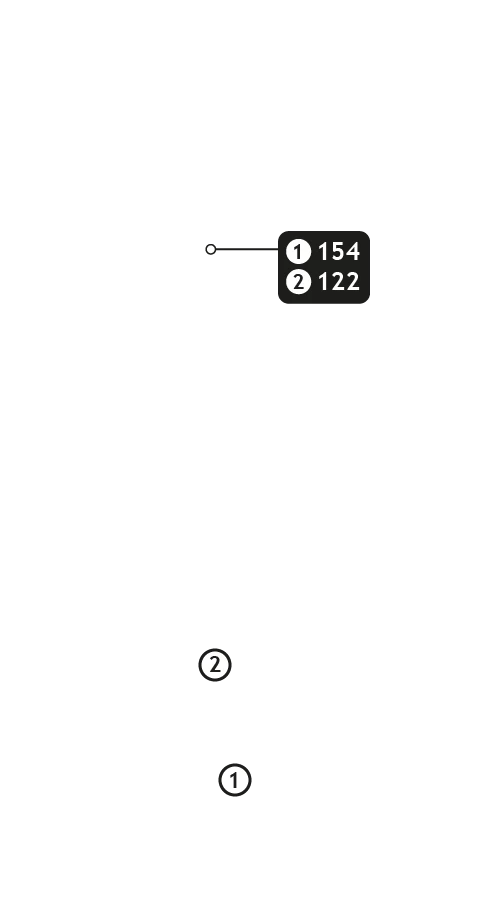
Buttons toggle between distance guide and media. See hole layout for result. If available, click icons to view media.
Pro Tip
A tricky opening hole with the fairway sloping right to left. A fade into this fairway will help the ball hold up. A fairway wood or rescue wood might be the safest option off the tee, as out of bounds lurks to the right and water left.


2 |
|
|||||||||


|
|
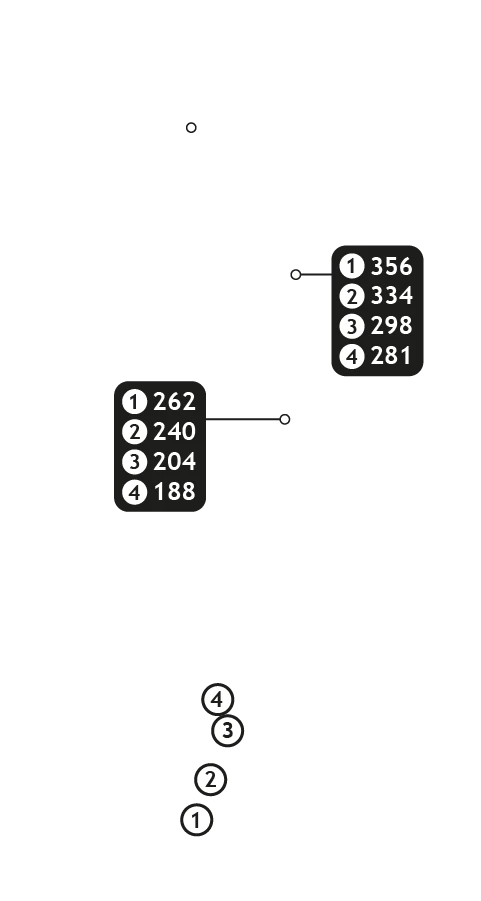
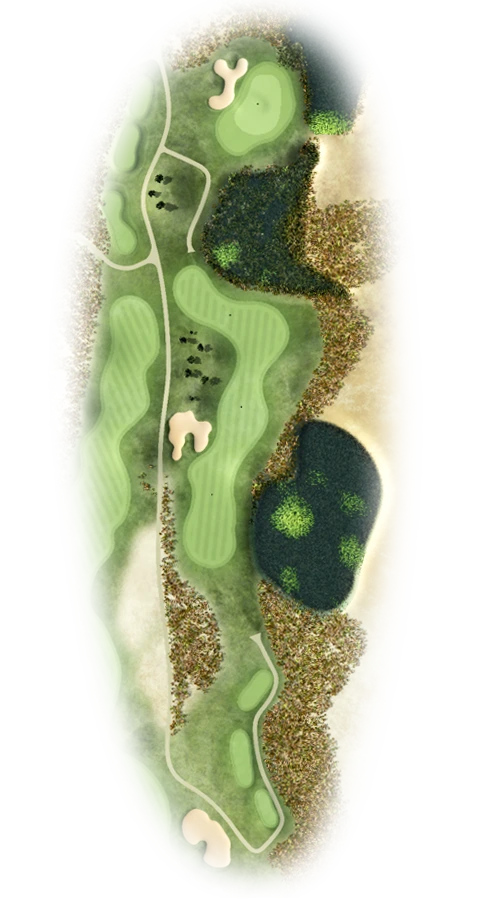
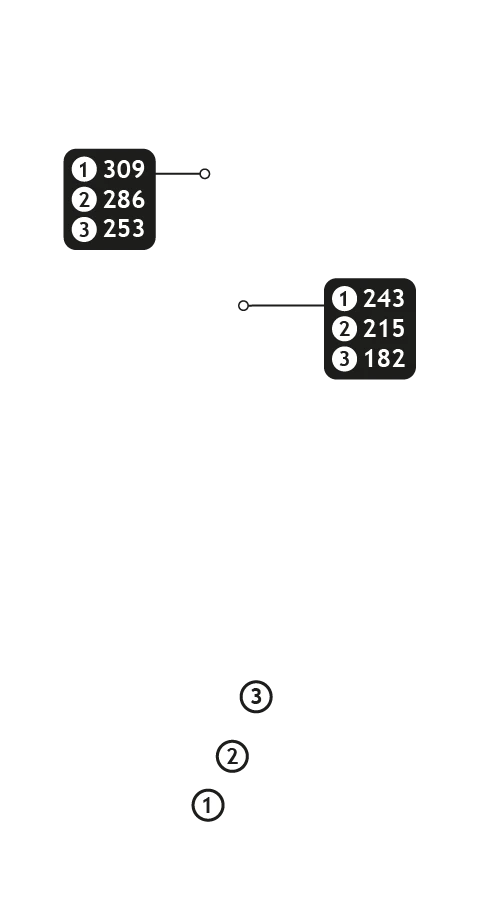
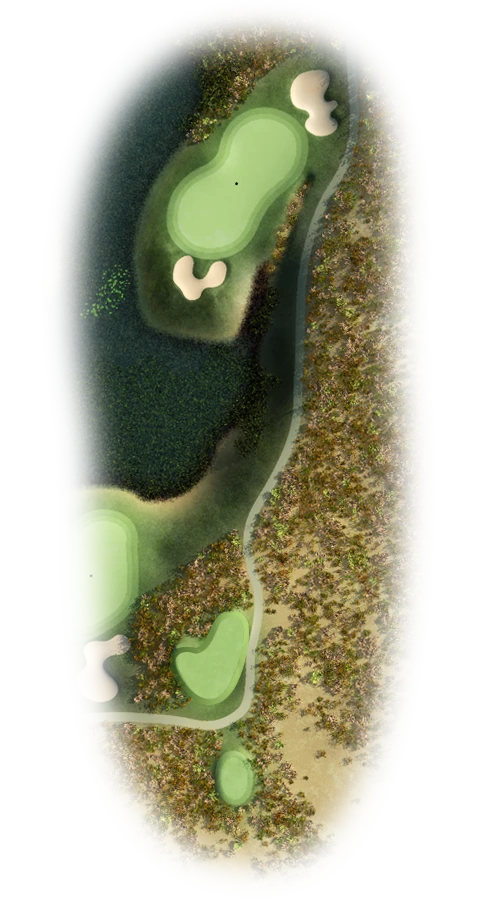
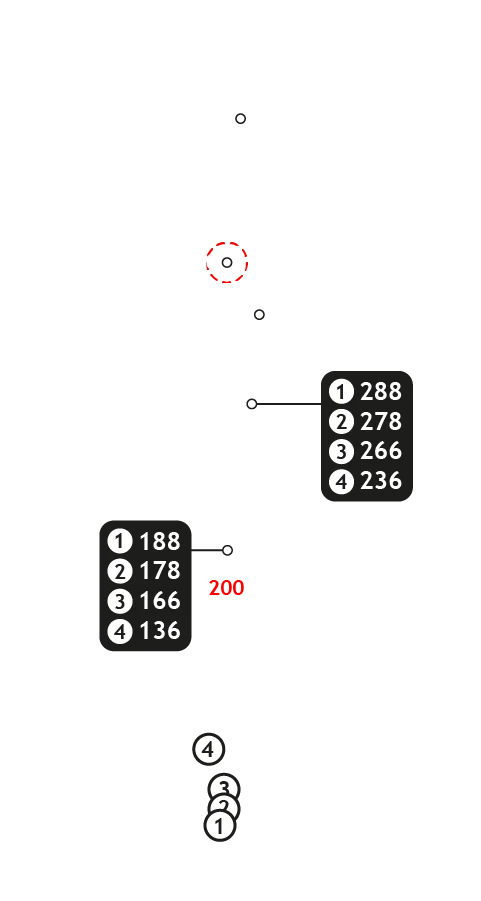
Buttons toggle between distance guide and media. See hole layout for result. If available, click icons to view media.
Pro Tip
A straight forward par 5, but accuracy off the tee is at a premium. After a good tee shot, the green could be in range, which allows for a good birdie opportunity.


3 |
|
|||||||||


|
|
Buttons toggle between distance guide and media. See hole layout for result. If available, click icons to view media.
Pro Tip
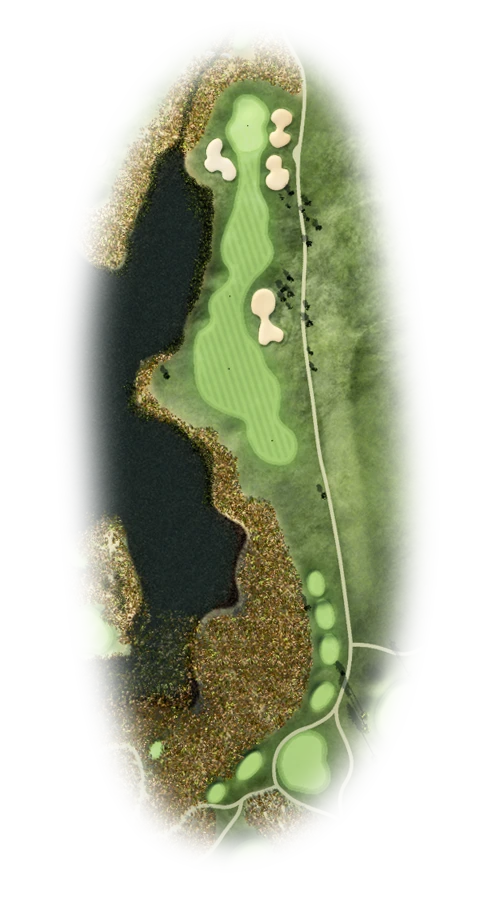
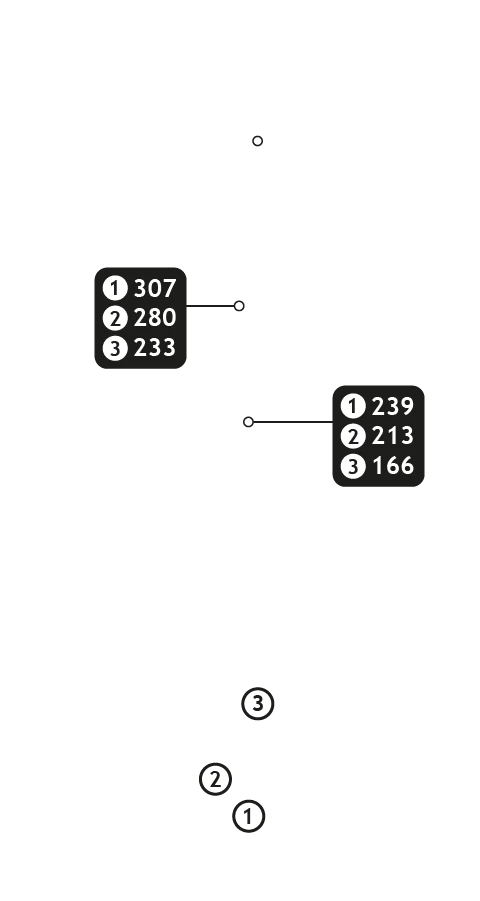
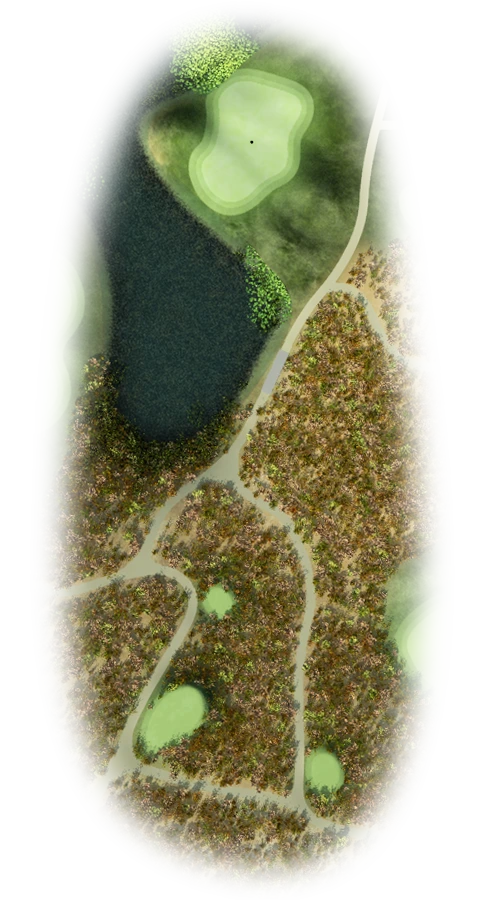
Club selection off the tee is crucial, as the fairway slopes into a dam. Once again a fairway wood or rescue wood might be the best option off the tee, which should leave you a mid iron carry over the water. The hole is protected by out-of-bounds left and water right.

4 |
|
|||||||||


|
|
Buttons toggle between distance guide and media. See hole layout for result. If available, click icons to view media.
Pro Tip
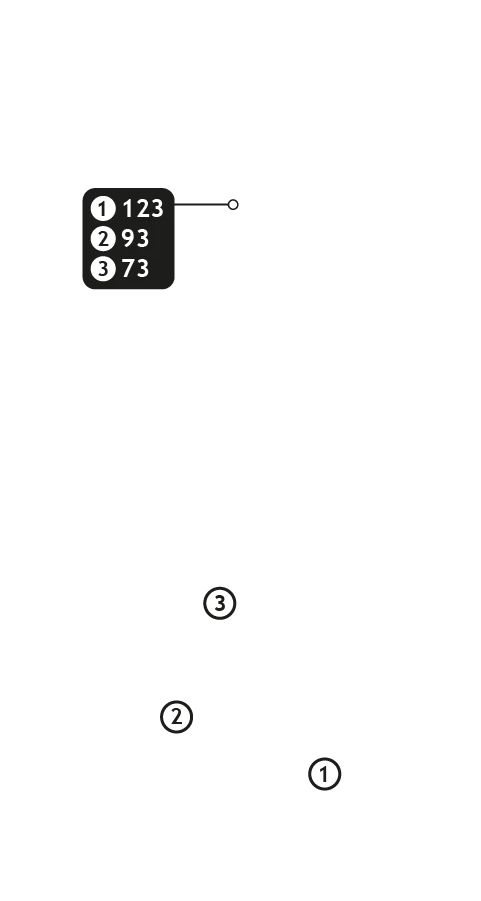
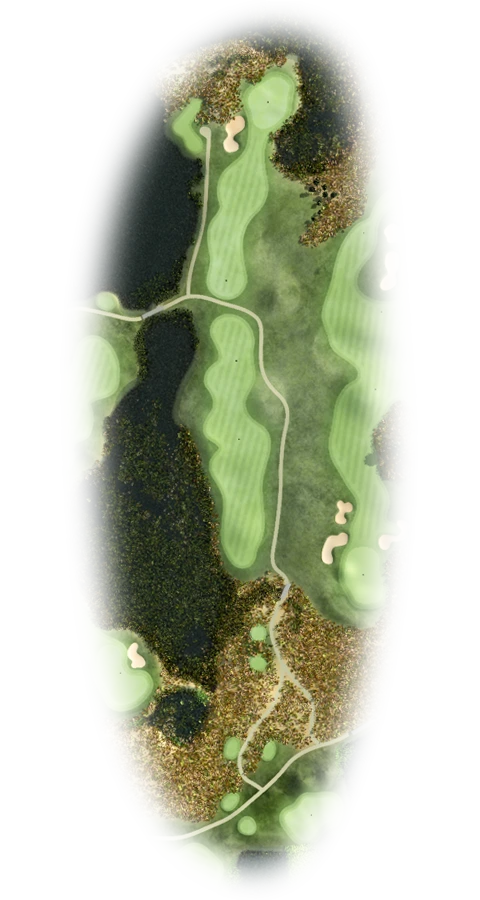
A short hole with a carry over water to a narrow green. Club selection is crucial, as short will land you in the water and long will leave you a downhill chip back towards the water.

5 |
|
|||||||||


|
|
Buttons toggle between distance guide and media. See hole layout for result. If available, click icons to view media.
Pro Tip
A drainage sloot runs through the middle of the fairway so check club selection off the tee. Mark sure your approach shots is left of the reeds protecting the green.

6 |
|
|||||||||

|
|
Buttons toggle between distance guide and media. See hole layout for result. If available, click icons to view media.
Pro Tip
A semi-blind tee shot over a hill. A 230m tee shot just left off the cart path will place you in a perfect position. Shorter hitters must keep left of the cart path.

7 |
|
|||||||||


|
|
Buttons toggle between distance guide and media. See hole layout for result. If available, click icons to view media.
Pro Tip
Hole 7 is also restricted by the topography of the land. The longer hitter will aim over the left hand bunker, while the shorter hitter should aim at the directional marker. Out-of bounds runs down the left of the hole.

8 |
|
|||||||||


|
|
Buttons toggle between distance guide and media. See hole layout for result. If available, click icons to view media.
Pro Tip
A simple par 3 with water protecting the right of the green and a bunker protecting the left.

9 |
|
|||||||||


|
|
Buttons toggle between distance guide and media. See hole layout for result. If available, click icons to view media.
Pro Tip
A very narrow driving hole with out-of-bounds right and left. A long iron or rescue wood may be required off the tee to gain position.

10 |
|
|||||||||
|
|
Buttons toggle between distance guide and media. See hole layout for result. If available, click icons to view media.
Pro Tip
Your choice, left or right. The right hand fairway might allow for a better view of the green.

11 |
|
|||||||||
|
|
Buttons toggle between distance guide and media. See hole layout for result. If available, click icons to view media.
Pro Tip
A beautiful, downhill par 3 with club selection vital due to the elevation change and the swirling winds. Depending on the wind direction you can use anything from a pitching wedge to a 4 iron.

12 |
|
|||||||||
|
|
Buttons toggle between distance guide and media. See hole layout for result. If available, click icons to view media.
Pro Tip
After a successful tee shot, the golfer must negotiate a green protected by water front and right. This is a very demanding hole, shorter hitters should consider laying up short of the green.


13 |
|
|||||||||

|
|
Buttons toggle between distance guide and media. See hole layout for result. If available, click icons to view media.
Pro Tip
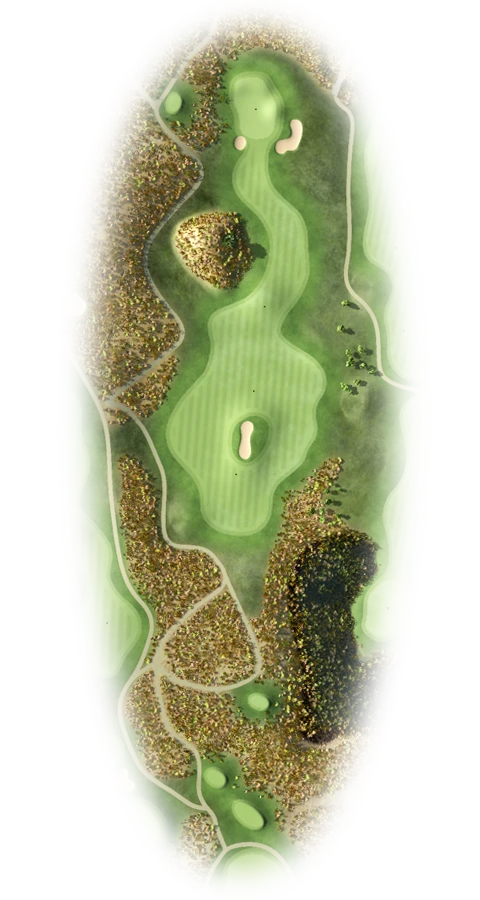
The ideal tee shot is just short of the fairway bunker. This will leave you with a short iron to the green. Water protects the left and right hand sides of the fairway. With your approach shot make sure you’re on the correct side of the green, as this green has a large camels-back in the middle of it.
14 |
|
|||||||||

|
|
Buttons toggle between distance guide and media. See hole layout for result. If available, click icons to view media.
Pro Tip
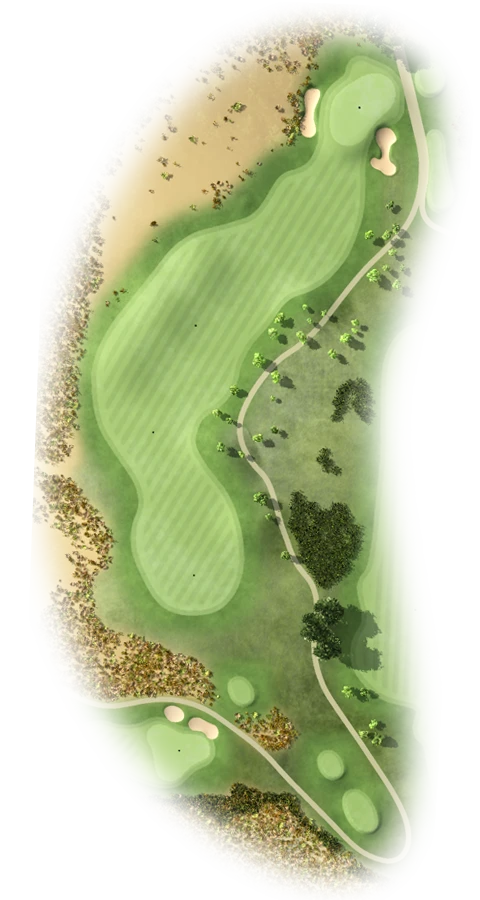
This is a fairly short par 5, which allows for a birdie opportunity. The fairway is protected on the left by trees and by long grass and water on the right.
15 |
|
|||||||||
|
|
Buttons toggle between distance guide and media. See hole layout for result. If available, click icons to view media.
Pro Tip
Once again make sure your club selection is correct off the tee as a dam protects the front and right of the green.

16 |
|
|||||||||
|
|
Buttons toggle between distance guide and media. See hole layout for result. If available, click icons to view media.
Pro Tip
A short but narrow par 4. A long iron or rescue wood may be your best option off the tee to avoid the water long and right. For the longer hitter, this might be an opportunity to have a go at reaching the green in one, but beware the dangers all around.

17 |
|
|||||||||
|
|
Buttons toggle between distance guide and media. See hole layout for result. If available, click icons to view media.
Pro Tip
Another downhill par 3 with a very long green. Make sure your club selection is correct and you should have a good birdie opportunity.

18 |
|
|||||||||
|
|
Buttons toggle between distance guide and media. See hole layout for result. If available, click icons to view media.
Pro Tip
A good closing hole, which requires an accurate tee shot just right of the bunker, which will allow you to attack a well guarded green. If you attack the green in two, beware the koppie on the right and deep ravine left.