1 |
|
||||||||
|
|
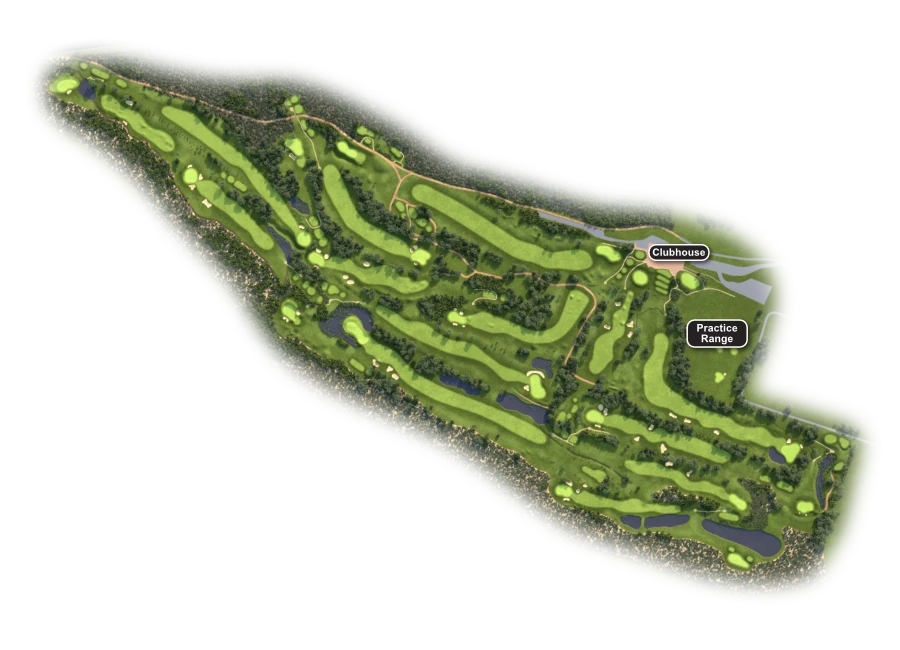
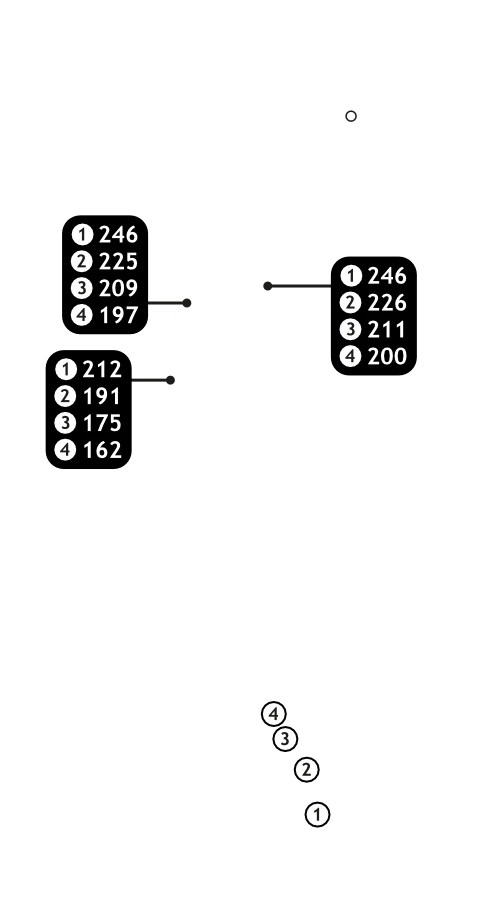
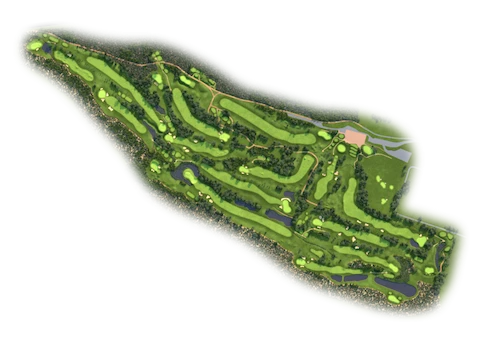
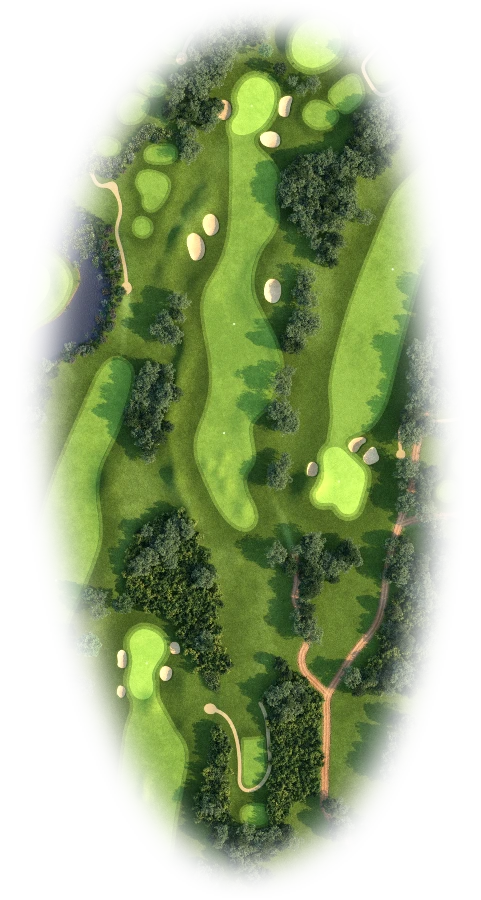
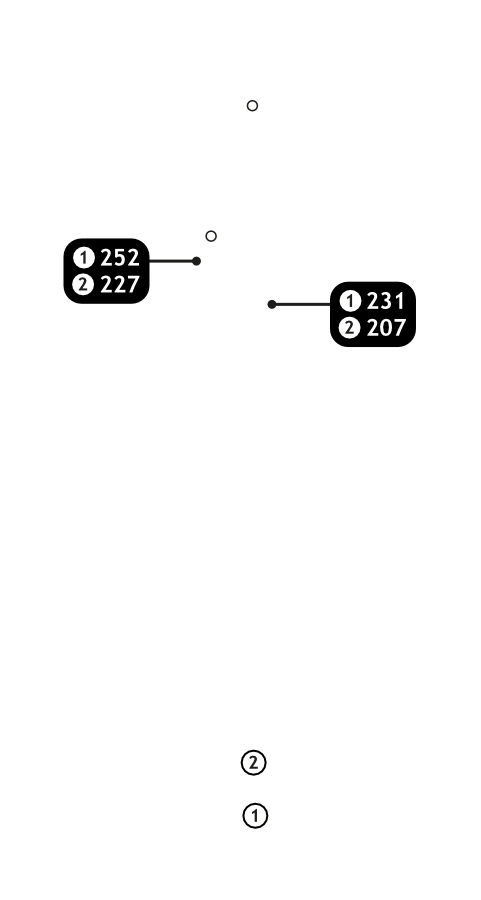
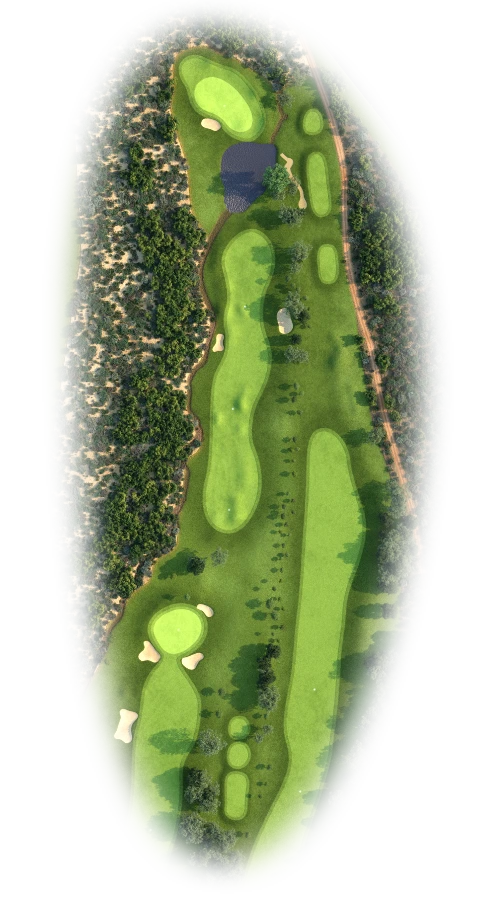
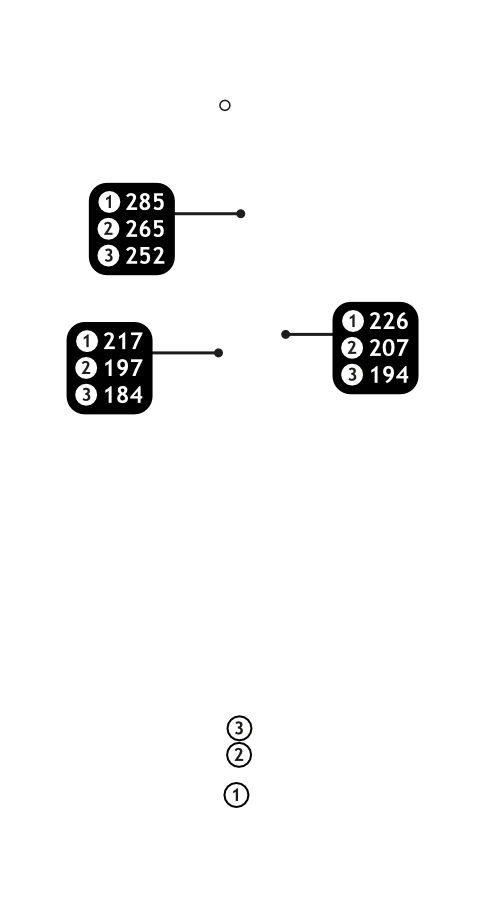
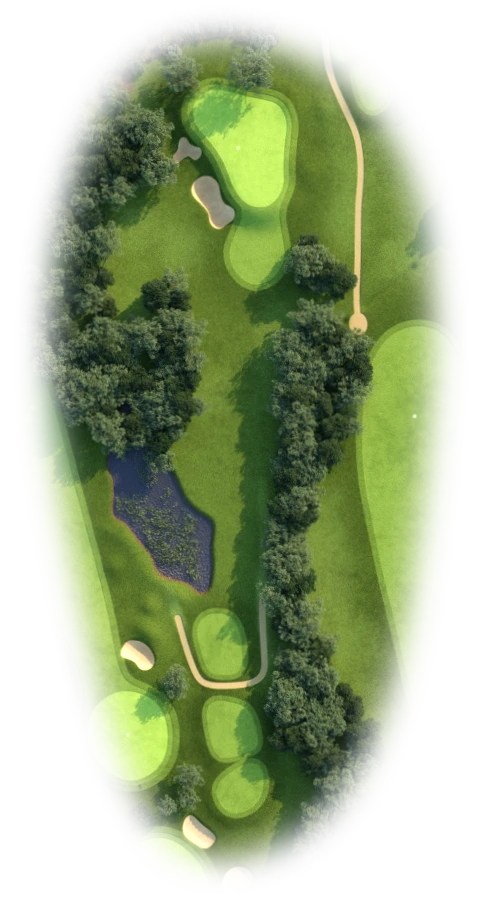
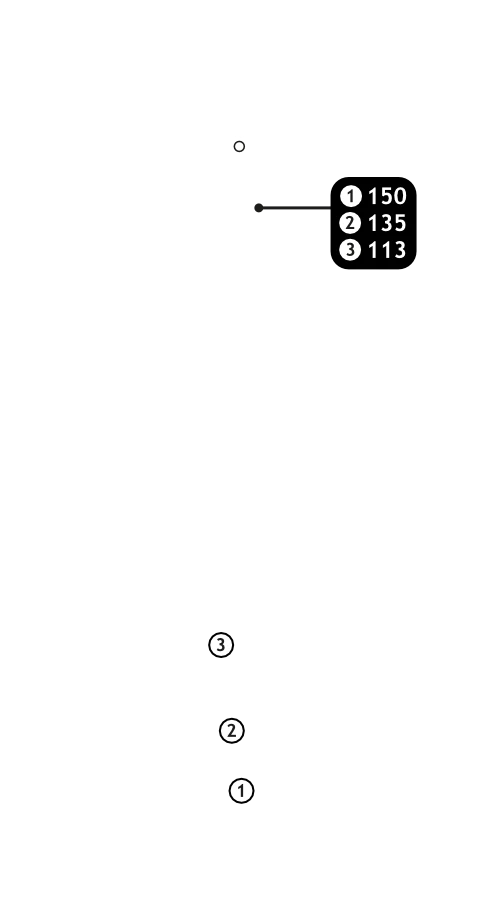
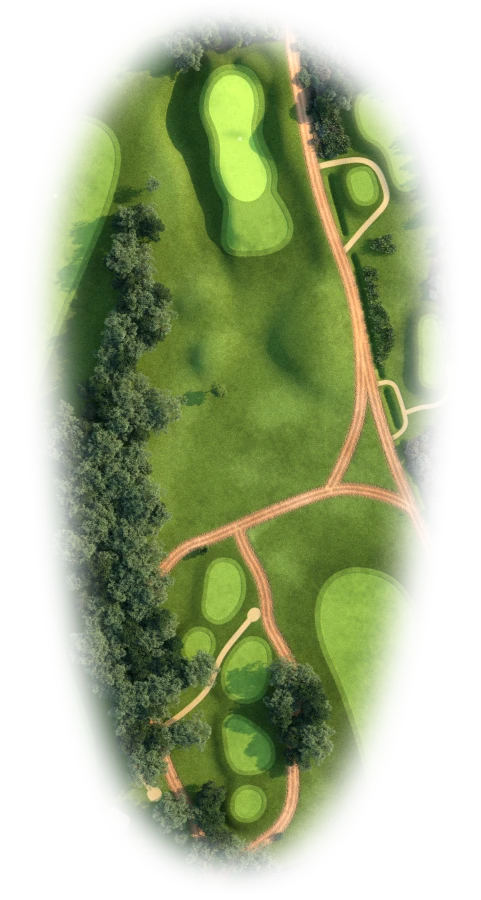
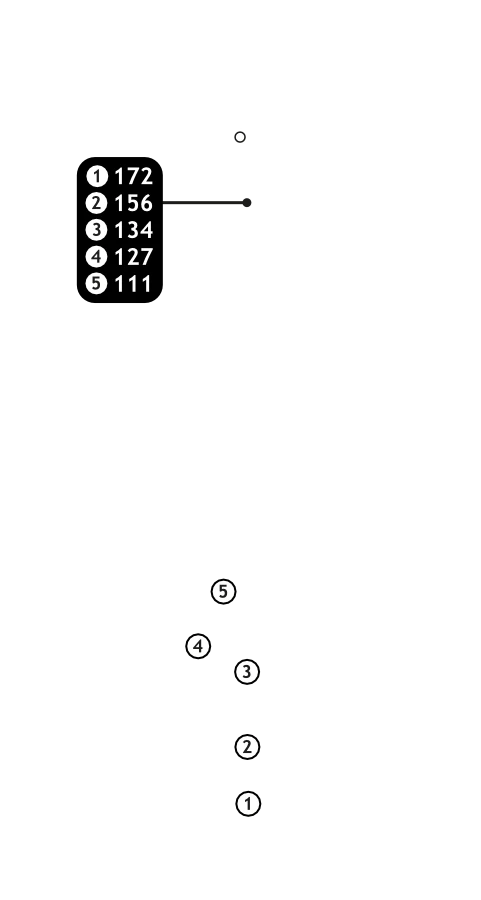
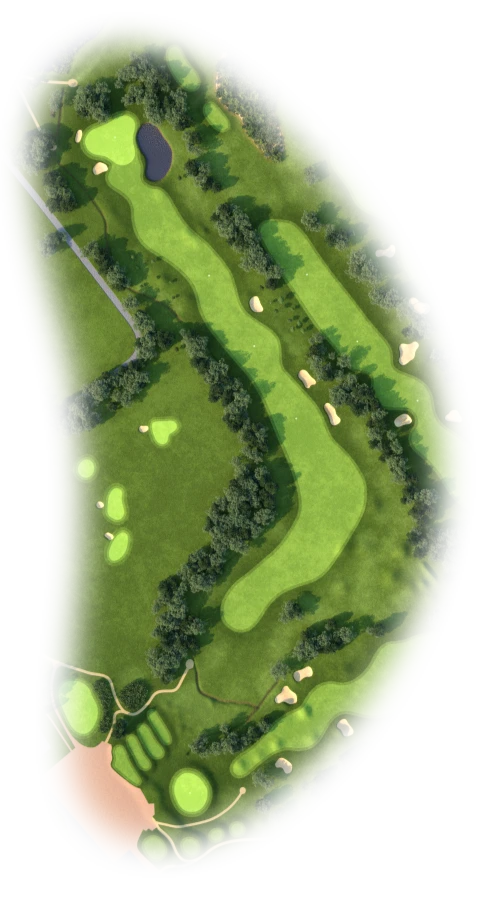
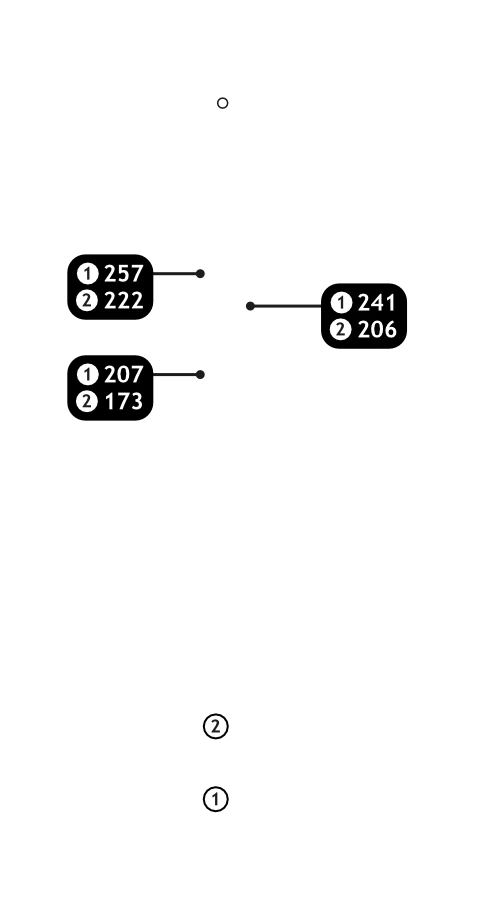
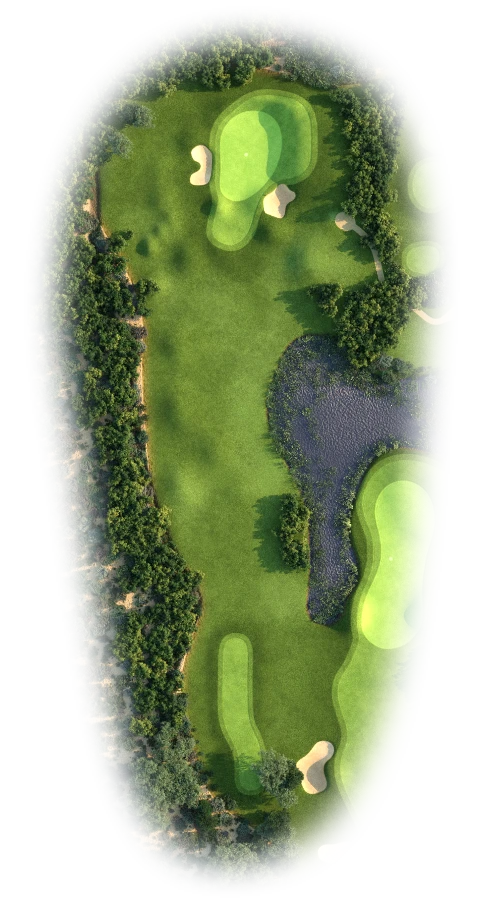
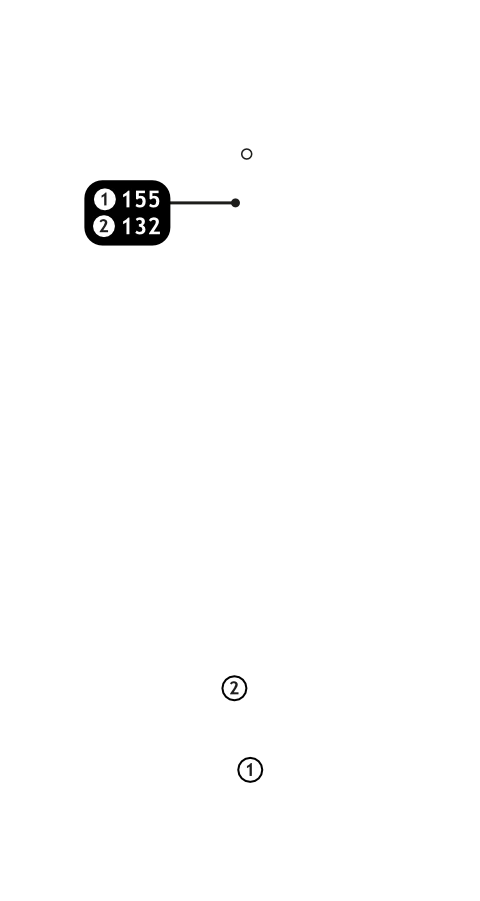
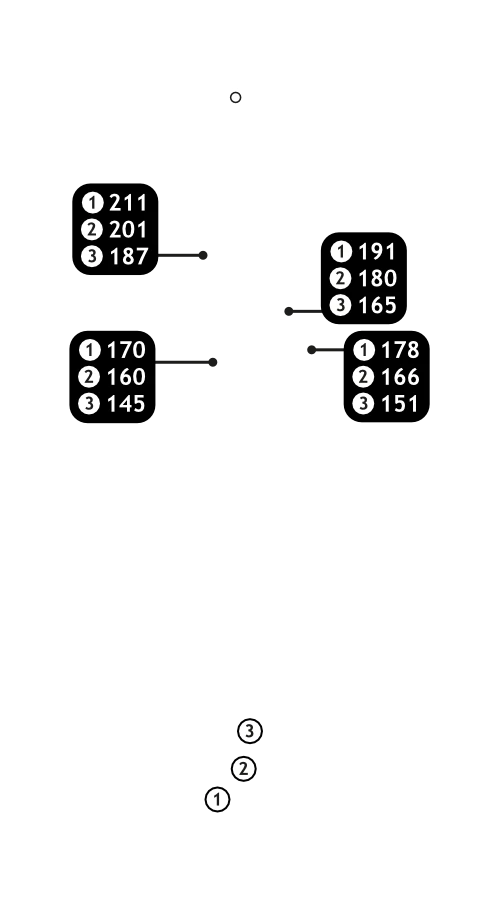
Buttons toggle between distance guide and media. See hole layout for result. If available, click orange icons to view media. All distances measured in meters from middle of Tee.
A testing opener. Requires a tee shot to the corner, leaving a mid-iron to a green surrounded by bunkers. Some may like to gamble with a longer tee shot over a tree-lined corner.

2 |
|
||||||||
|
|
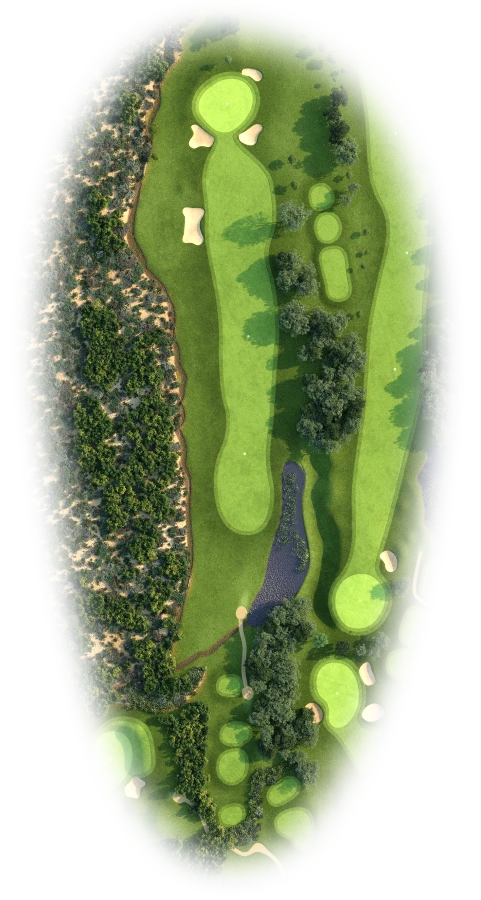
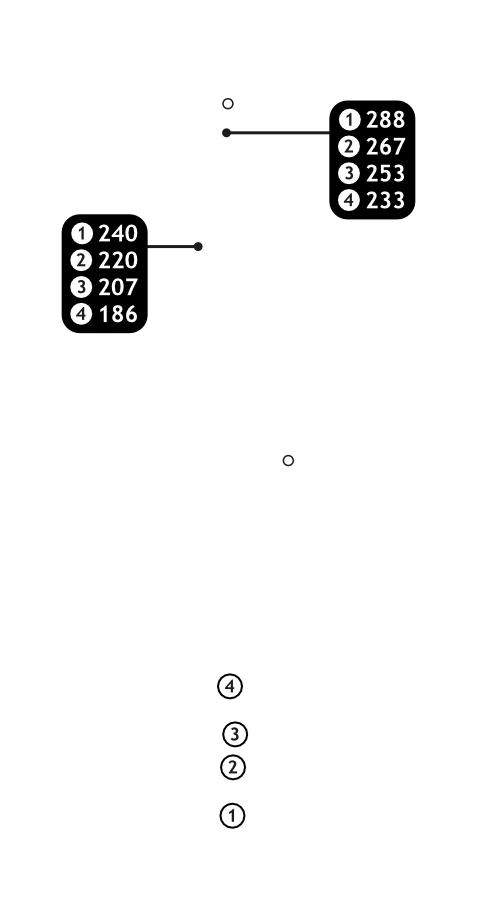
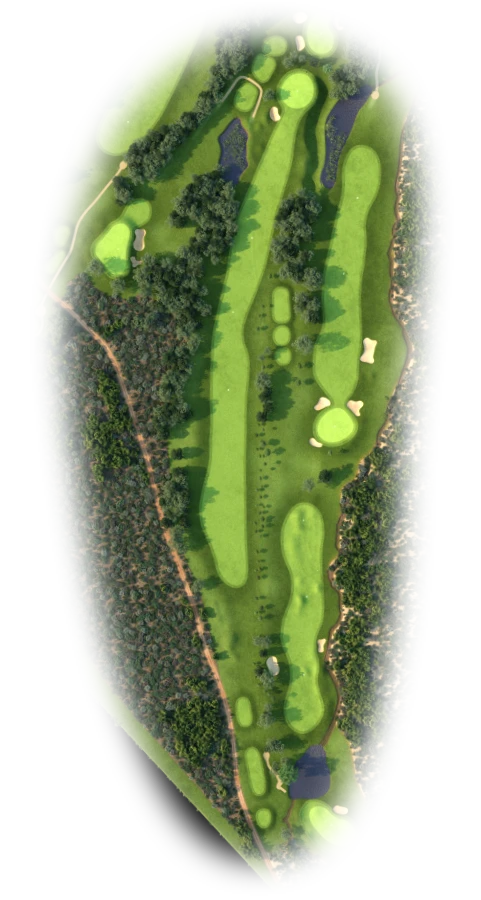
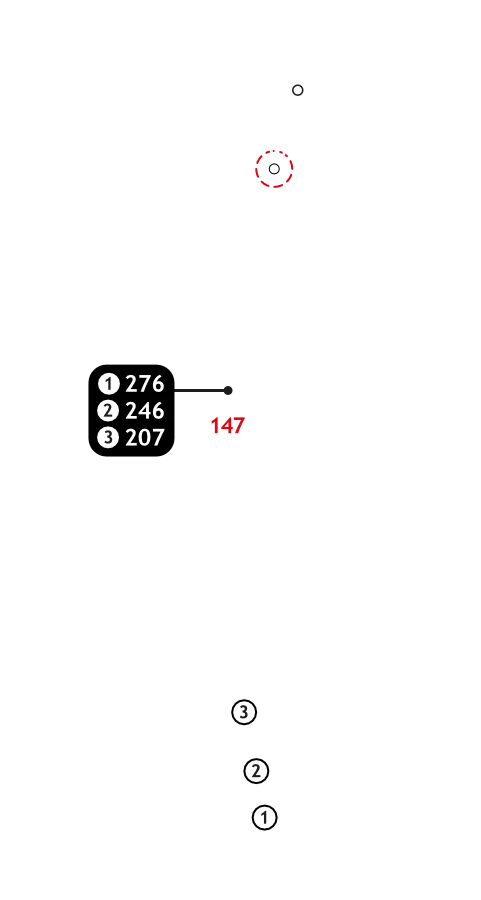
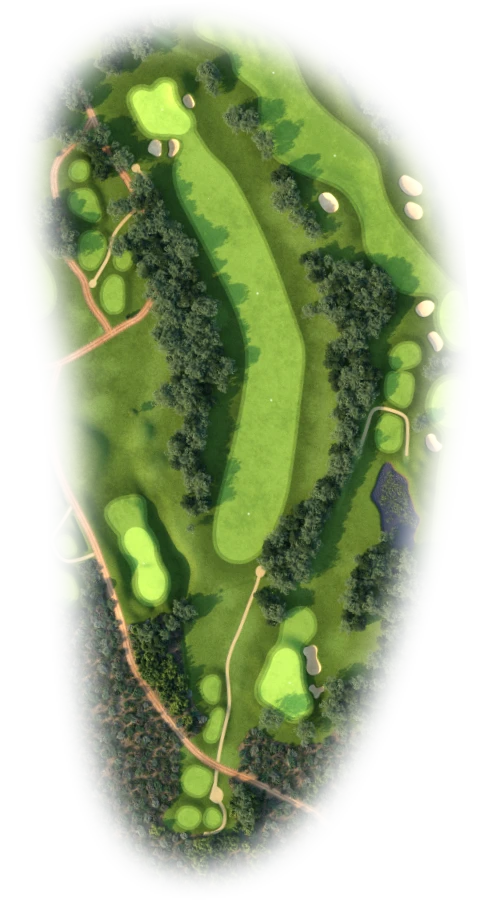
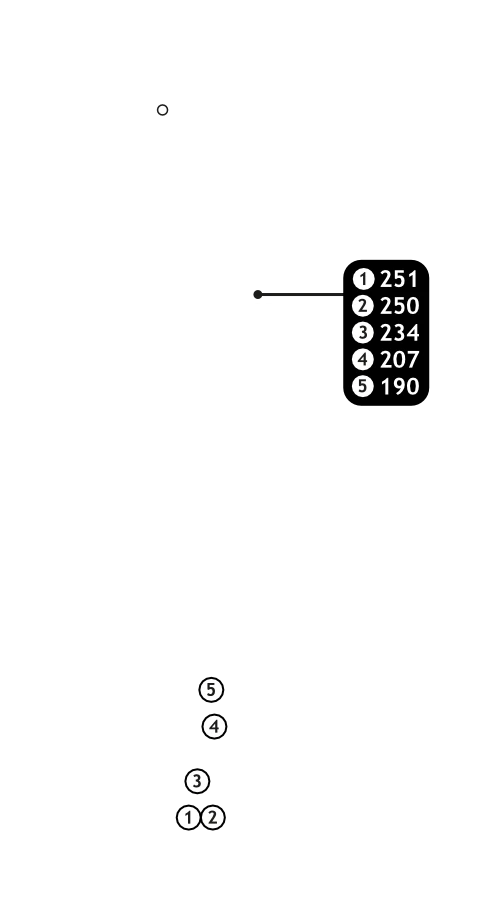
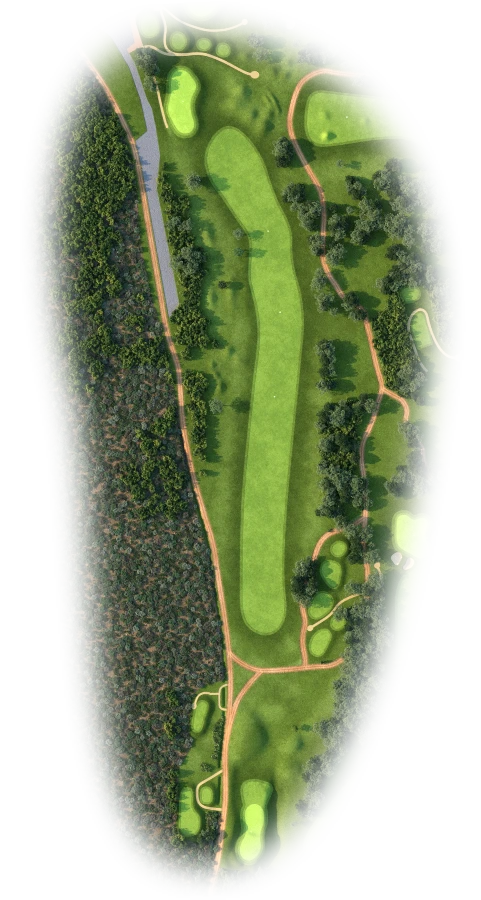
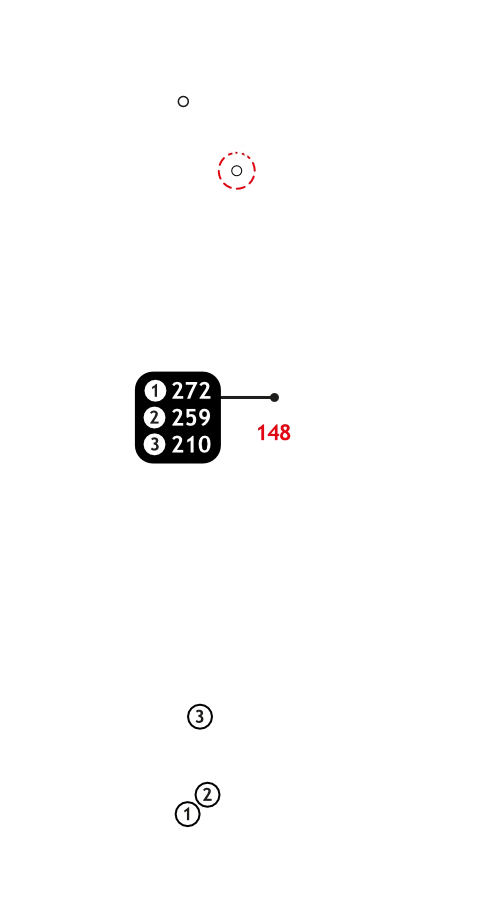
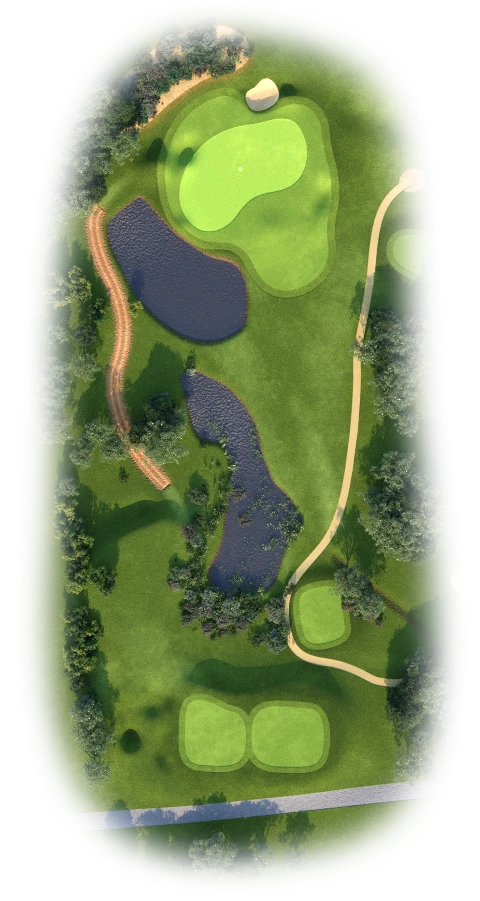
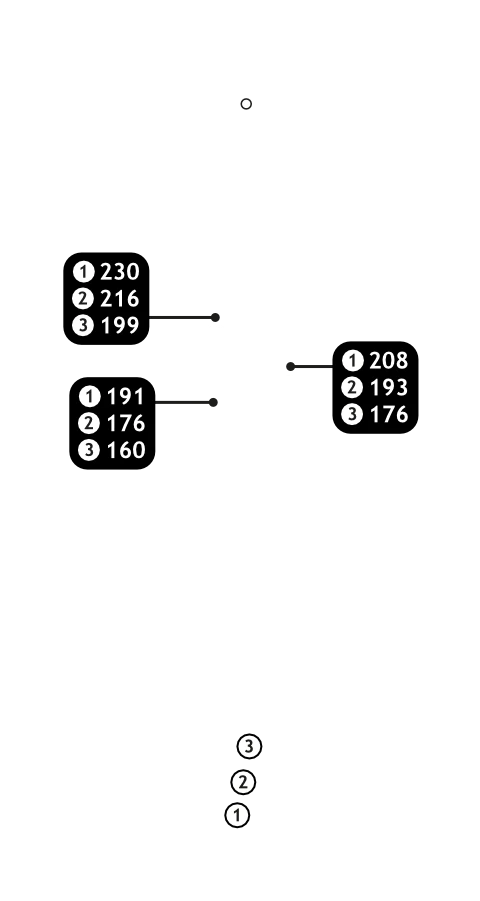
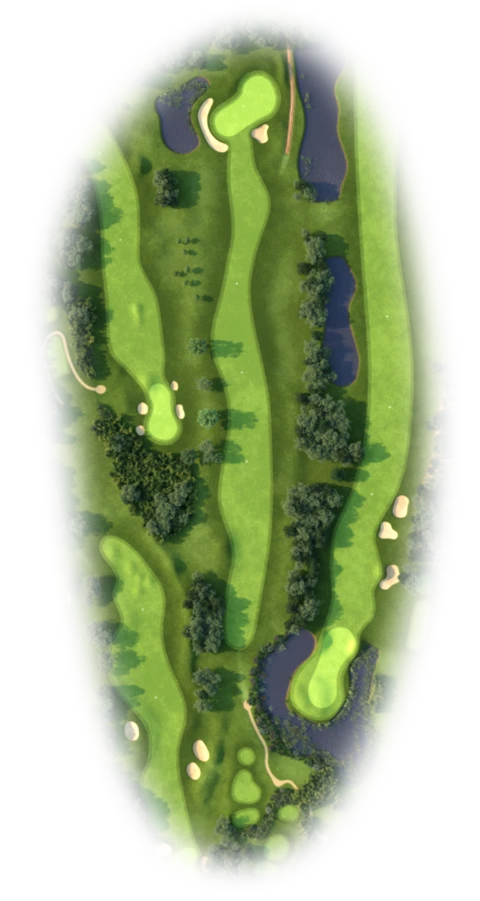
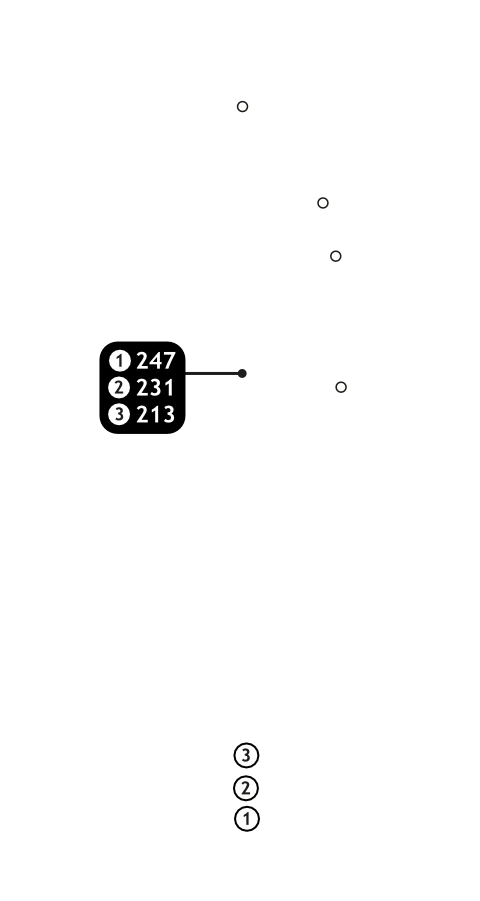
Buttons toggle between distance guide and media. See hole layout for result. If available, click orange icons to view media. All distances measured in meters from middle of Tee.
A short par four. Requires an accurate tee shot, leaving a pitch into a well-guarded green.
3 |
|
||||||||
|
|
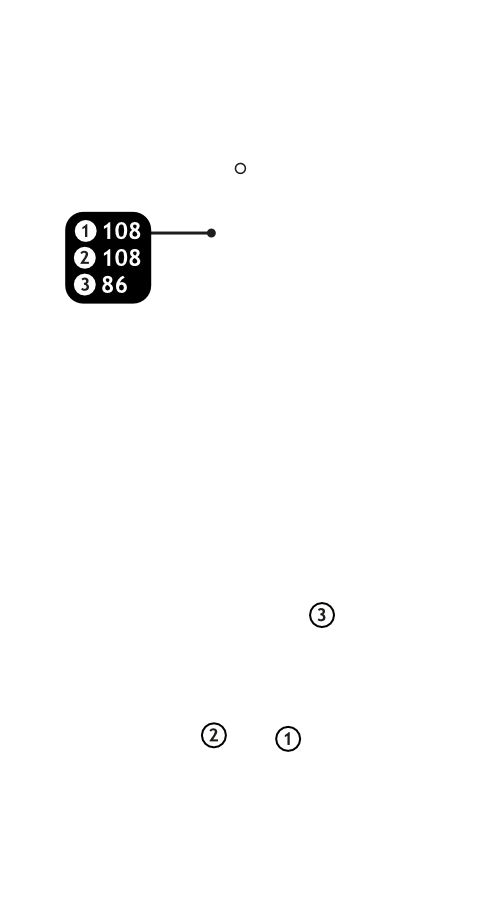
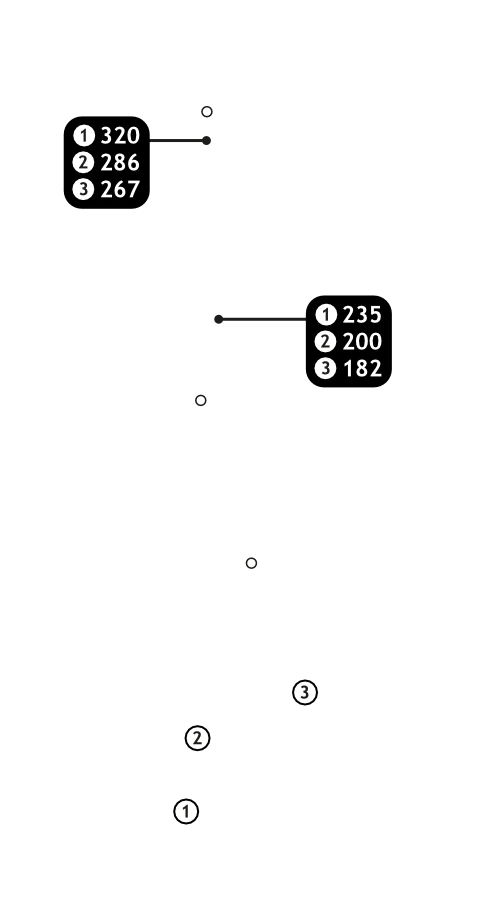
Buttons toggle between distance guide and media. See hole layout for result. If available, click orange icons to view media. All distances measured in meters from middle of Tee.
A short par four with Silvermine Stream (and out-of-bounds) running down the left. An iron shot or fairway wood leaves a short iron into a flat green.
4 |
|
||||||||
|
|
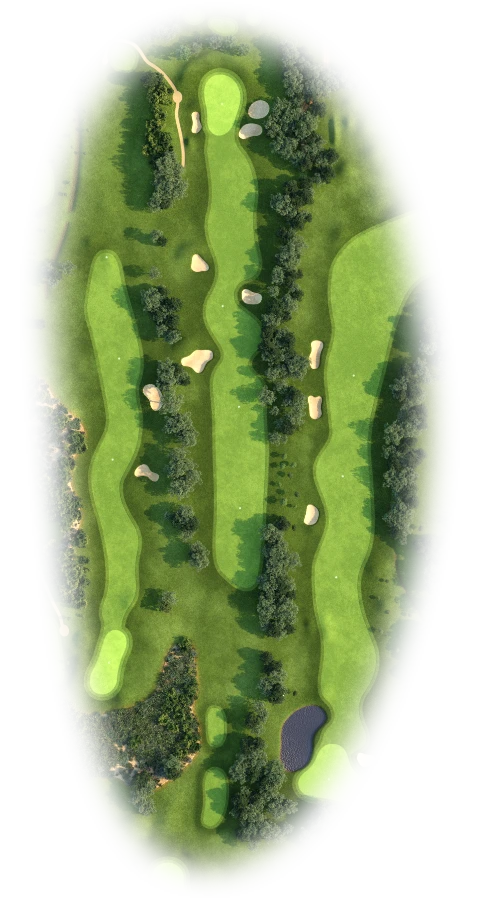
Buttons toggle between distance guide and media. See hole layout for result. If available, click orange icons to view media. All distances measured in meters from middle of Tee.
A testing par four. The drive is crucial with Silvermine Stream down the left. A challenging second where yardage is important as the green is surrounded by water.
5 |
|
||||||||
|
|
Buttons toggle between distance guide and media. See hole layout for result. If available, click orange icons to view media. All distances measured in meters from middle of Tee.
An easy tee shot down an open fairway leaves an interesting second to a green that slopes away. Beware of the hidden water hazard down the right side, short of the green.
6 |
|
||||||||
|
|
Buttons toggle between distance guide and media. See hole layout for result. If available, click orange icons to view media. All distances measured in meters from middle of Tee.
A semi-blind tee shot into a tricky green. Better played by the right hand side.
7 |
|
||||||||
|
|
Buttons toggle between distance guide and media. See hole layout for result. If available, click orange icons to view media. All distances measured in meters from middle of Tee.
One of the longer par fours, demanding a right to left tee shot to leave a mid to long iron to a green protected by bunkers.
8 |
|
||||||||
|
|
Buttons toggle between distance guide and media. See hole layout for result. If available, click orange icons to view media. All distances measured in meters from middle of Tee.
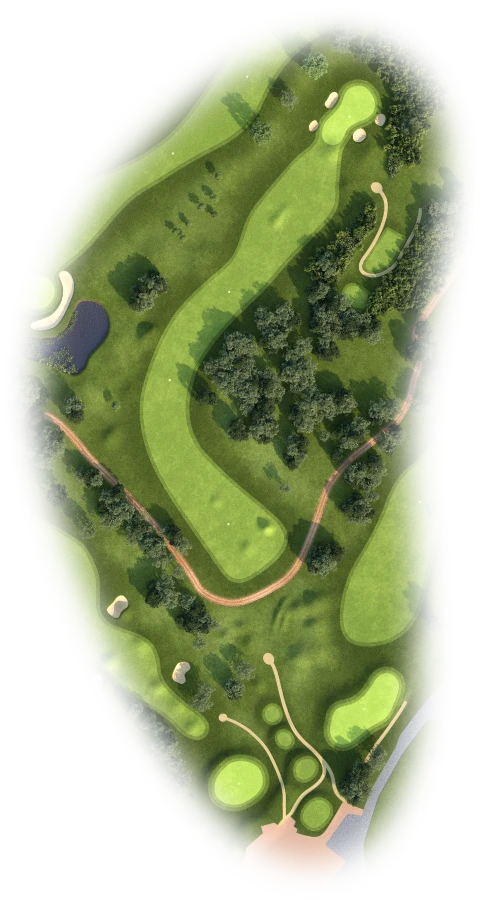
The longest par three, a two-tier green that demands a good iron shot.
9 |
|
||||||||
|
|
Buttons toggle between distance guide and media. See hole layout for result. If available, click orange icons to view media. All distances measured in meters from middle of Tee.
The best par five on the course. The longest hitters may make it up in two. Demands accuracy and good judgement around the green. The most difficult on the course.
10 |
|
||||||||

|
|
Buttons toggle between distance guide and media. See hole layout for result. If available, click orange icons to view media. All distances measured in meters from middle of Tee.
A challenging par five with a dog-leg left. Some may take on the corner and leave a mid iron in. A deep two-tier green will challenge your distance control.
11 |
|
||||||||
|
|
Buttons toggle between distance guide and media. See hole layout for result. If available, click orange icons to view media. All distances measured in meters from middle of Tee.
This shorter par three requires a well-judged short iron into a deep flat green.
12 |
|
||||||||
|
|
Buttons toggle between distance guide and media. See hole layout for result. If available, click orange icons to view media. All distances measured in meters from middle of Tee.
A straight-away par four. Straight forward tee shot Keep left into a well-bunkered green.
13 |
|
||||||||

|
|
Buttons toggle between distance guide and media. See hole layout for result. If available, click orange icons to view media. All distances measured in meters from middle of Tee.
A straight tee shot sets up a mid to short iron into a long green. Club selection is critical.
14 |
|
||||||||

|
|
Buttons toggle between distance guide and media. See hole layout for result. If available, click orange icons to view media. All distances measured in meters from middle of Tee.
A tight par four Requires accuracy off the tee, leaving a pitch in. The longer hitters may take the green on, at their peril.
15 |
|
||||||||

|
|
Buttons toggle between distance guide and media. See hole layout for result. If available, click orange icons to view media. All distances measured in meters from middle of Tee.
The tee shot is crucial. Long down the left to avoid the water hazard on the right, and leaves an easy approach to an open green.
16 |
|
||||||||
|
|
Buttons toggle between distance guide and media. See hole layout for result. If available, click orange icons to view media. All distances measured in meters from middle of Tee.
A tight par three mid to short iron. Pin placements can make the approach tough.
17 |
|
||||||||
|
|
Buttons toggle between distance guide and media. See hole layout for result. If available, click orange icons to view media. All distances measured in meters from middle of Tee.
The longest, toughest par four on the course requires an accurate tee shot down the right leaving a very long second into a well-guarded green. Avoid the water hazard on the right of the green.
18 |
|
||||||||

|
|
Buttons toggle between distance guide and media. See hole layout for result. If available, click orange icons to view media. All distances measured in meters from middle of Tee.
A straight tee shot sets up a pitch into a raised green. Slightly off-line drives will end up in bunkers left and right of the fairway. Judgement of the approach is critical.